Denim jacket decorated with vintage scarfs and old buttons


This oversized denim jacket I got from a friend to be used as material for my designed denim bags. Instead I felt like doing something extra bold with it; I decided to sew small pieces of vintage scarfs to make the jacket “float” and “puffy”.

I used vintage scarfs that were a little bit damaged beyond repairing  and cut same sized rectangular pieces which I then sew on the jacket. Sleeves I had to take apart otherwise I could not been able to fasten the scarfs.

By separating the colors and sewing matching ones side by side the surface is more interesting and lively. And the number of vintage scarf pieces I used to this jacket… 583 pieces.


Buttons I attached by hand and each one is carefully placed so the colors again flows easily and makes interesting surface.


Susanoo denim quilt bag from two old jeans

My friend asked me if I could sew denim bag to her out of her old jeans which were low cut and tight, not in fashion any more ;) Project sounded fun so I agreed and she sent me her jeans. Both jeans were the same color; same tone of dye so my first idea to sew a bag with different sizes and colors of denim stripes was not going to work because of the “flat” color hues on the denim. So I looked up from my special japanese quilting technique books and found this pattern which builds up almost in 3d when put together. Quilting it is!

I carefully planned out this bag and measured the right amount of parts also thinking about the dark and light parts of the denim trousers so I could make the most of the pattern. It took some time sewing the parts together and ironing every seam but the end result was worth it.

She also wished for a pocket inside and outside and that the handles were so long that she can carry the bag easily on her shoulder.

Jeans old leather back labels I used upside down on the front of the bag. This cause I do not want anyone to be able to easily read what it says on the labels (small artsy point) but there are there visible to all to remind that reusing and refashioning is the only way to save this planet from textile waste.

The “back” of the bag or reverse side I made out of different sized denim parts, those which were left over from after my first cut. She wished a pocket on the outside so this one is hidden near your body when the “front” of the bag is visible while carrying it on the shoulder.

Patchwork denim jacket from reused denim

This refashioned denim jacket began of the idea to use old, worn jeans, one thrifted denim skirt and one old Ikea bed linen. This jacket I sew in Delft, Netherland. There are feelings and thoughts sewn into this piece that can not be seen: early morning runs in Delft and the constant buzz of people coming and going in the city center.

All materials, including zippers and other small parts are reused and the total cost for the materials was about 20€. Sewing hours were several, made the jacket with no rush during early mornings and weekends, with a lot of coffee :)

Vintage fashion magazine dated 1991 I found a raglan sleeve jacket pattern that I used as a base.

From the old jeans I removed the back pockets and ripped open the hems on the bottom of the legs so I could reveal some lovely fades and washes.

The whole idea was to use miss-matched pieces and let the outcome and the colors to feel relaxed and easy. I did not plan to line the jacket but it is more wearable and easier to maintain when it has a lining.

I am pleased of the whole outcome of this jacket and the best of all it is one of a kind!

The photoshoot took place in Dusseldorf, in front of a cool graffiti wall. Peace!

Susanna in her diy denim quilt jacket and diy leather bag
Susanna in her diy denim quilt jacket

leather tote bag made from old jackets

leather quilt bag and studs

Quilting model called card trick. Green suede and blue/red leather bag. Studs I first placed on the handles to make them more durable to handle weight but after noticing that silver colored studs really make the bag look more interesting I also decorated the pattern in the front. All leather are old jackets that I was not able to mend anymore but pieces that I salvaged works just perfect in this bag.

Tilkkutyötekniikalla ommeltua nahkaa. Lainasin kirjastosta aihetta käsittelevän kirjan ja löysin muutaman mallin joita halusin kokeilla nahkalaukkuun.Tämän mallin nimi on card trick-korttitemppu. Valitsin punaisen, vihreän ja sinisen nahan. Sininen nahka on laukussa myös takakappaleena ja olkahihnoina. Vuoriksi laukkuun löysin tukevaa collegekangasta. Laukun koristelin vielä sisustusniiteillä jotka ensin kiinnitin vain vahvistamaan olkahihnoja mutta kokeiltuani yhtä niiteistä tilkkujen yhtymäkohtaan halusinkin niitä enemmän. Nyt perinteinen värikartta sai uutta potkua niittien elävöittämänä.

handpainted red and orange leather earrings

I often paint and glue my leather parts for the earrings in advance. When I feel like it. Then I use the painted leather when my ongoing design needs it- it can take for a year or a week or just hours. Depends on the flow.

These leather parts I made one summer evening but something more important came along and I put the designs aside. Now when cleaning up my desk and the drawers I found these red and orange leather designs I knew that it was their time to shine.

The metal chain is from old bracelet that I found from charity shop and took apart. I love the way the thin chain moves, reminds me of misty mornings and spider webs in the forest.

The fabric is old IKEA curtain.

Intercoiffure photoshoot “white nights” with Susanoo refashioned clothes and acc.

Intercoiffure Finland spring&summer 2015. Style White nights, hair Katja Perkkiö (Tina´s), photoshoot Luiza Lehtinen, make-up Ara Koivula (Bang by Ara).

Styling and close up craft photos Susanna Kaunisto.

Dress is made out of an old 80´s white leather jacket. Front of the dress is actually the back of the jacket leaving the back of the dress open and making it sensual and feminine.

Neckpiece is made out of the same jacket crocheting narrow slices of leather together. Adding a massive silver colored chain into the necklace makes it an outstanding piece and a perfect pair to the simple dress.

diy crocheted white leather and silver colored chain neckpiece

Mekko on tehty vanhasta 80-luvun nahkatakista. Takin etuosa on nyt mekon takaosa, jättäen selän avoimeksi vyötärölle asti. Helmaan ompelin somisteeksi ns. “kalanpyrstön”. Kaulakorun materiaali on samaa nahkatakkia josta leikkasin suikaleita ja virkkasin ne yhteen. Tyyli on modernin puhdas mutta samalla rosoisen romanttinen.

diy leather dress out of old jacket with matching neckpiece

diy leather dress out of old jacket with matching neckpiece

Denim jacket from old shirt and skirt


Susanoo refashioned denim jacket

For this denim jacket refashioning I used one old mens denim shirt (labeled James) and one worn out denim skirt. Shirt I used was size L so I was able to play with the size by gathering some of the excess fabric to the back.

How I did it

Original sleeve cuffs I cut off and attached denim pleats instead.

attaching pleats

planning pleats

susanoo refashioned denim jacket_pleats please

As usual when I am into these refashioning pieces I do not follow any plans. My way is to go step by step, feeling the fabric and trying the piece on often between different stages just to see how it acts when on you.

my work flow

original shirt

Adding the belt done with light/dark colored denim pieces gives the jacket more feminine figure. Cotton lace was a last minute fix to hide the masculine front piece.

I am super satisfied how this denim refashioning piece turned out; modest flamboyant with contemporary twist.


Susanoo design long cardigan with wool/alpaca scarf

This post is oldie but still goodie, I made it in Delft, Netherlands some years ago (2016).

My long cardigan is self-made from woolen blend jersey. It is a pattern from 1992 Burda which I altered by lenghtening it and also took away the collar. Rounded patch pockets has a lining inside them and pockets are big enough to create an eyecatching element in the front but also super comfy to keep your hands in. My back bag is made from old leather pants and decorated with studs.

I bought 8 rolls of Ambiente black wool/alpaca yarn (not cheap) and crocheted the scarf with 15 sized hook (made from bamboo). Reason why I spent so much for the materials were that I wanted a black basic scarf with quality material; alpaca mixed with virgin wool makes the scarf super soft and quite light to wear. The extra that makes the scarf pop are the tassels I made from the same yarn.  Susanoo remark: the yarn was bought in Delft from a nice, small yarn shop by the canal called Knotten.

Susanna with diy long cardigan and alpaca scarfSusanna with diy long cardigan and diy leather back bag in Delft Netherlands

Fall/winter is the time of the year when you can daringly play with your outfits- layering different materials and shapes takes the whole look into new dimensions. Why not layer a long cardigan with a short leather vest and experiment freely by mixing scarfs together with different sizes and colors.

refashioned quilted denim jacket

This jacket is a mix and match from other denim clothes. Back of the jacket is made out of denim quilts and the front out of jeans. Putting together different elements was quite tricky, mostly I had the jacket on me and pinned the parts together without any patterns. I choose not to do a lining in the jacket cause I wanted the seams and different techniques to be visible.

Pitkän, tumman denimtakin uusi elämä. Vanhasta takista on jäljellä vain yläosa, keskiosa ja alaosa takin edustasta on vanhoista farkuista ja takaosa tilkkutyönä tehtyä pintaa denimkankaista. Kauluksen ja rintataskun läpät takkiin irroitin vaaleasta denimtakista. Kaavoitin ja yhdistelin kaikki takin elementit päälläni ja myös mallinukkea apua käyttäen. Takkiin taakse ompelin palan kuminauhaa jotta takin siluetti päälle puettaessa olisi myötäilevä. Jätin kaikki saumat huolittelematta takin sisältä, haluan että kankaan saumat elävät ja kuluvat yksilöllisen näköisiksi.

denim quilt long jacket

diy denim long jacket

vintage set remodelled to long cardigan

This post I did already back when we lived in Delft, Netherlands. Back then I frequently visited second hand and charity shops which were plenty in Delft. Back at those times there were not so much discussions about reuse or remodelling as we have now frequently every day in the media. I consider myself truly and utterly remodelling miracle. Well sometimes one needs to be honest.

Long cardigans can save your outfit problems in a second…proportion play in clothing is something I often do, cardigans and vests with long sihouettes have been my all time favourites, mostly because they suit my bodytype and also of the fact that in this way I can play more with layering clothes. Therefore when I came across this woolblend two pieced knit outfit at the second hand I just could not leave it…I had in my mind what would become of it and the price was also quite amazing- only 6€!

Susanoo fashion drawing with i pad

I joined the original cardigan with the skirt from the skirts hem, in this way I ensured that I have enough fabric also for the big pockets. It is a nonchalant ( relaxed and calm in a way that shows that you do not care or are not worried about anything) effect on a cardigan to have pockets, somewhere to put your hands and make the style more street-smart.

hand stitched decorations on the long cardigan

Oh and the shoes which I wear in these two pics are a gift from my friend; velvet stretch ankle boots from the golden 90s!

Susanna with remake long cardigan from second hand twin set

Cardigan works also nicely paired with denim culottes (my own design) and vintage leather boots.

cross stitch bag “Gypsy Lady” with #

work in process, trying out different ways to decorate

This is a circa 1960s-70s cross stitch of a painting by “Torino” – Little is known about Torino other than he was prevalent from around the 50s to the 70s and there are a few versions (poses) of this “Gypsy Lady” print.

Came across this cross stitch work at second hand store. There it was lying amongst other finished and half finished needle works just for 3€. I knew at once what I wanted to do from it certainly something that will not go unnoticed. First I was playing around with the idea to really make the gypsy lady fierce with tattoos and make-up but after a few try outs I skipped that idea. The cross stitch work is beautifully done and it would be a shame to hide it. I needed a piece of fabric to go with it and choose checkered black and white, to make the whole look more contemporary. When the two pieces were joined it felt like the bag needs a message. Something to do with gypsy way of life, for example fortune telling, freedom and spiritual things. So I came up with the hashtag sign. Under the # one can imagine these words.

Back part of the bag is done out of recycled leather and handles are from old thrifted bag. The leather pieces that hold the handles are parts from a belt and the black rings curtain parts. So again 100% recycled, remake and zero waste.

handles from old bag, leather parts to hold handle old belt

diy gypsy lady cross stitch bag with # decoration

diy gypsy lady cross stitch bag with # decoration

Intercoiffure photoshoot “northern lights” with Susanoo refashioned clothes and acc.

Intercoiffure Finland photoshoot, styling Susanoo diy clothes and accessories

fashion drawing for Intercoiffure Finland photoshoot by Susanoo

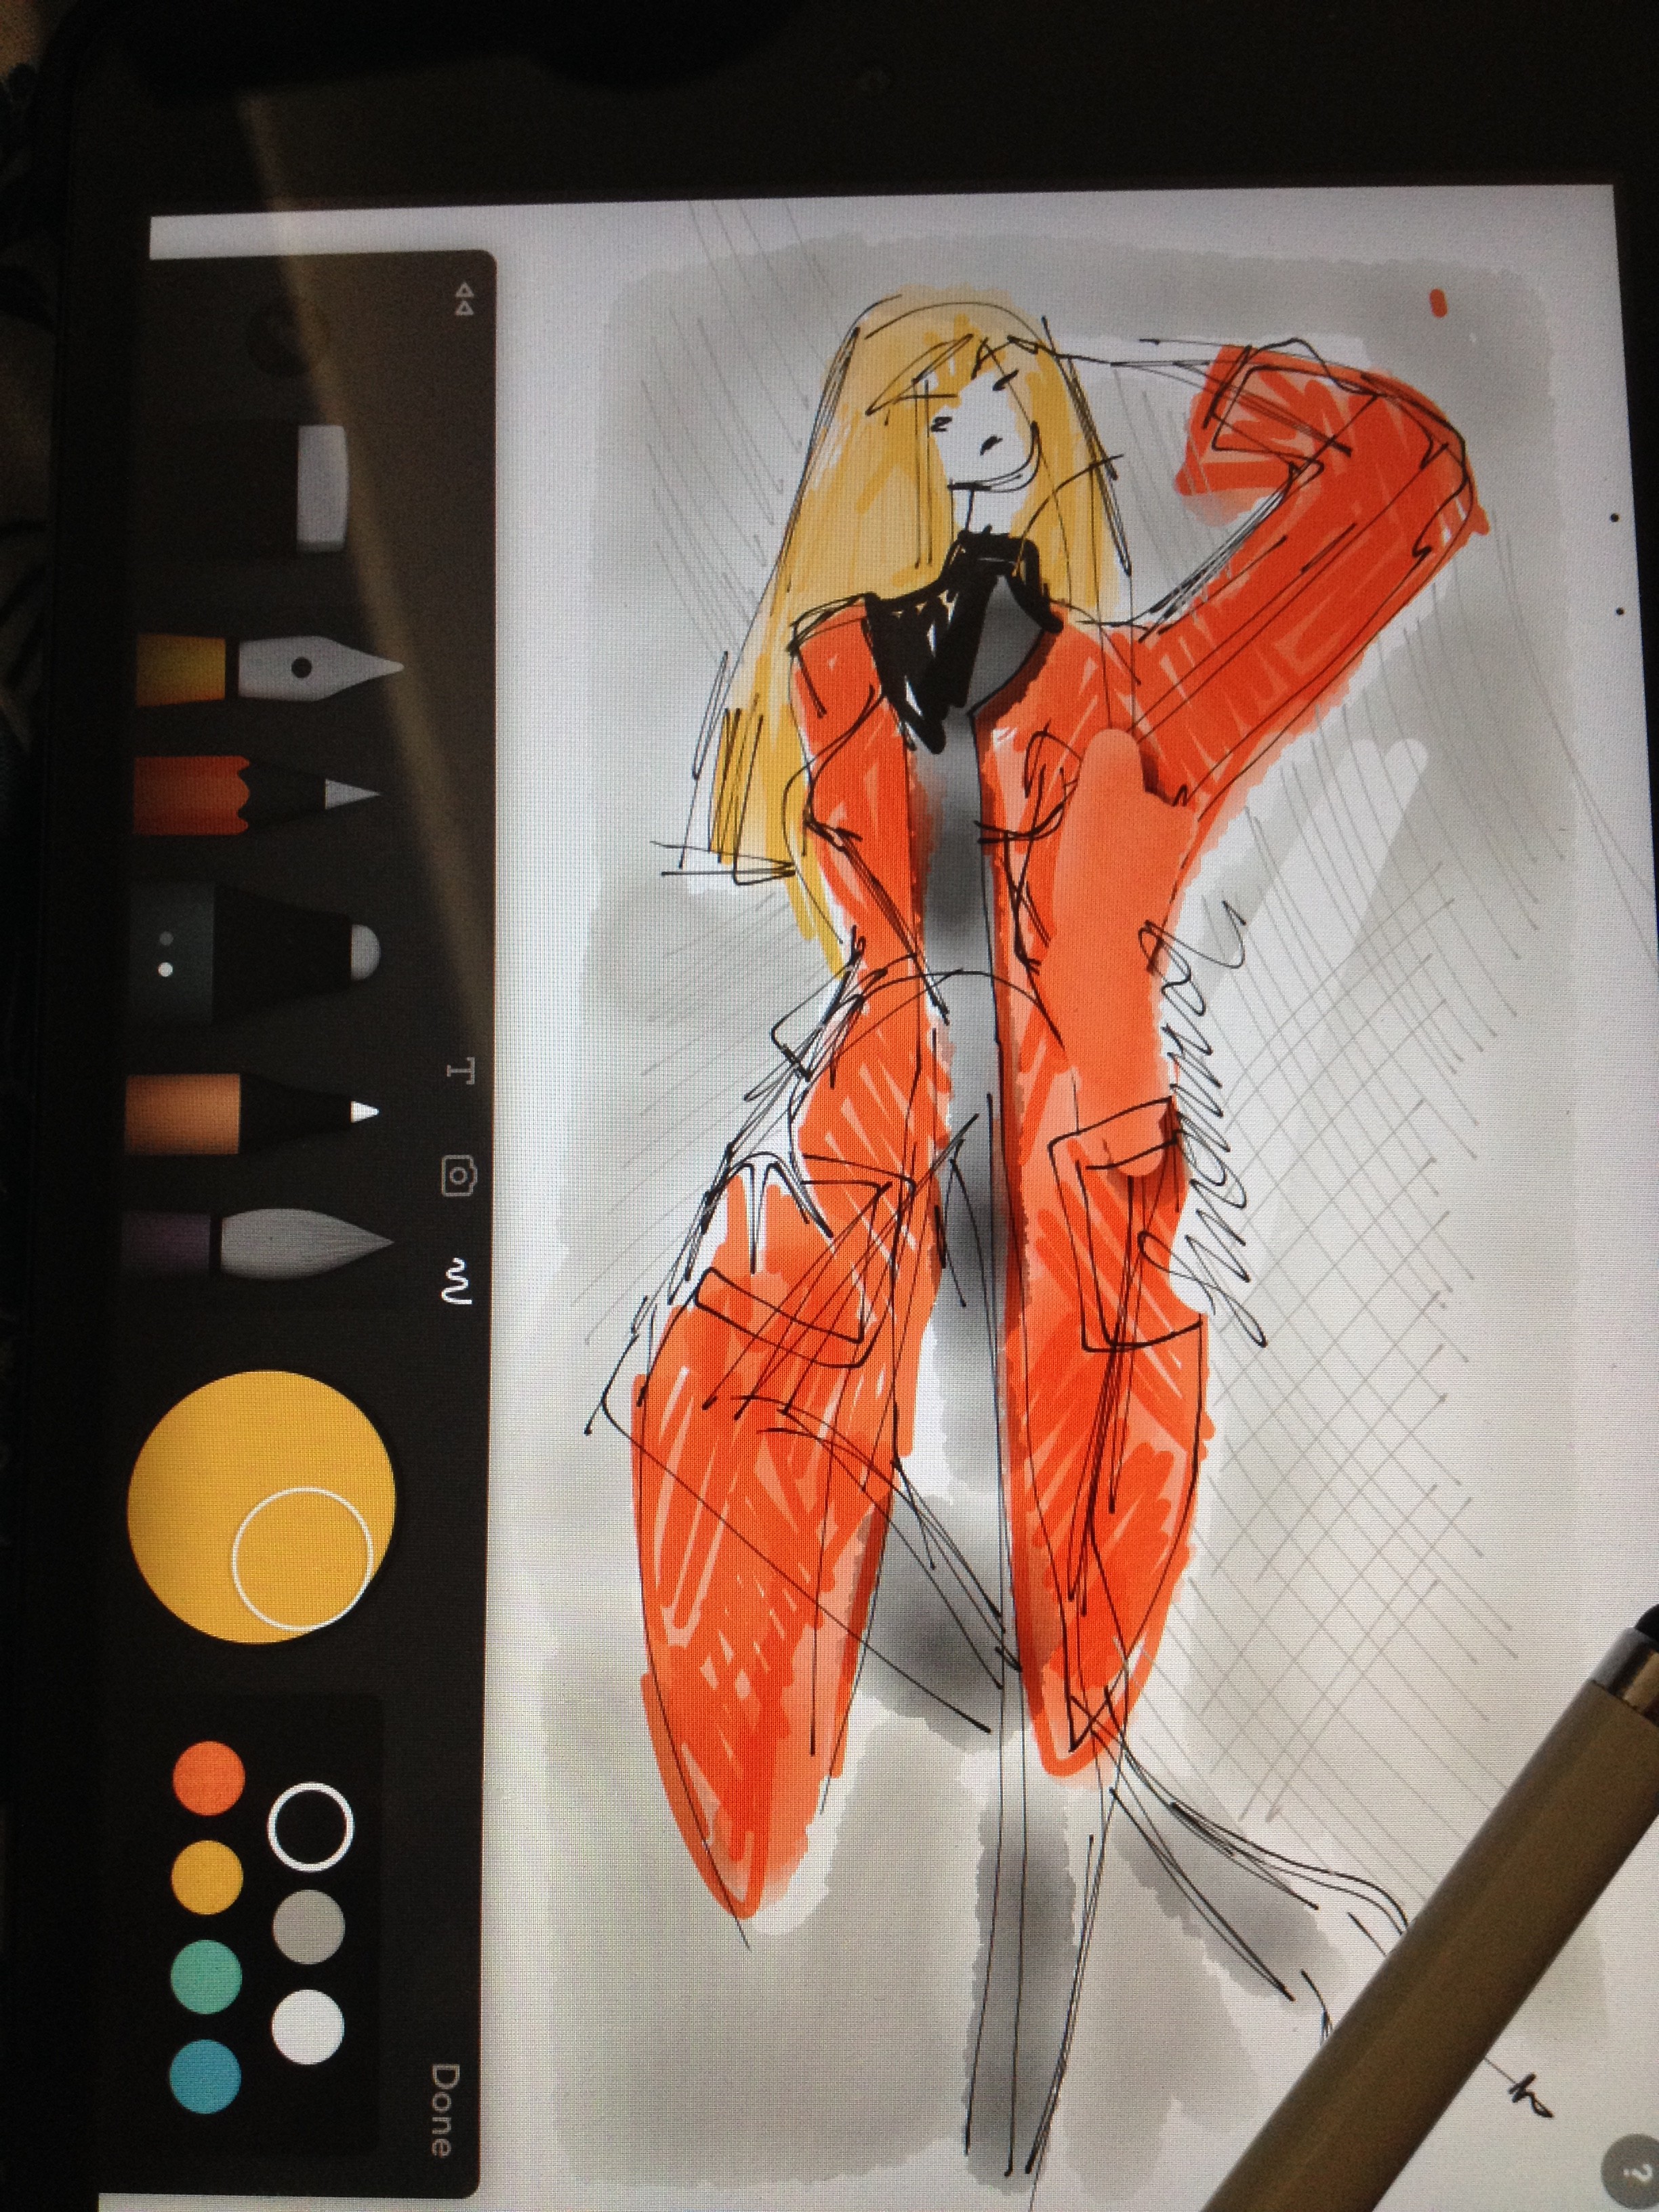
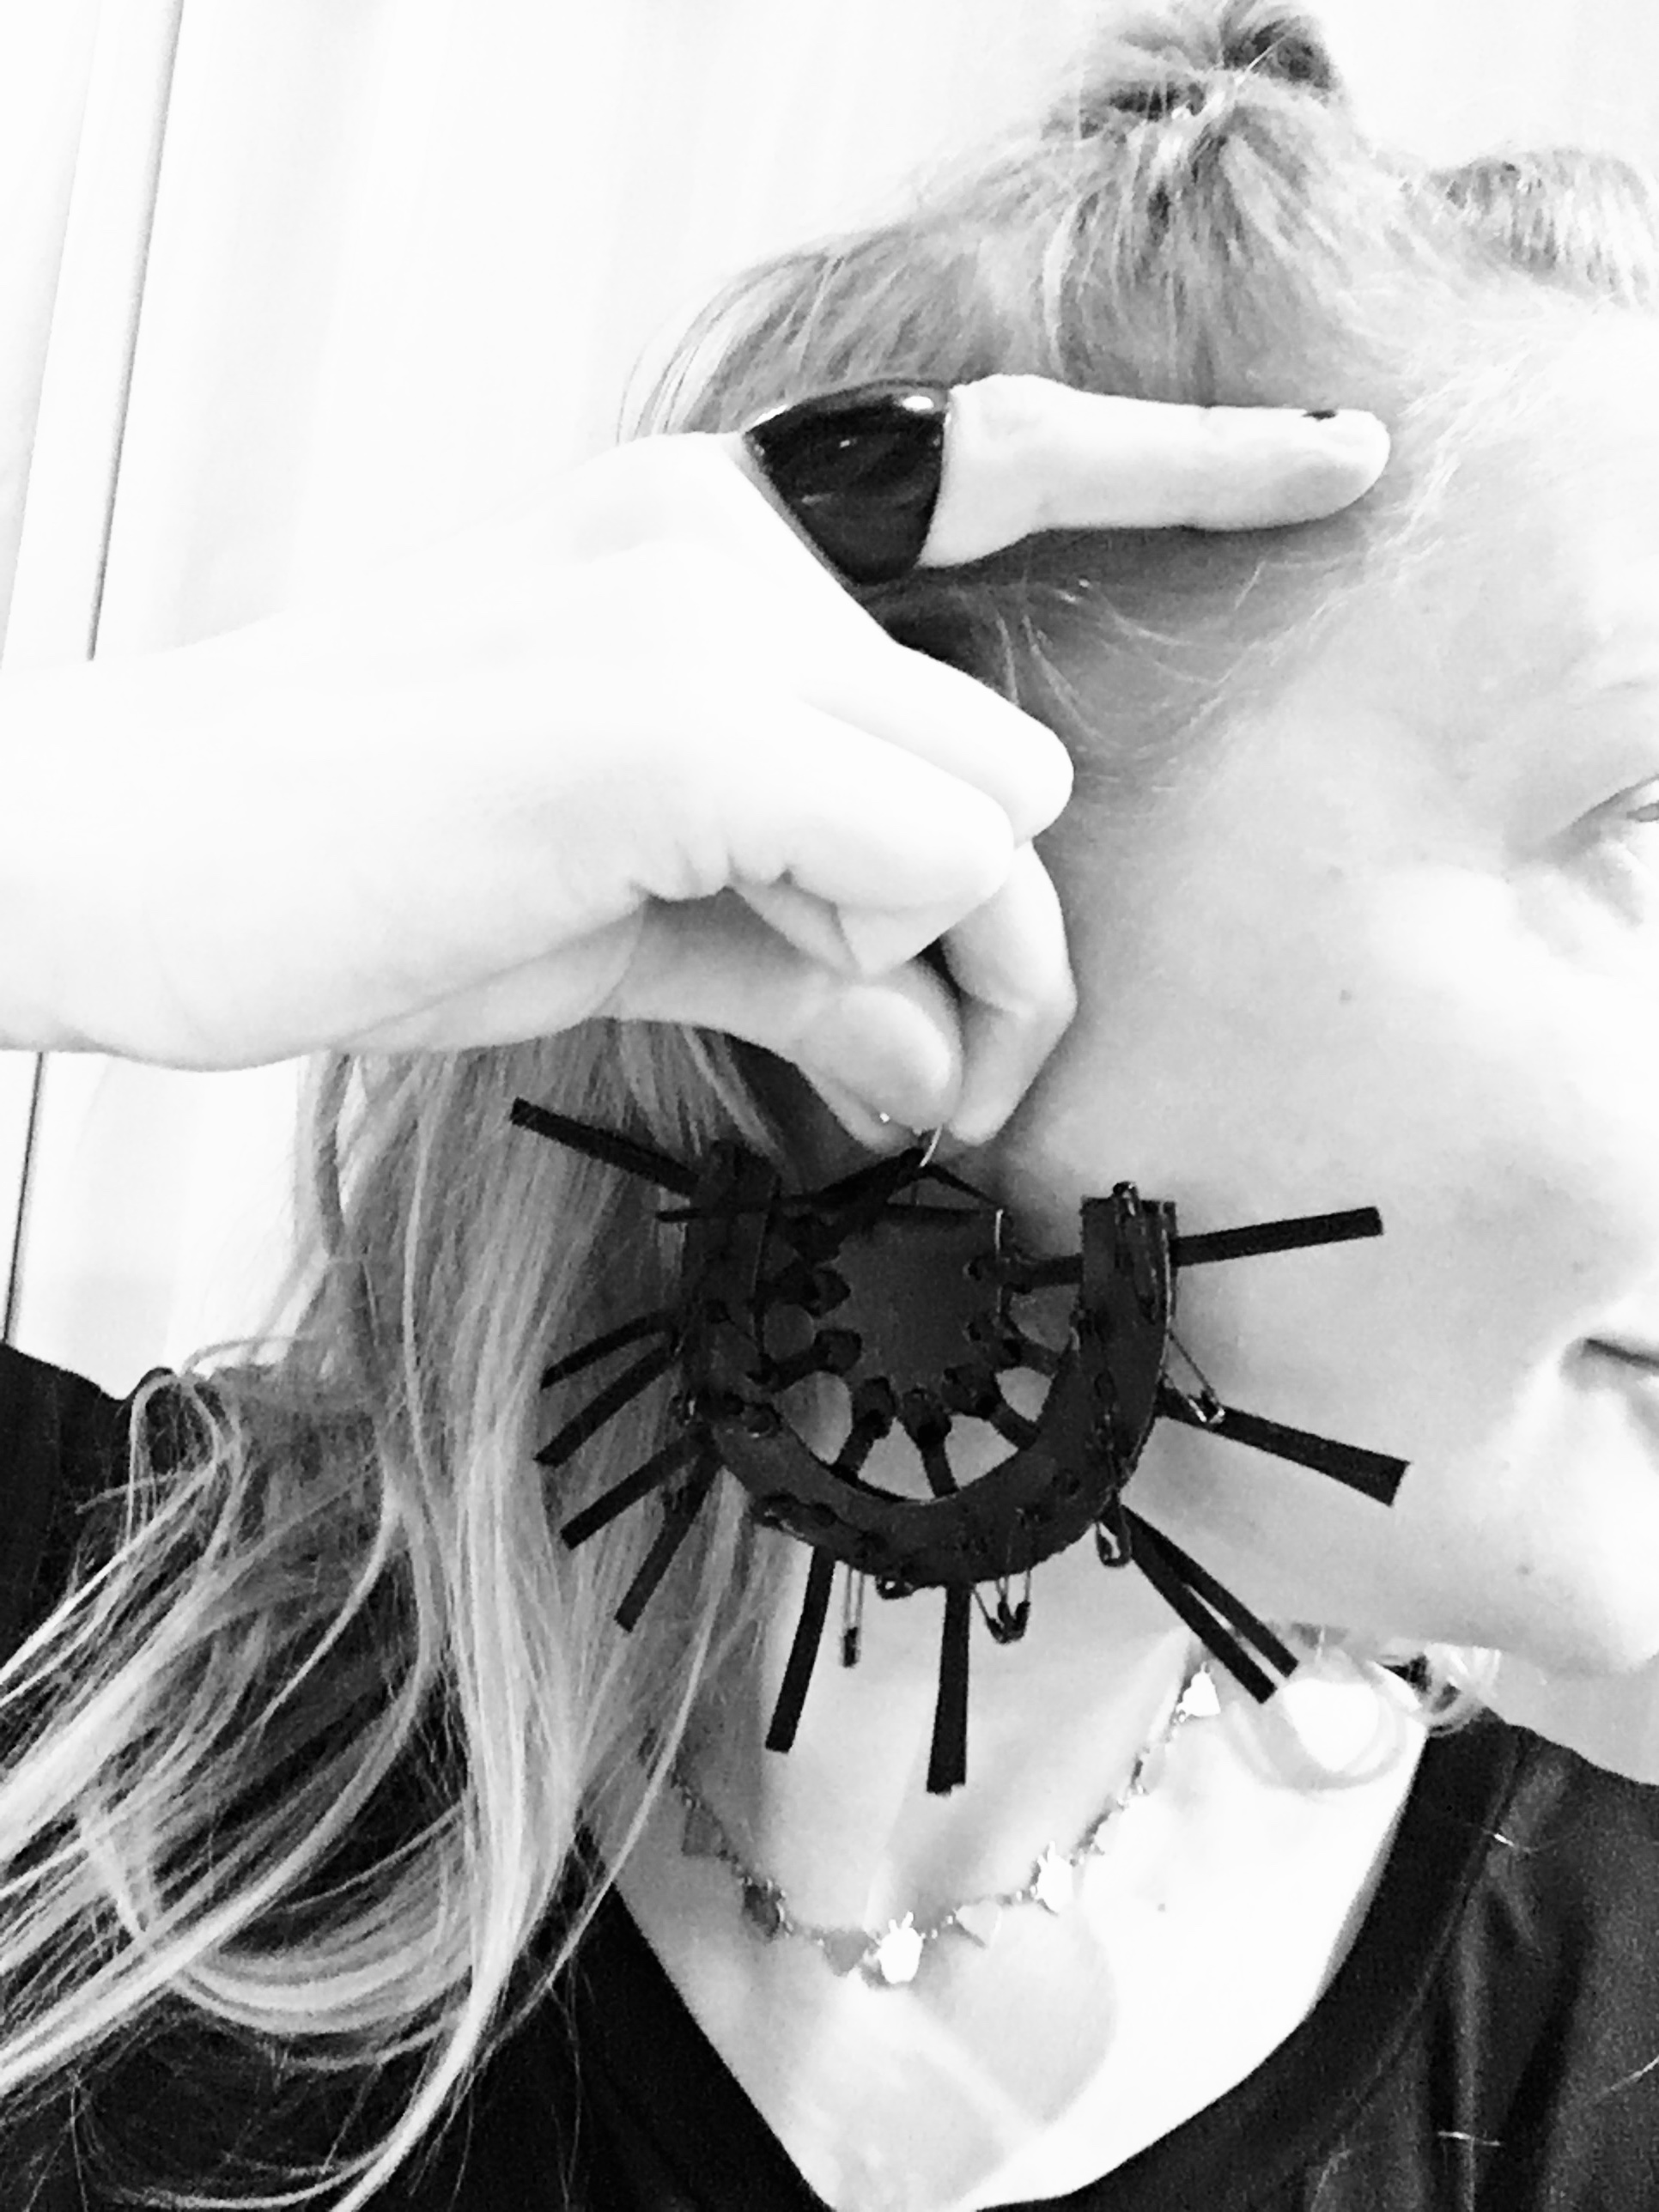
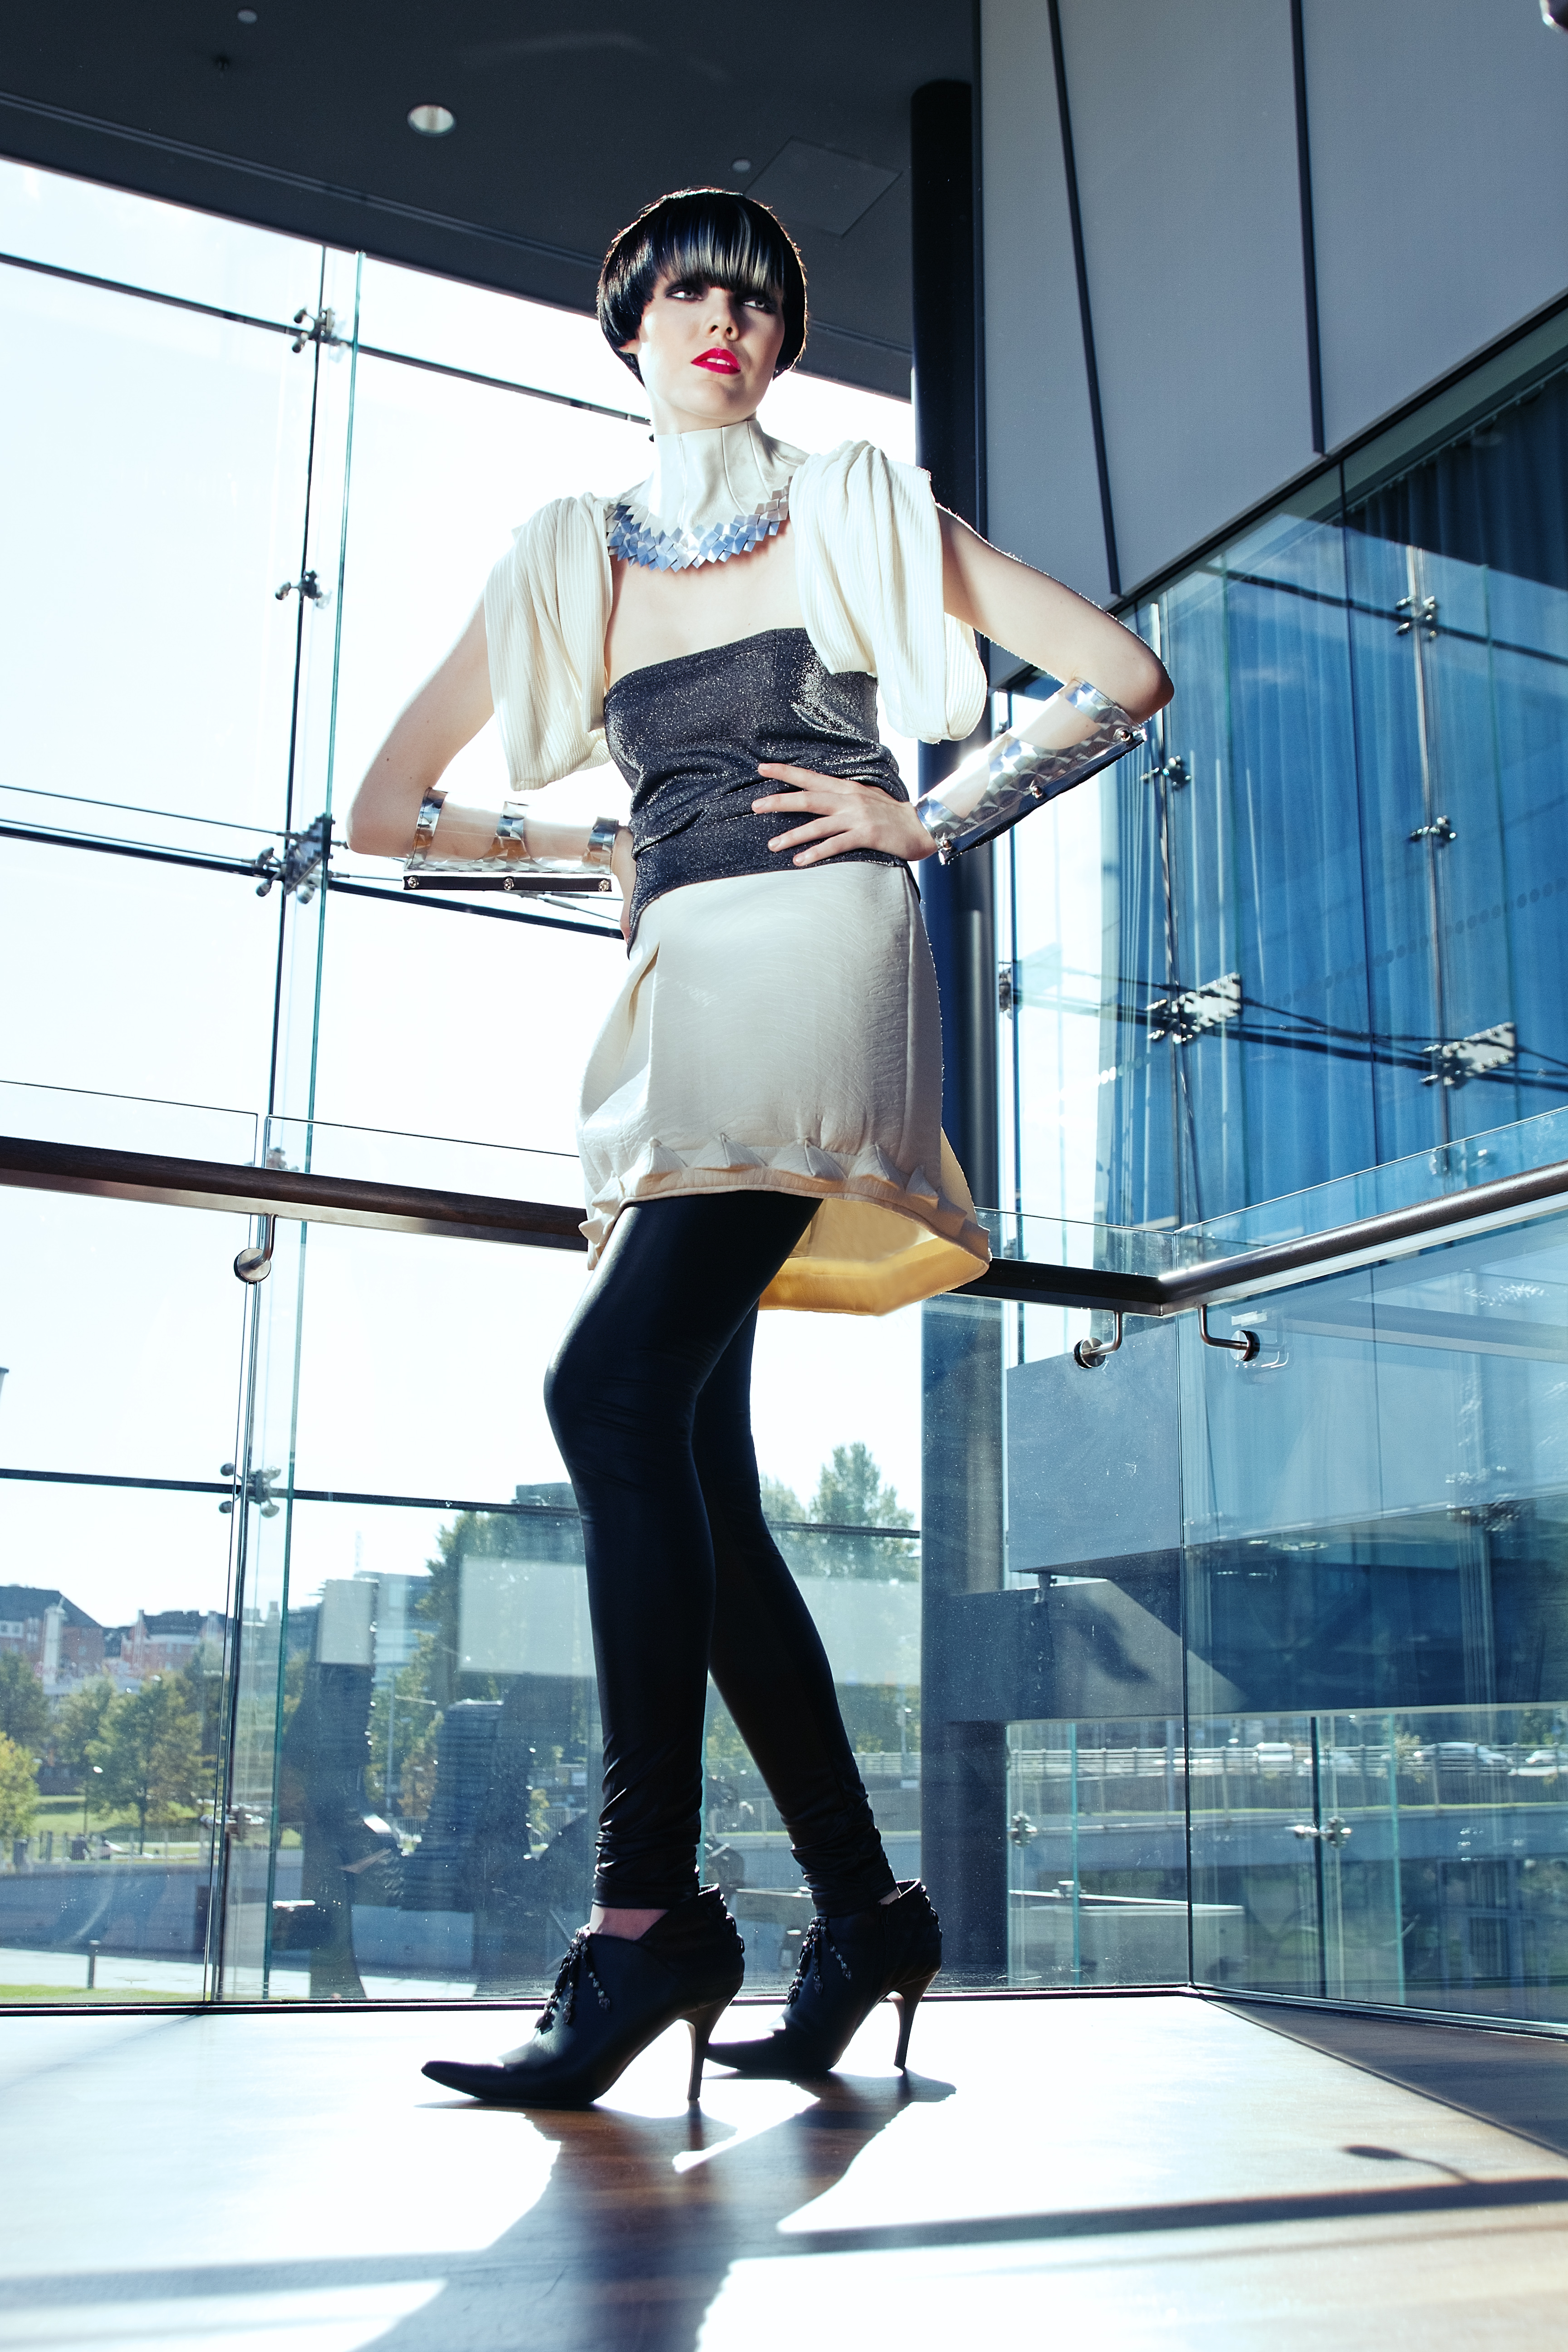
Intercoiffure Finland spring&summer 2015. Style Northern Lights, hair Marko Sutinen (HS-Salonki), photo Luiza Lehtinen, make-up Ara Koivula (Bang by Ara).

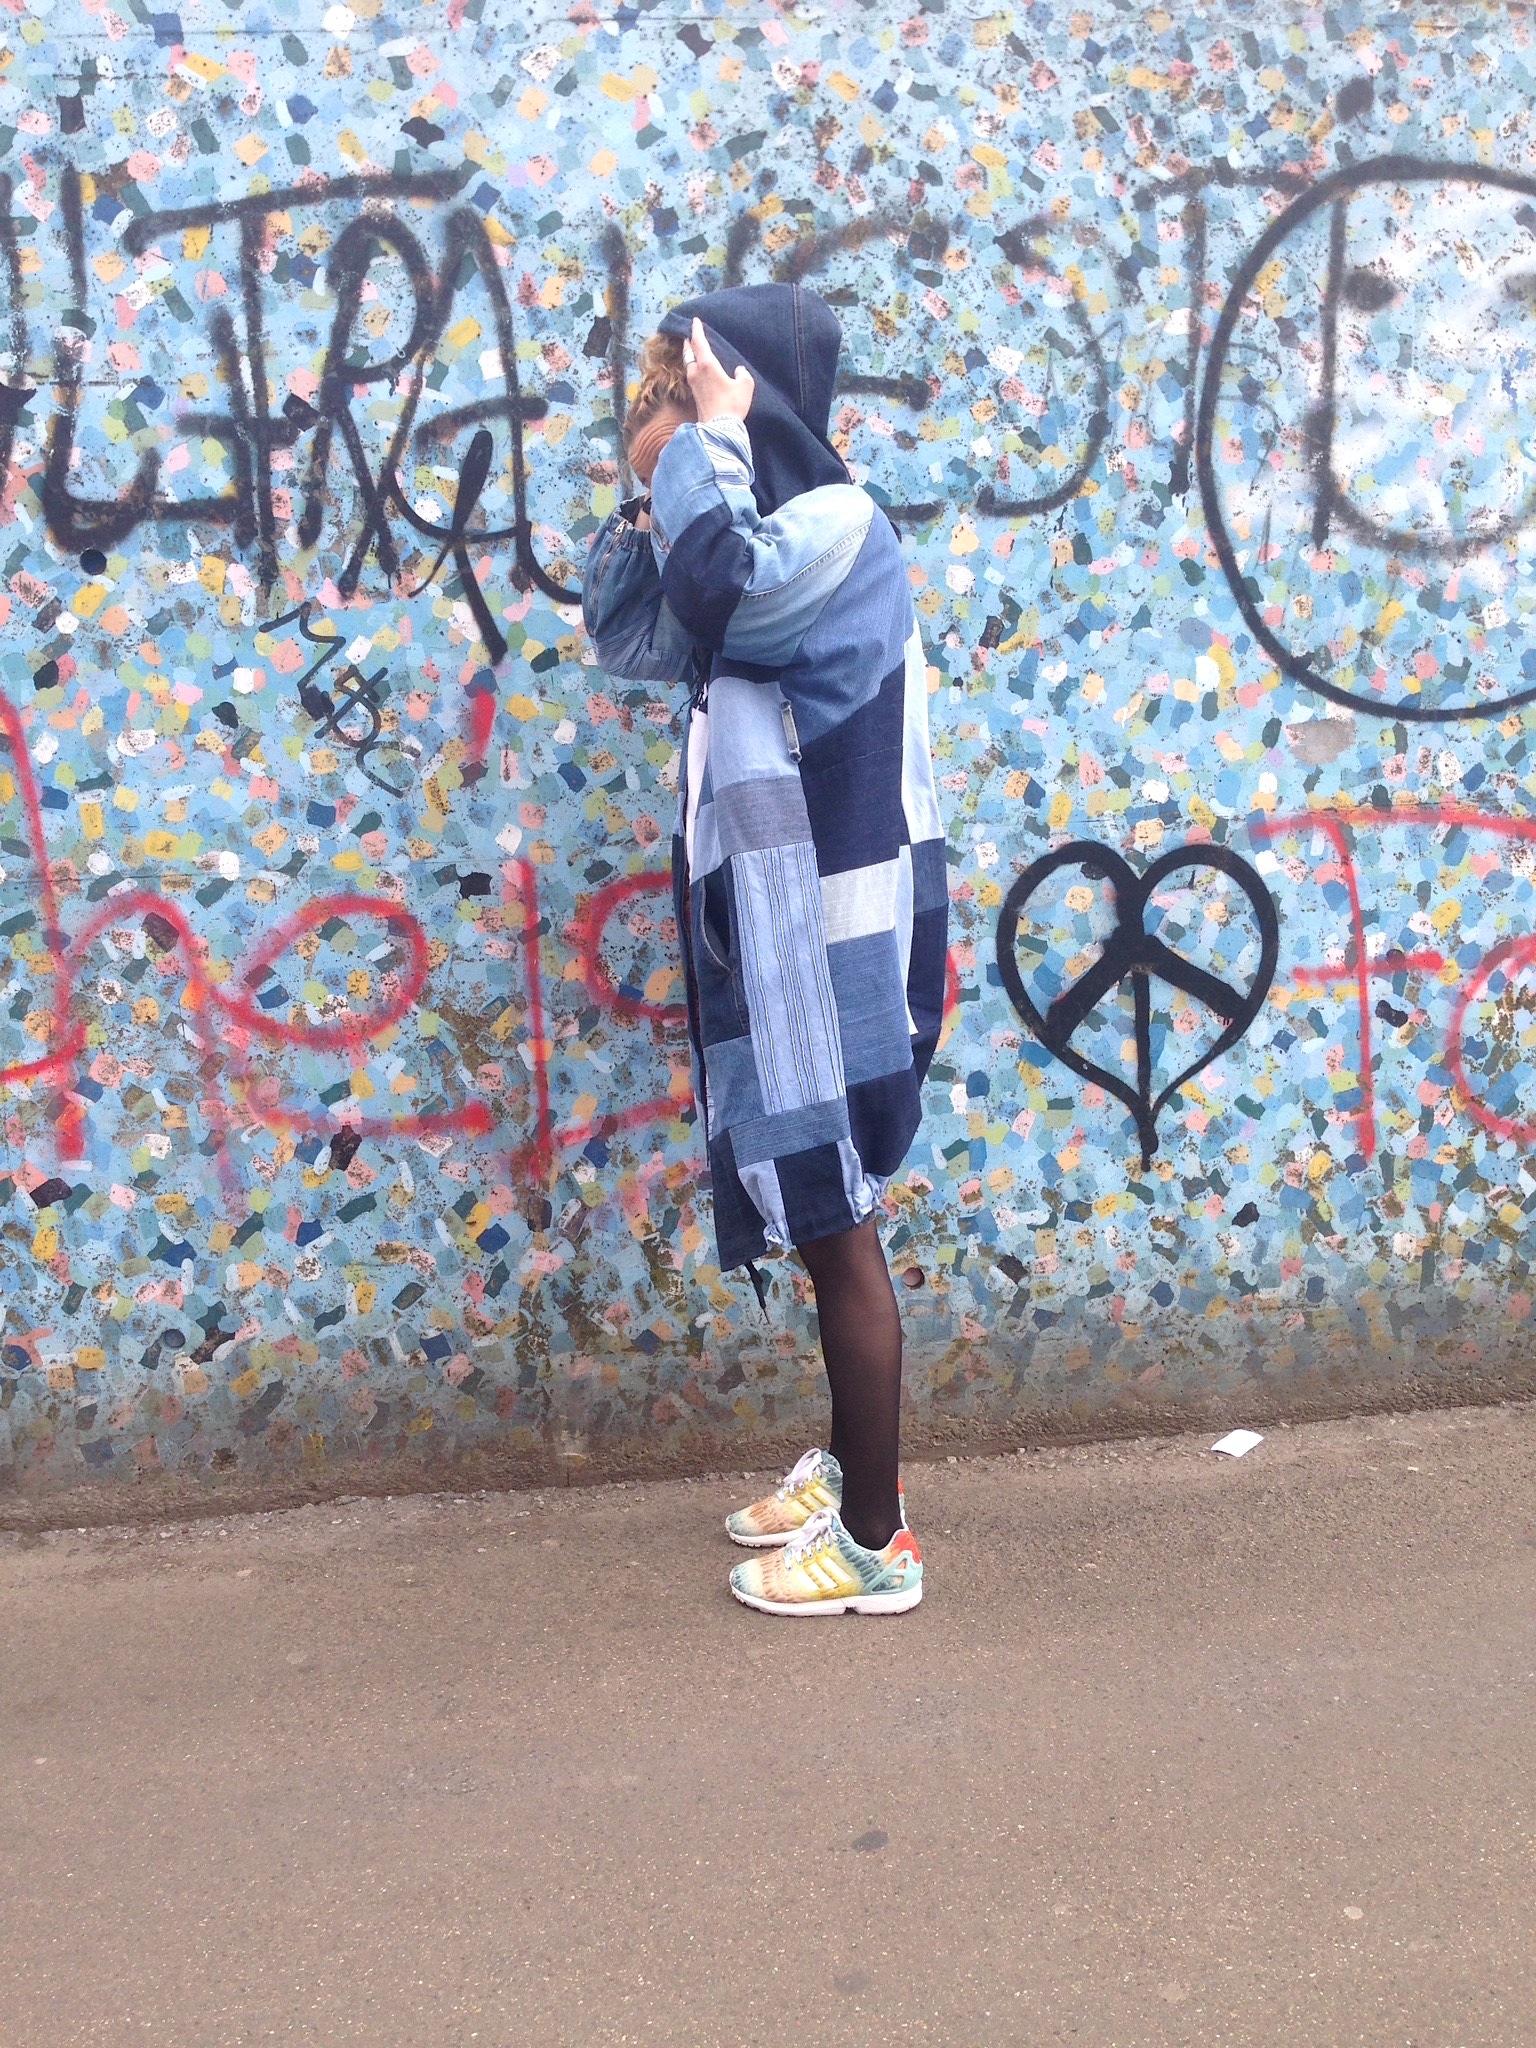
Styling Susanna Kaunisto, Susanoo. Style is called northern lights, futuristic up-all-night-long party style inspired by northern summer light.

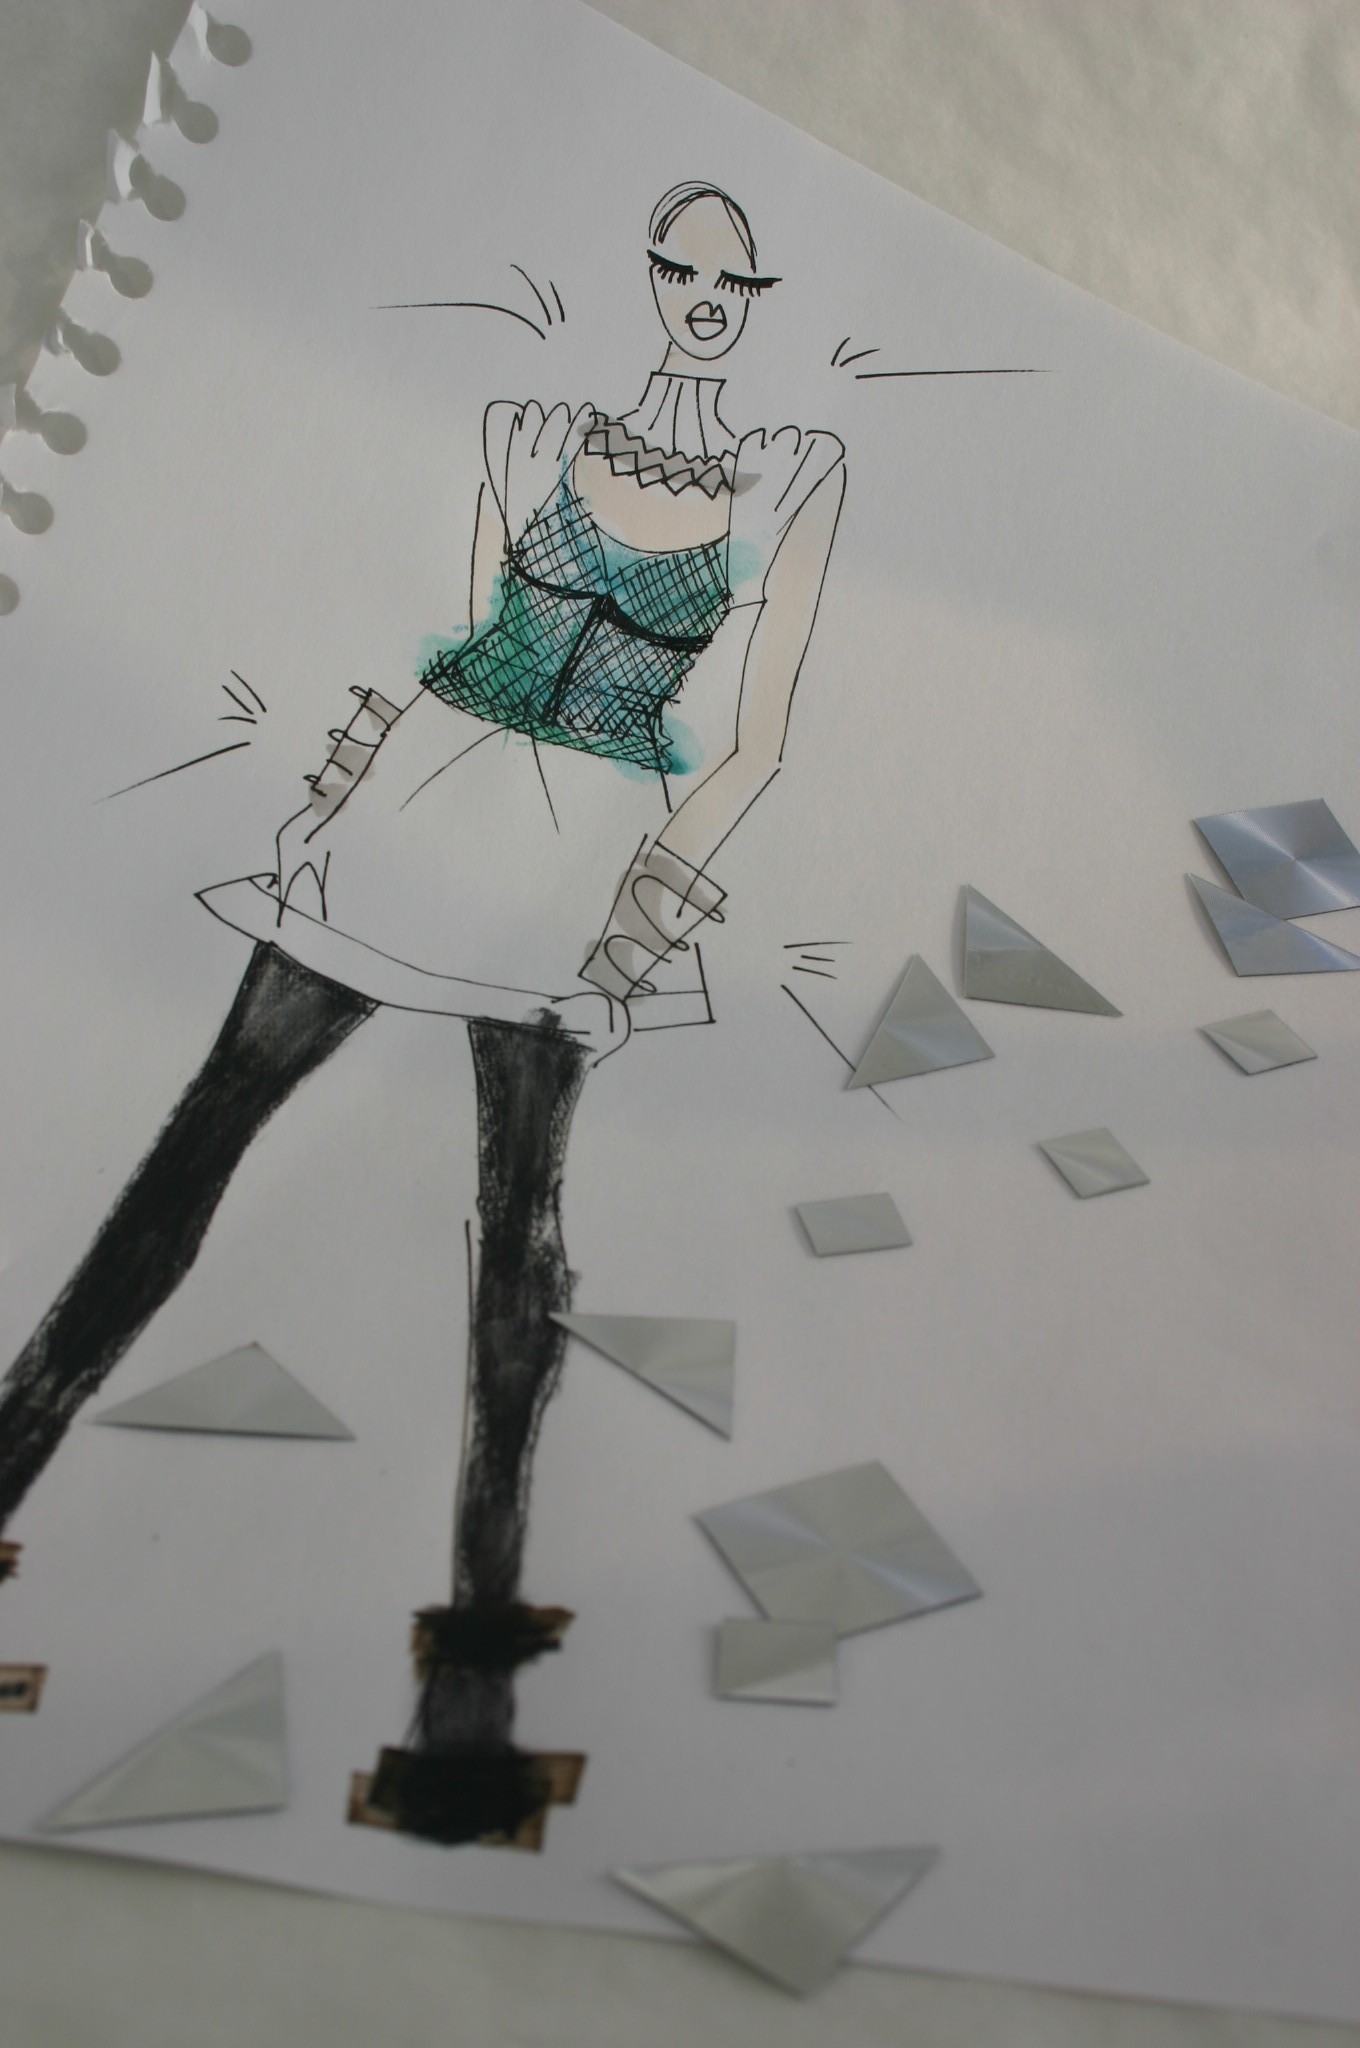
I searched my inspo to this style from space, fencing and futuristic styles.

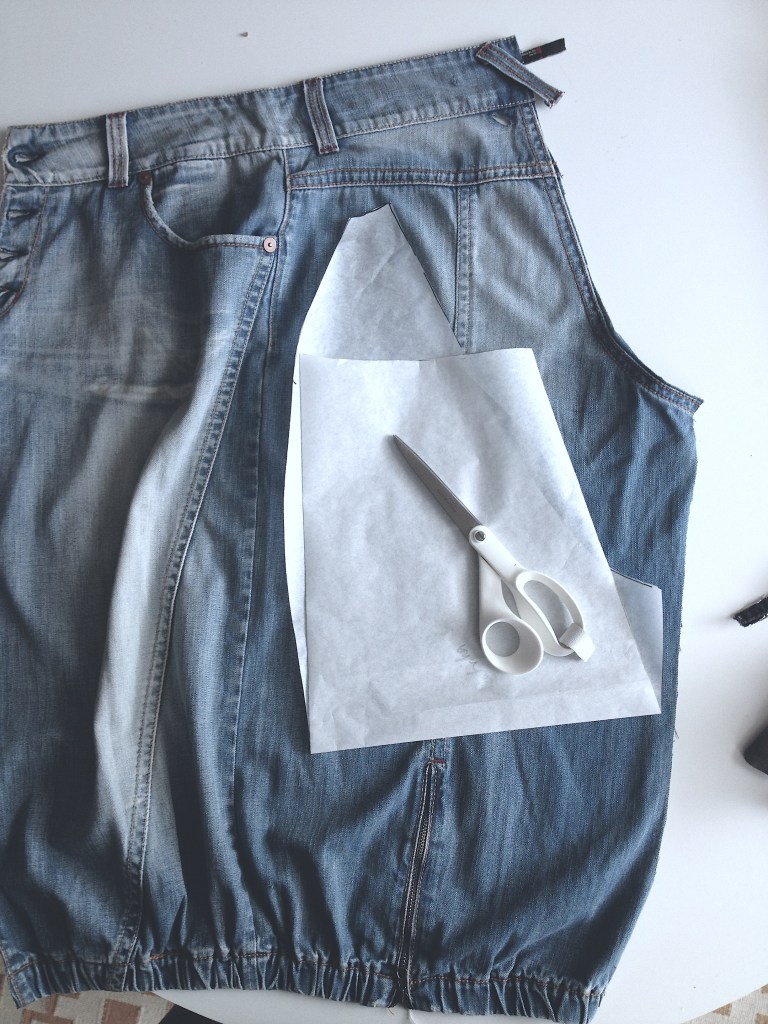
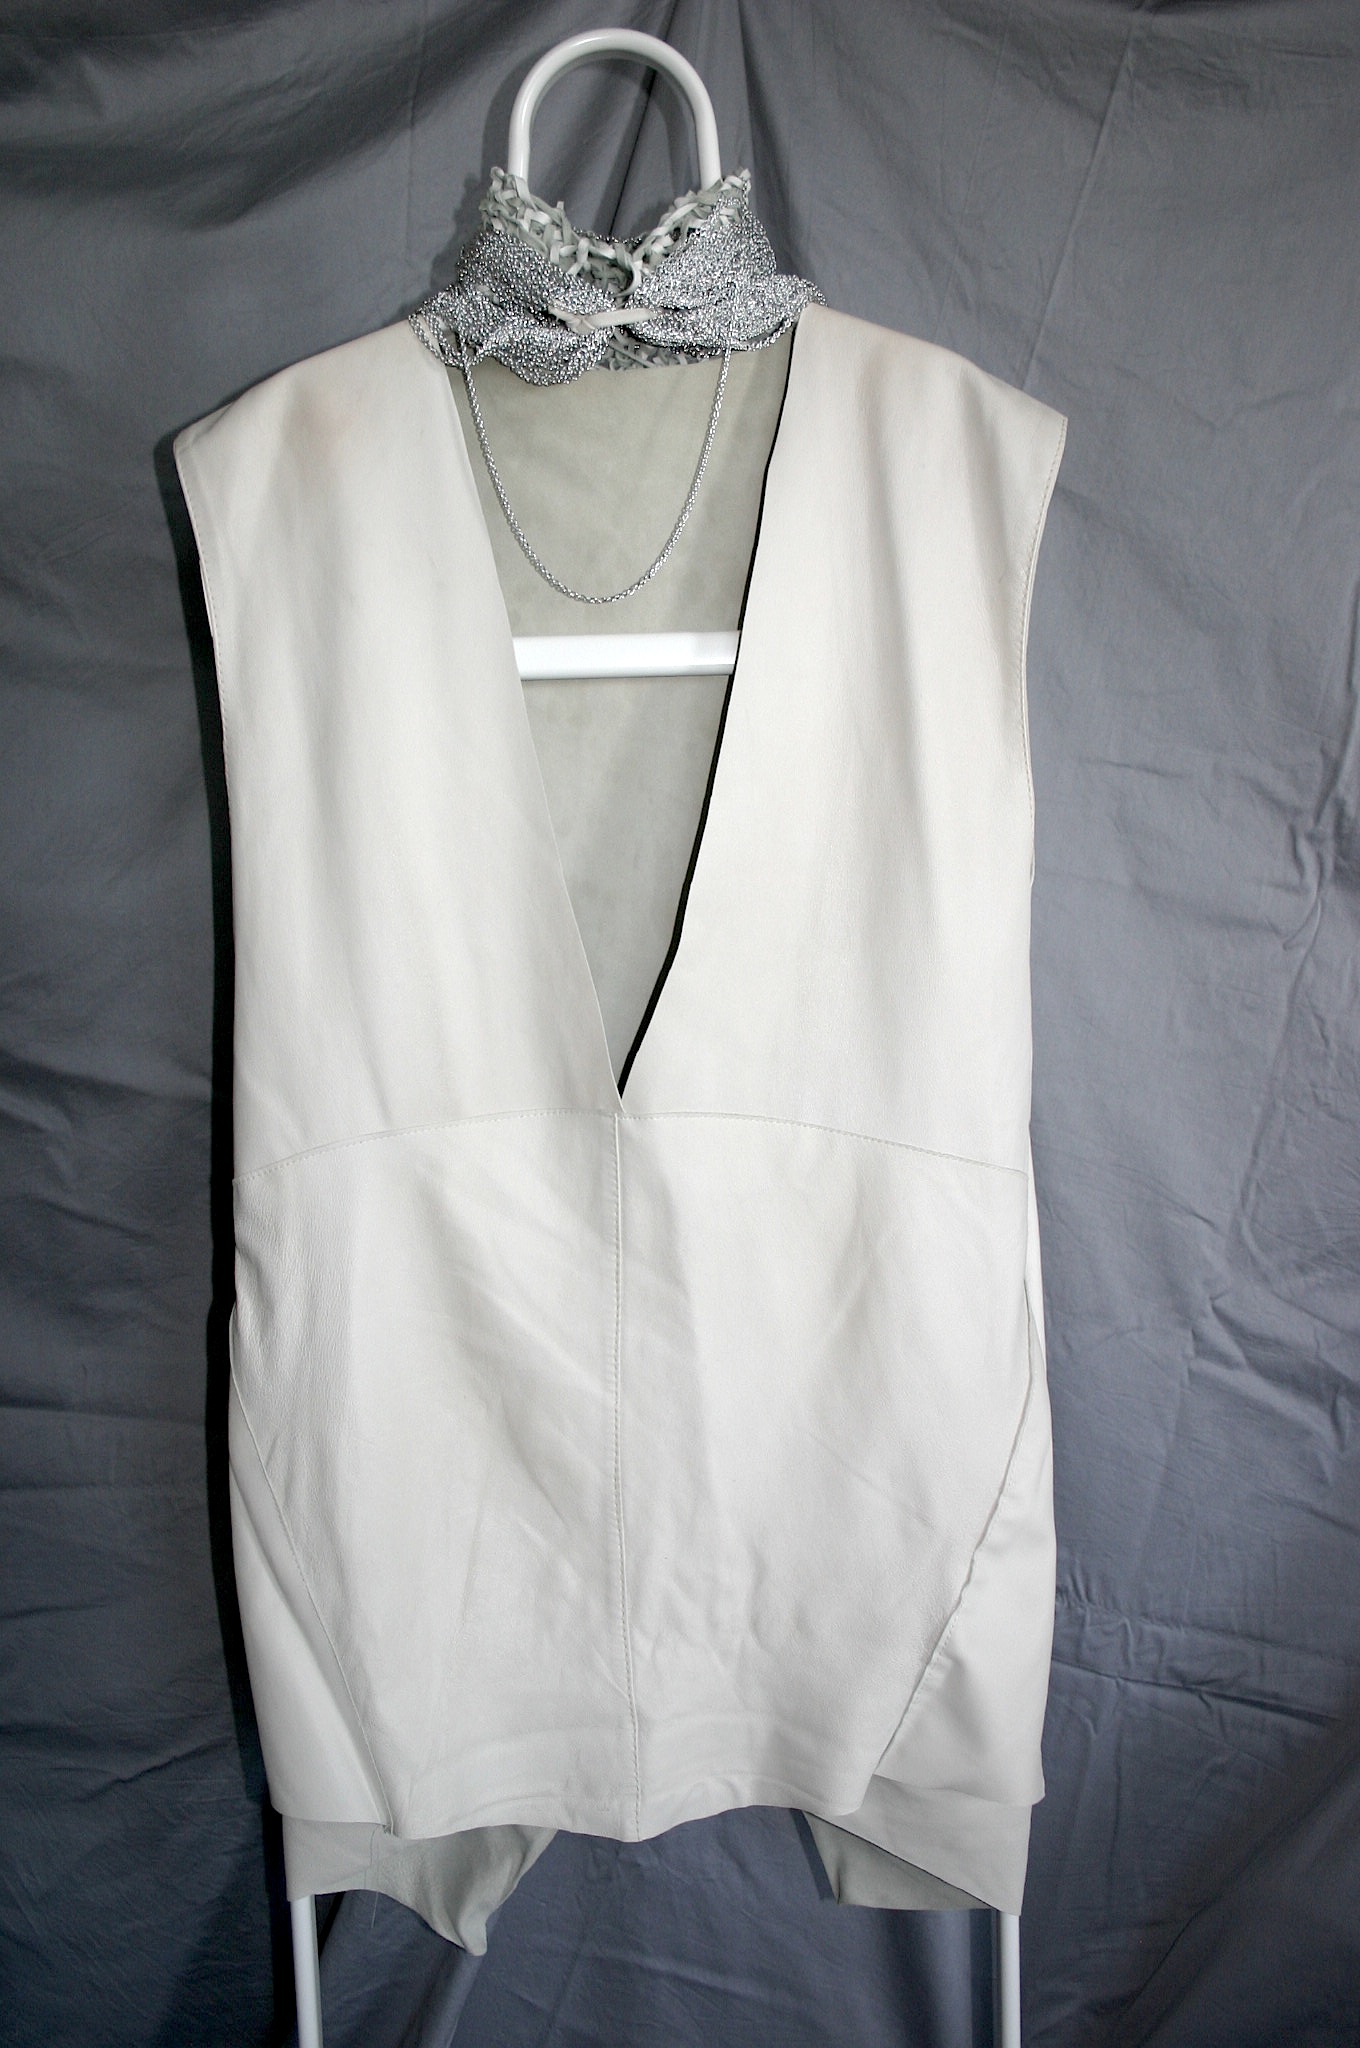
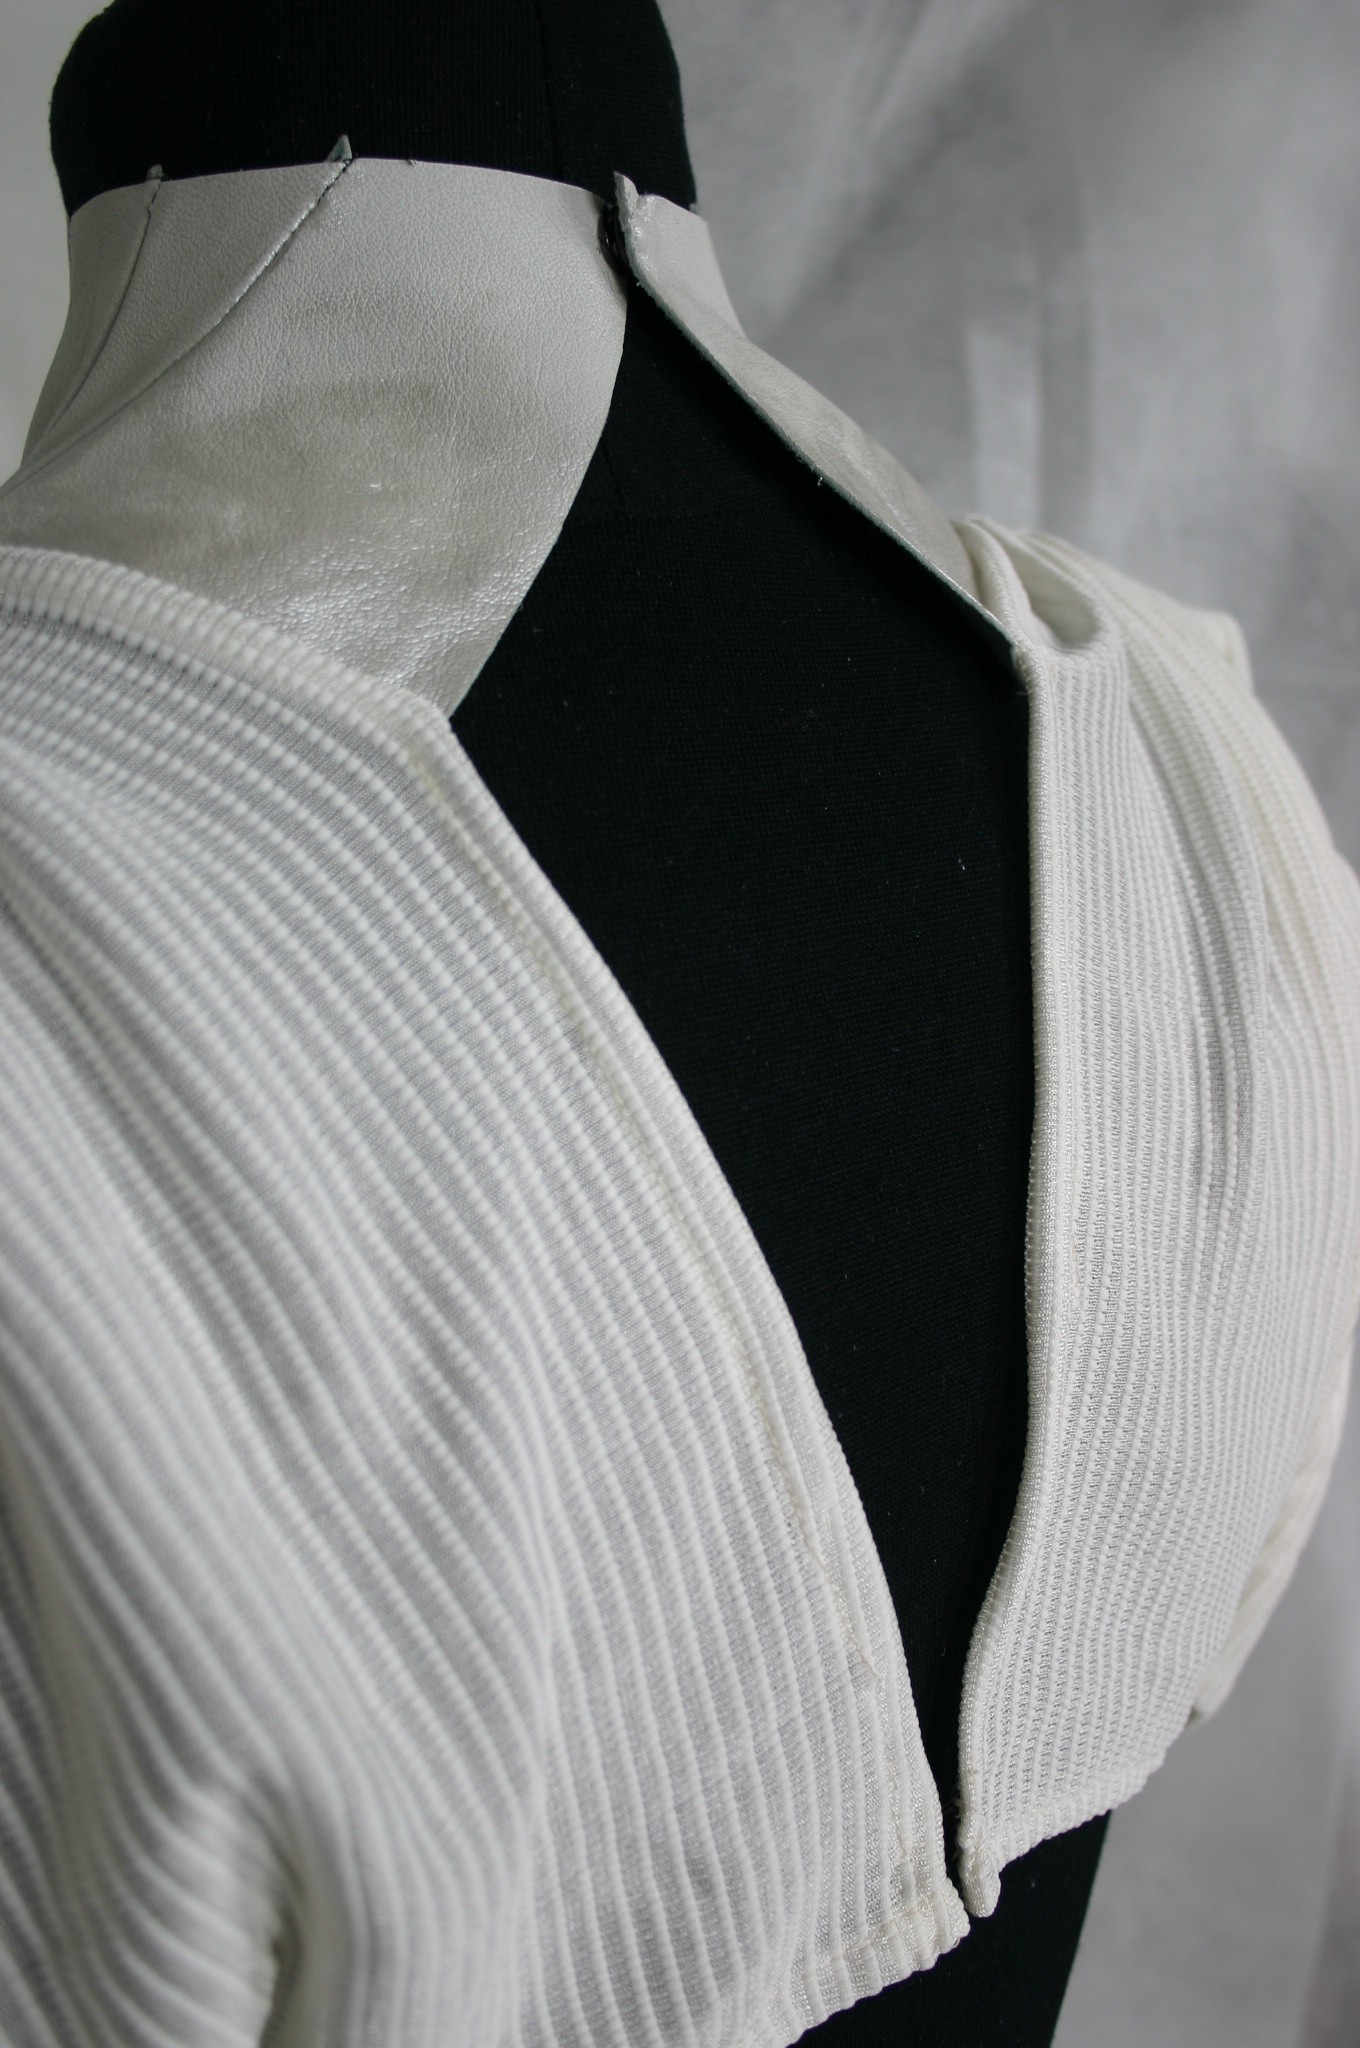
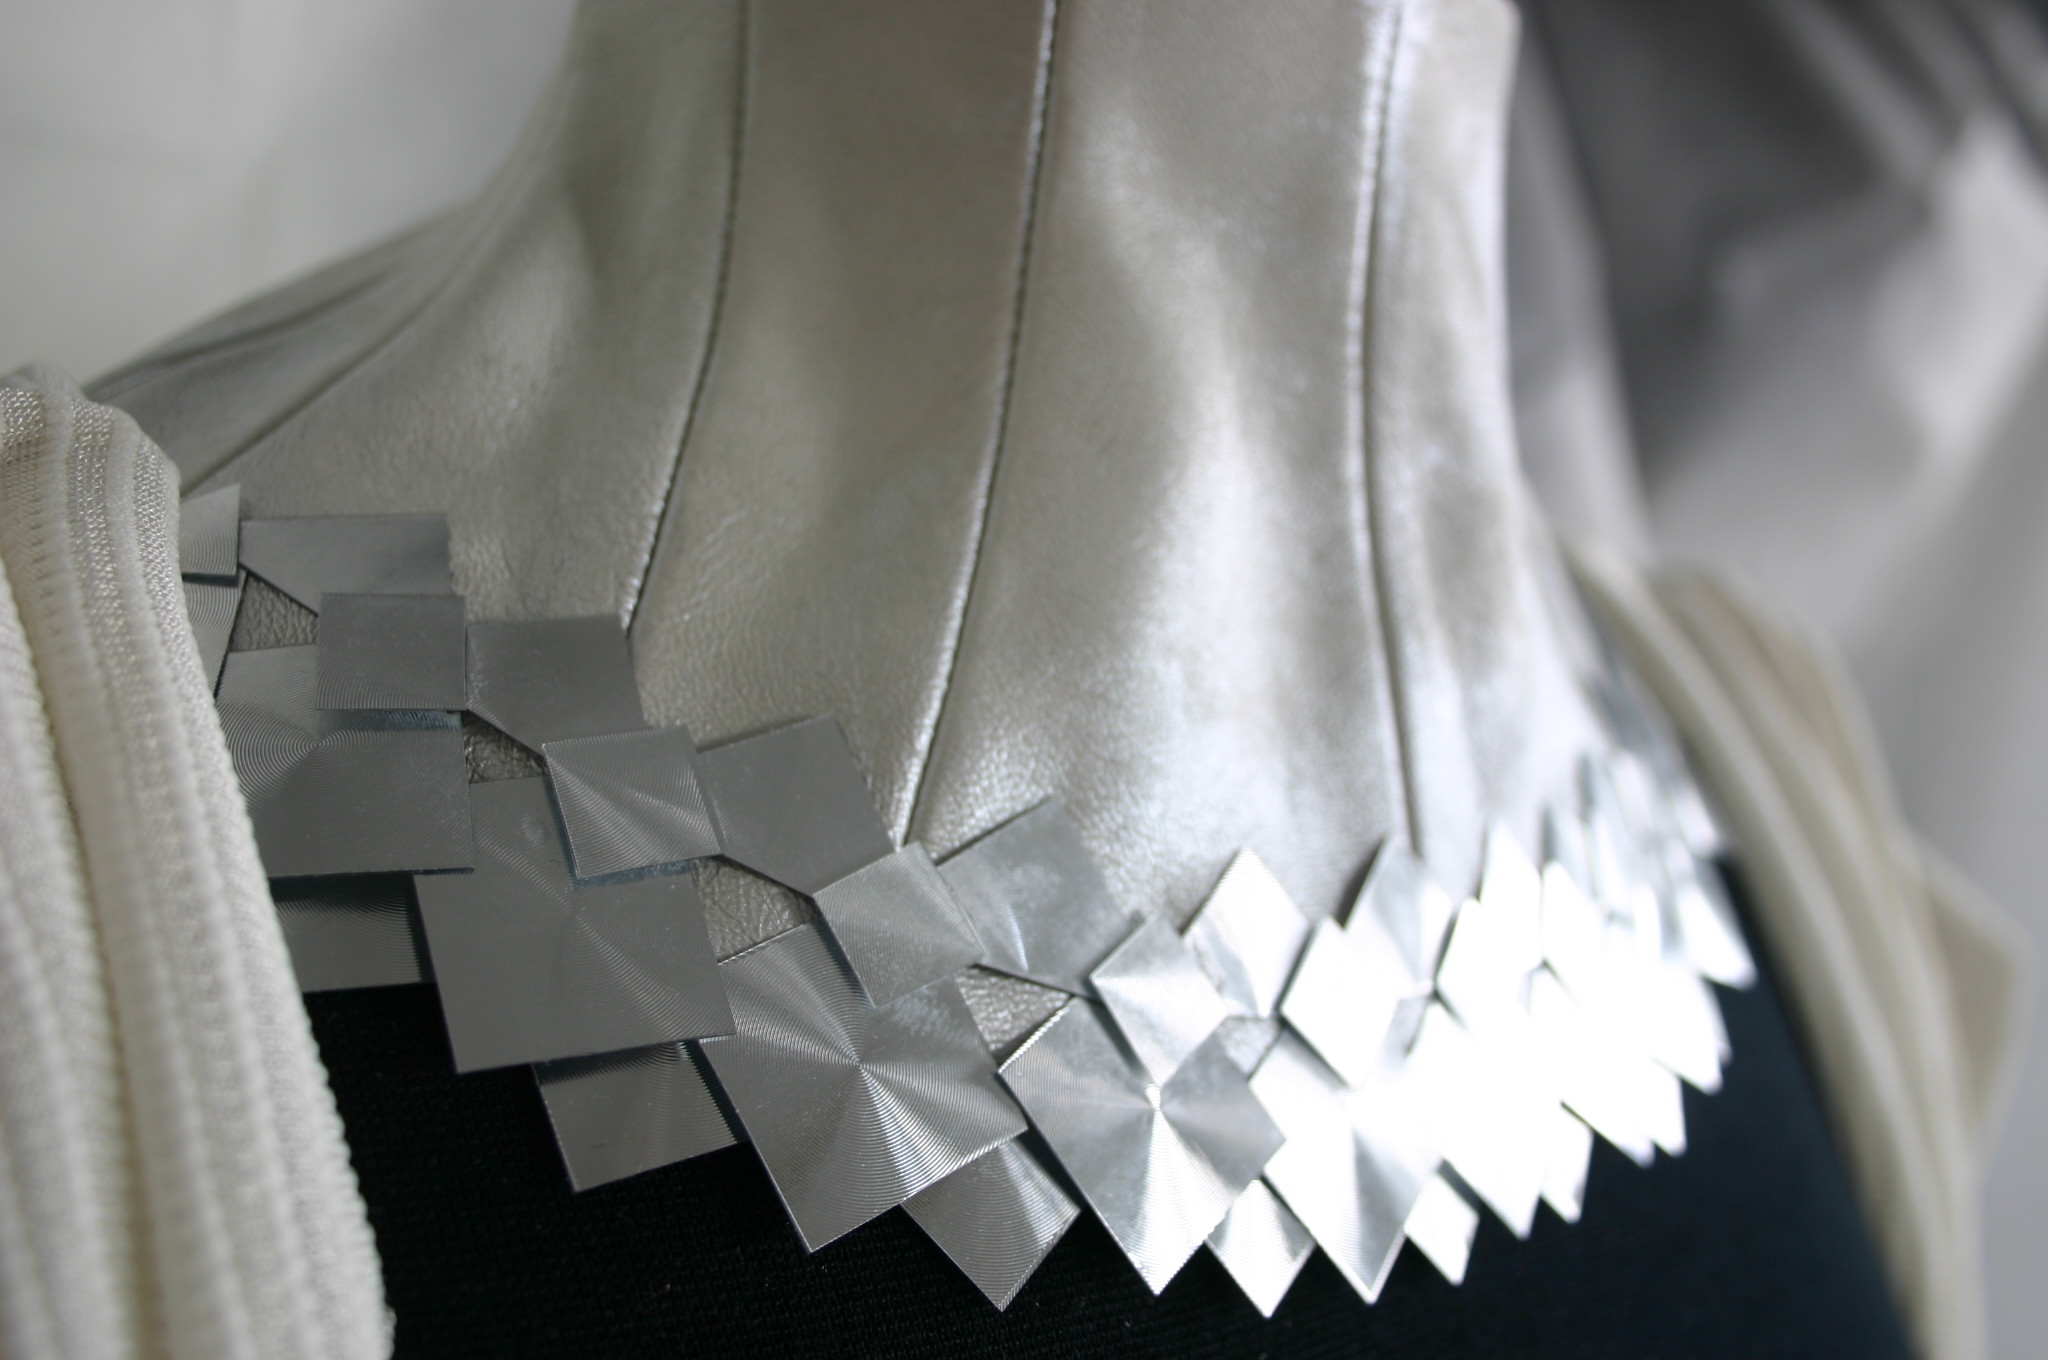
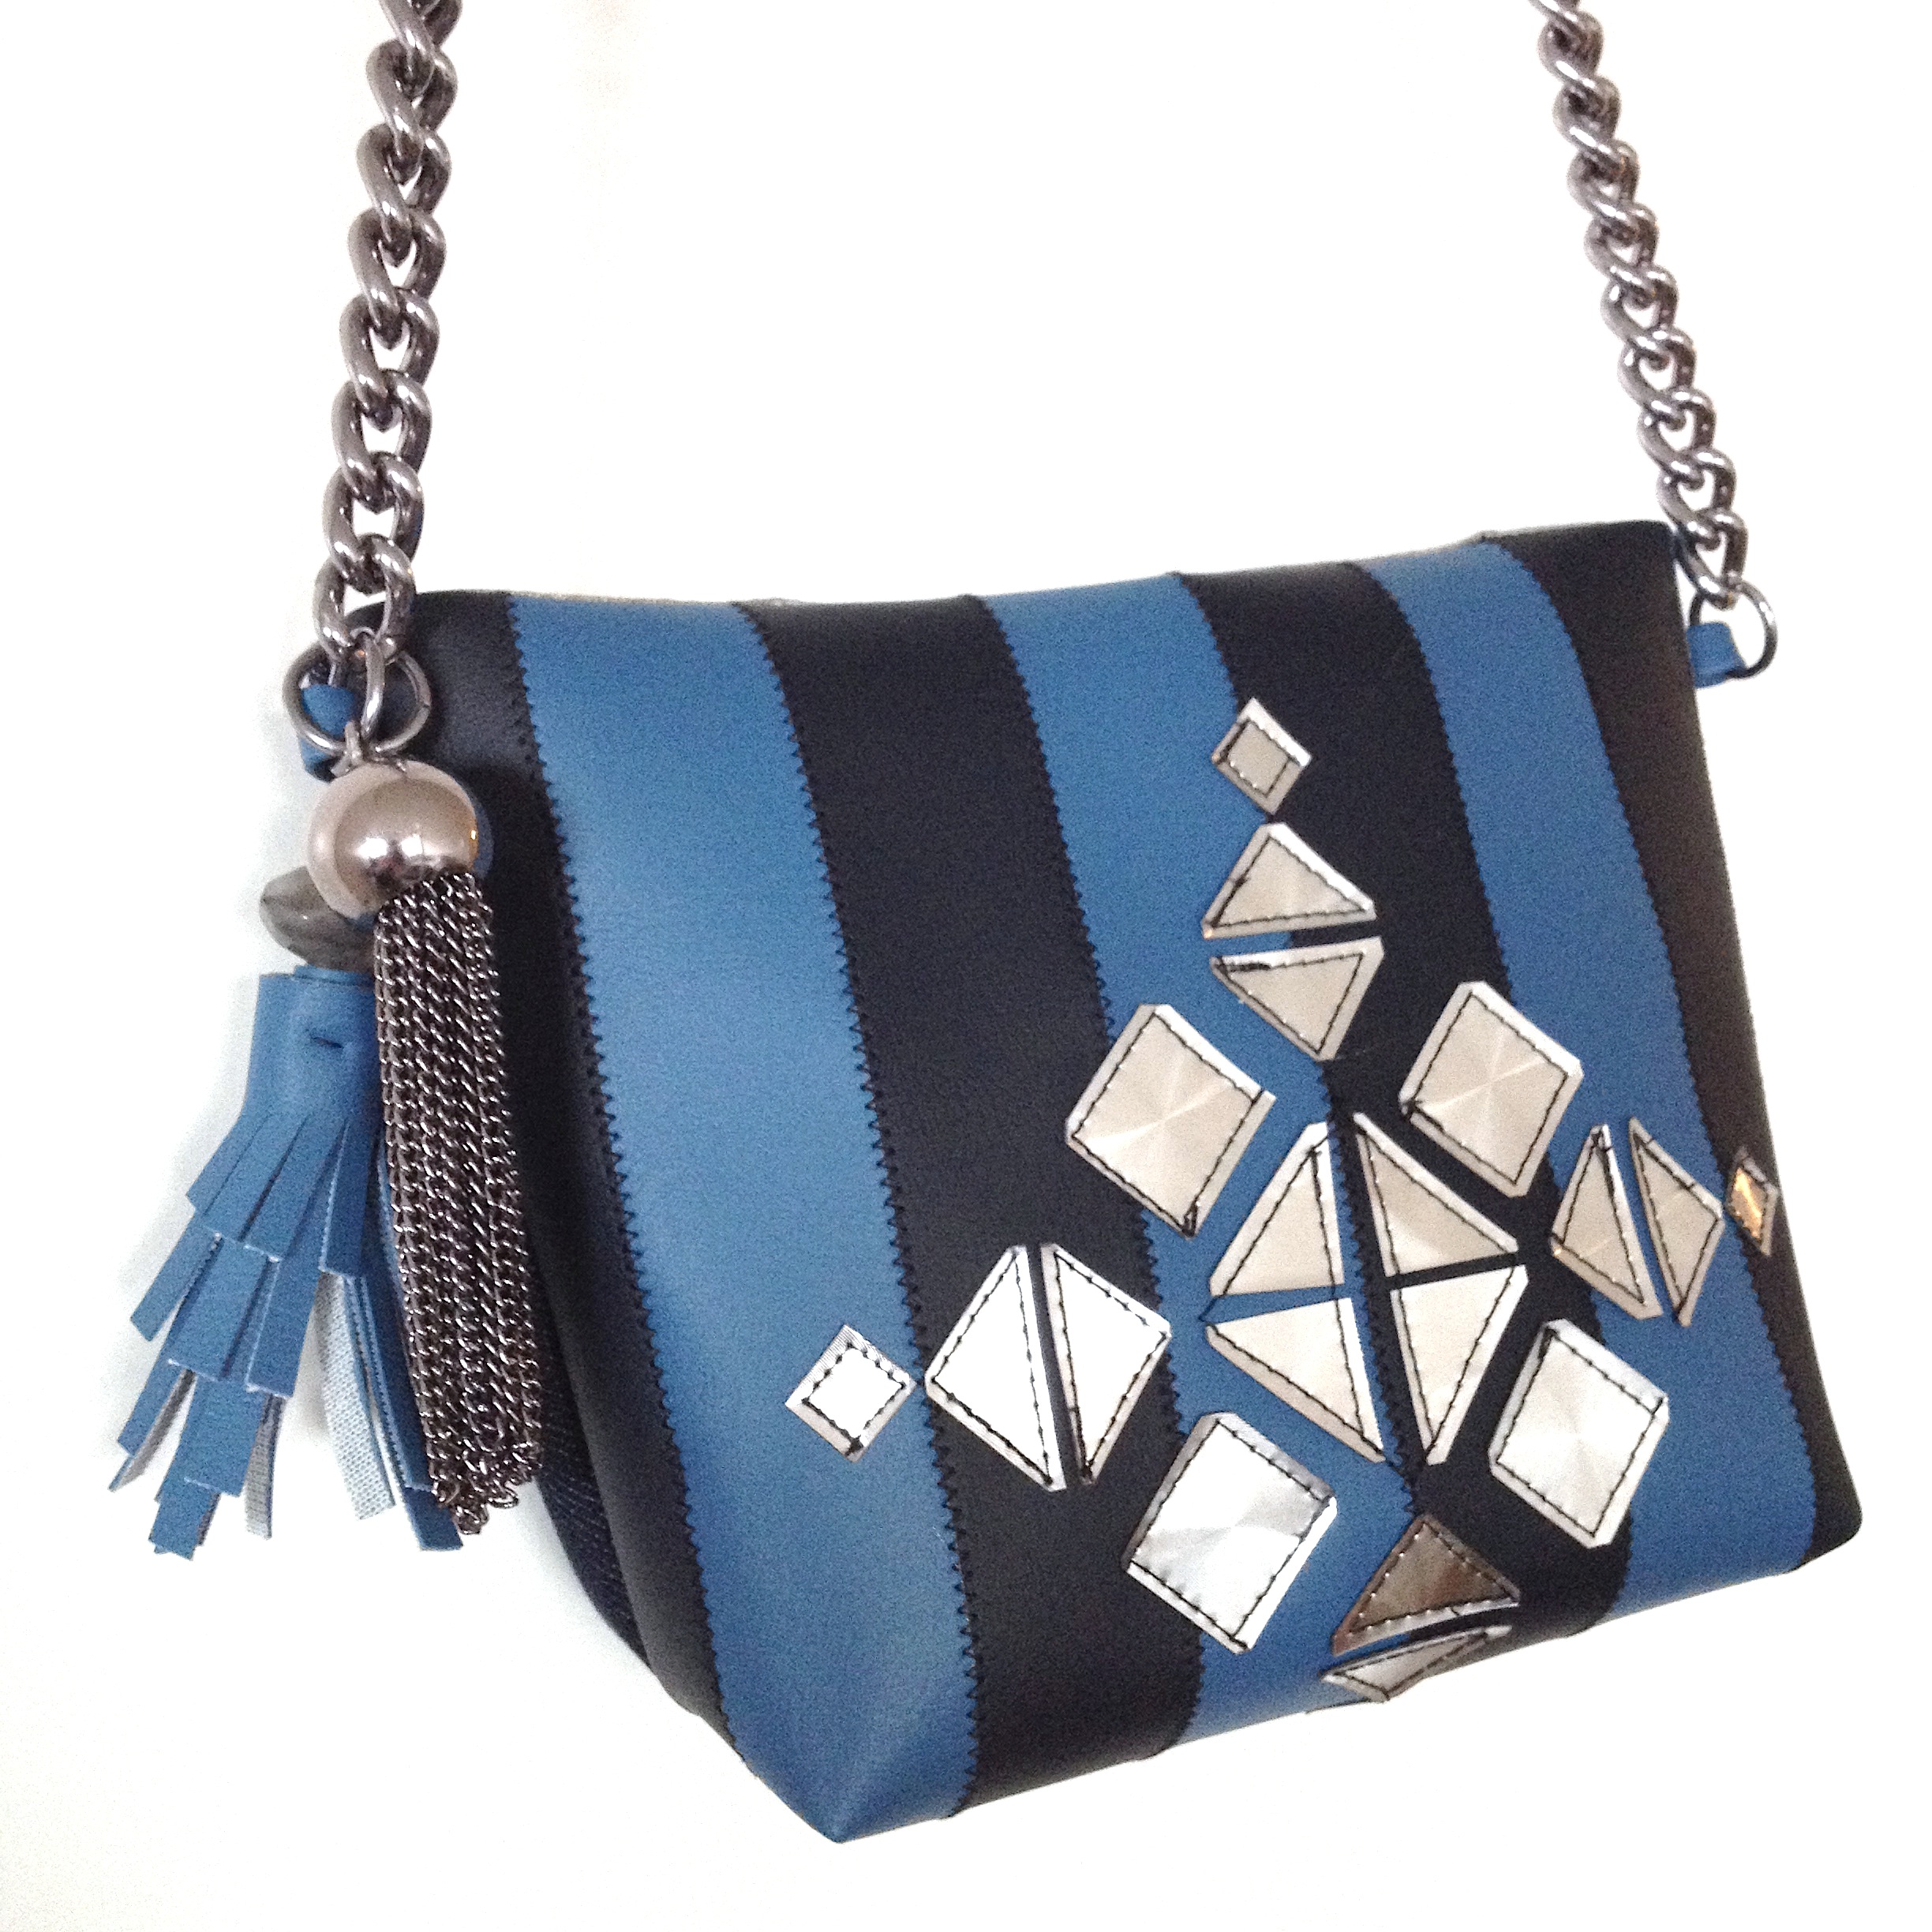
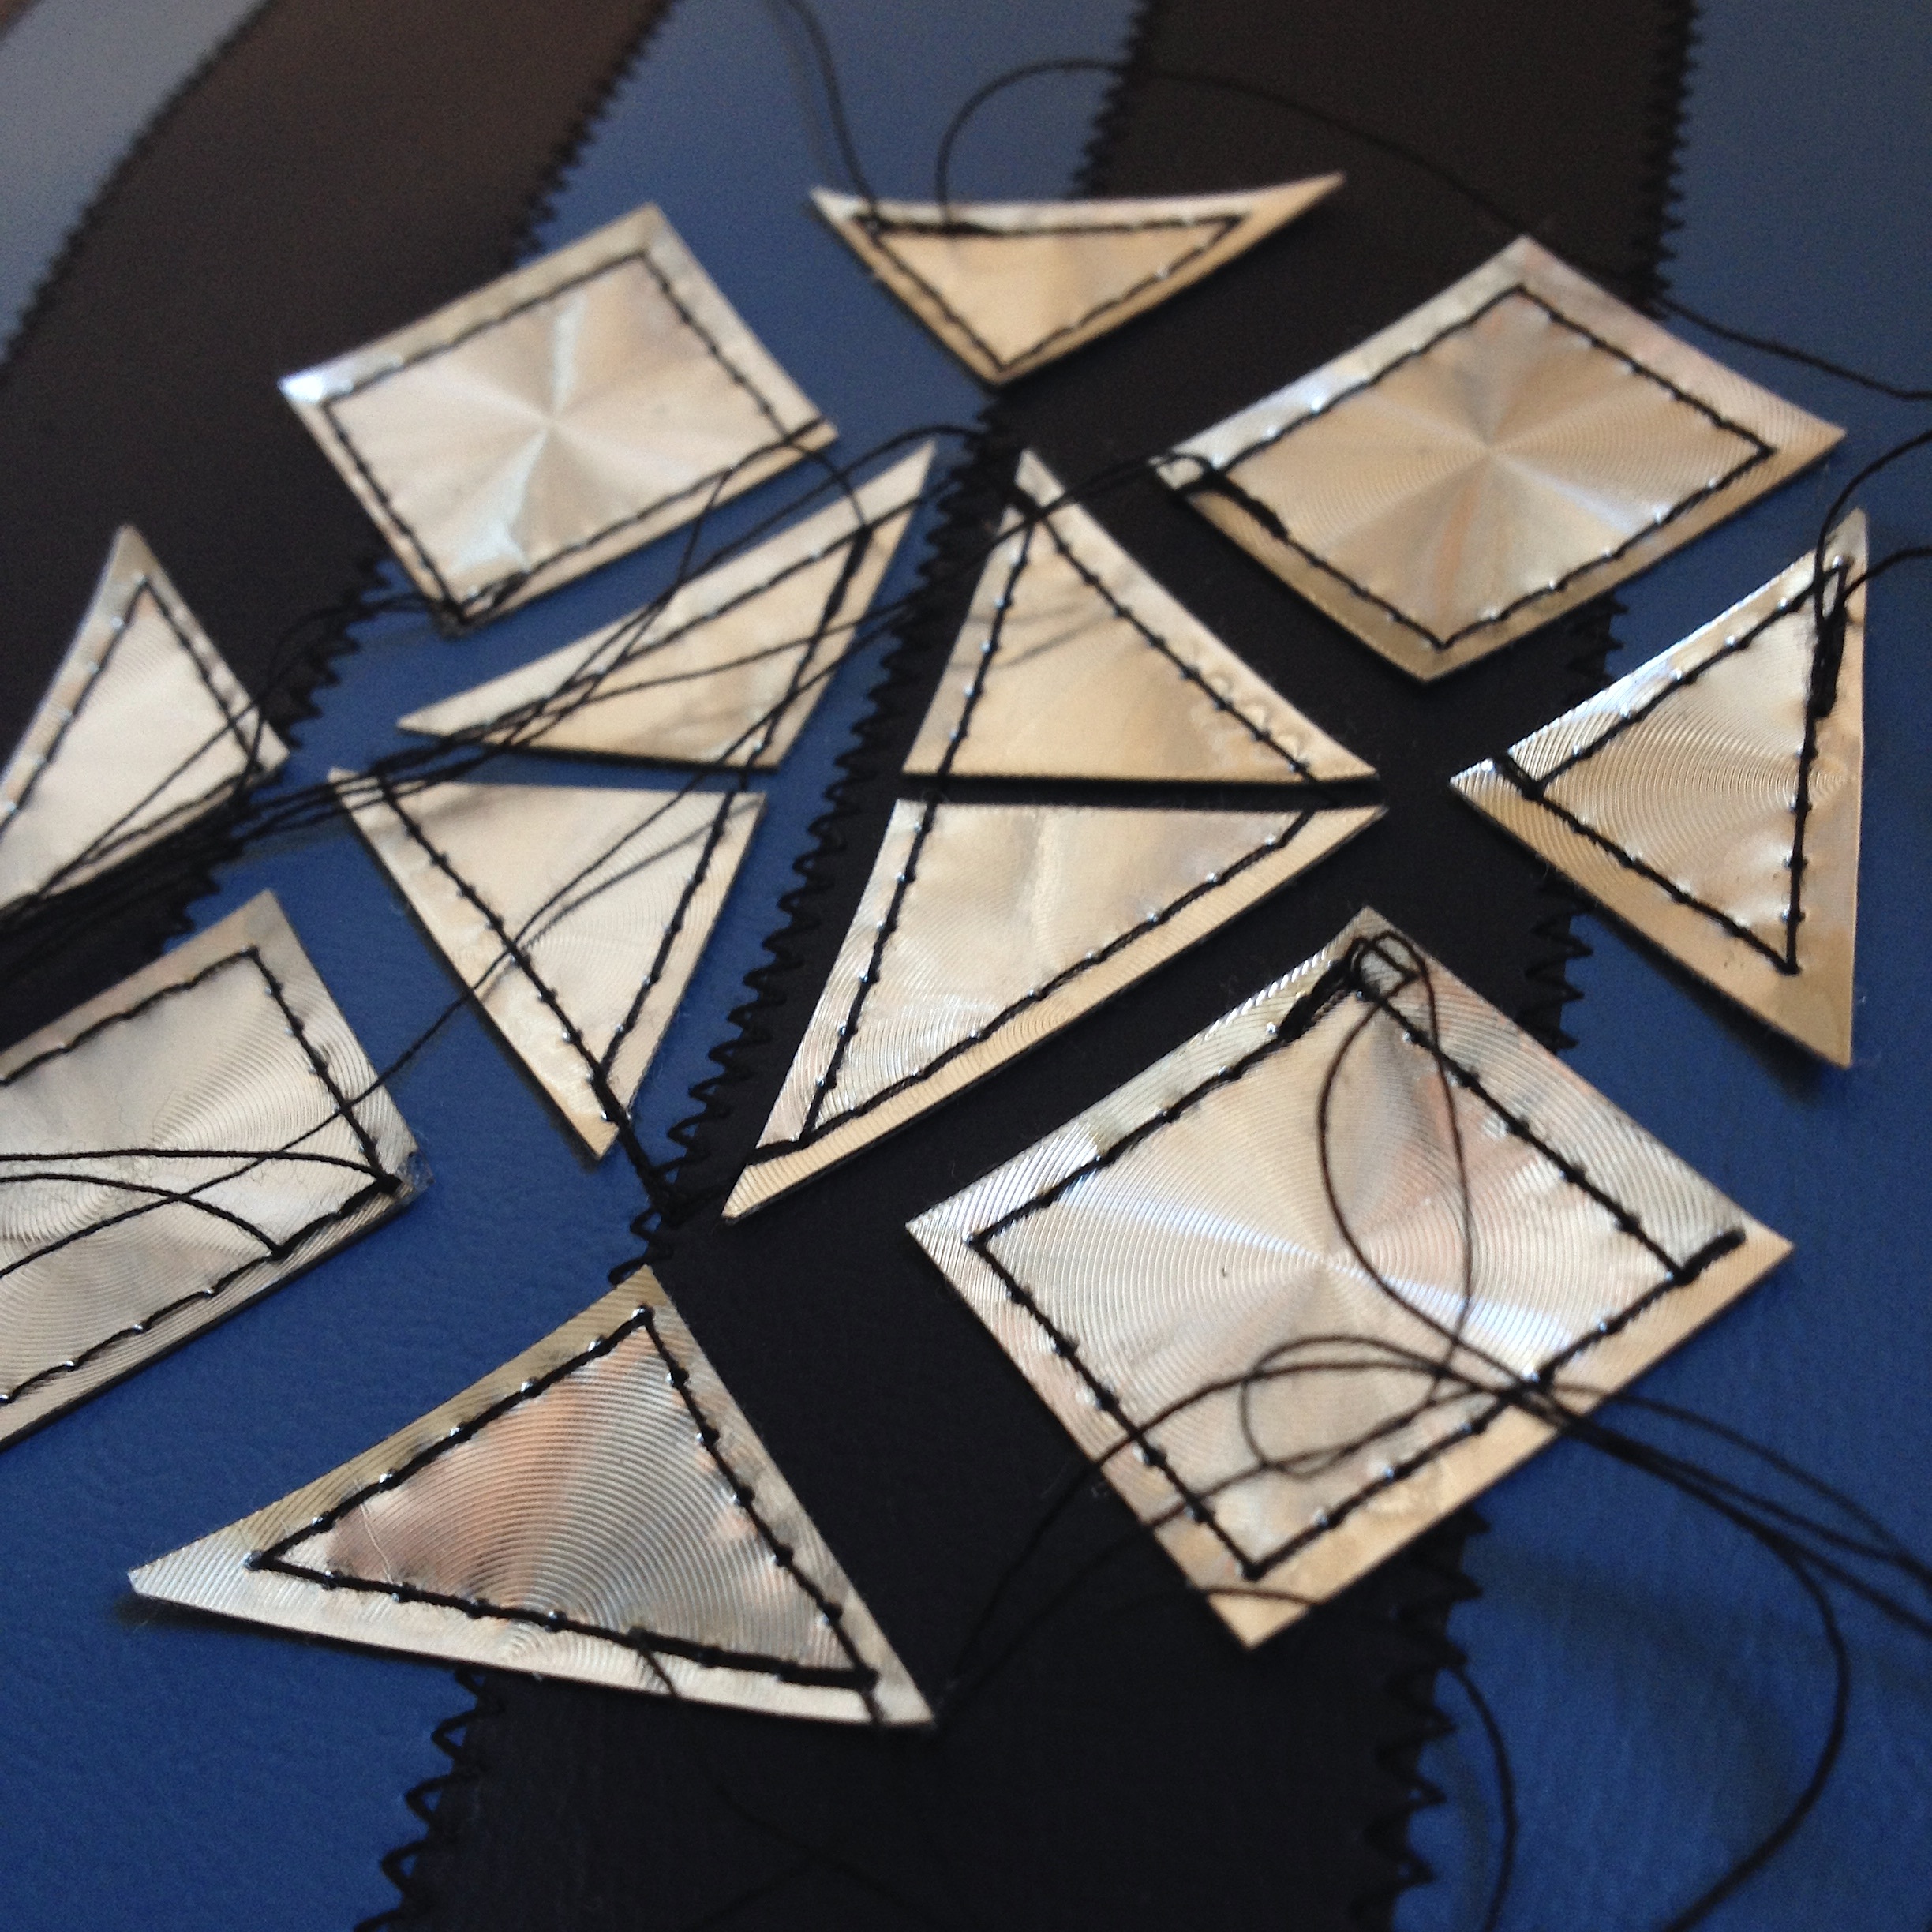
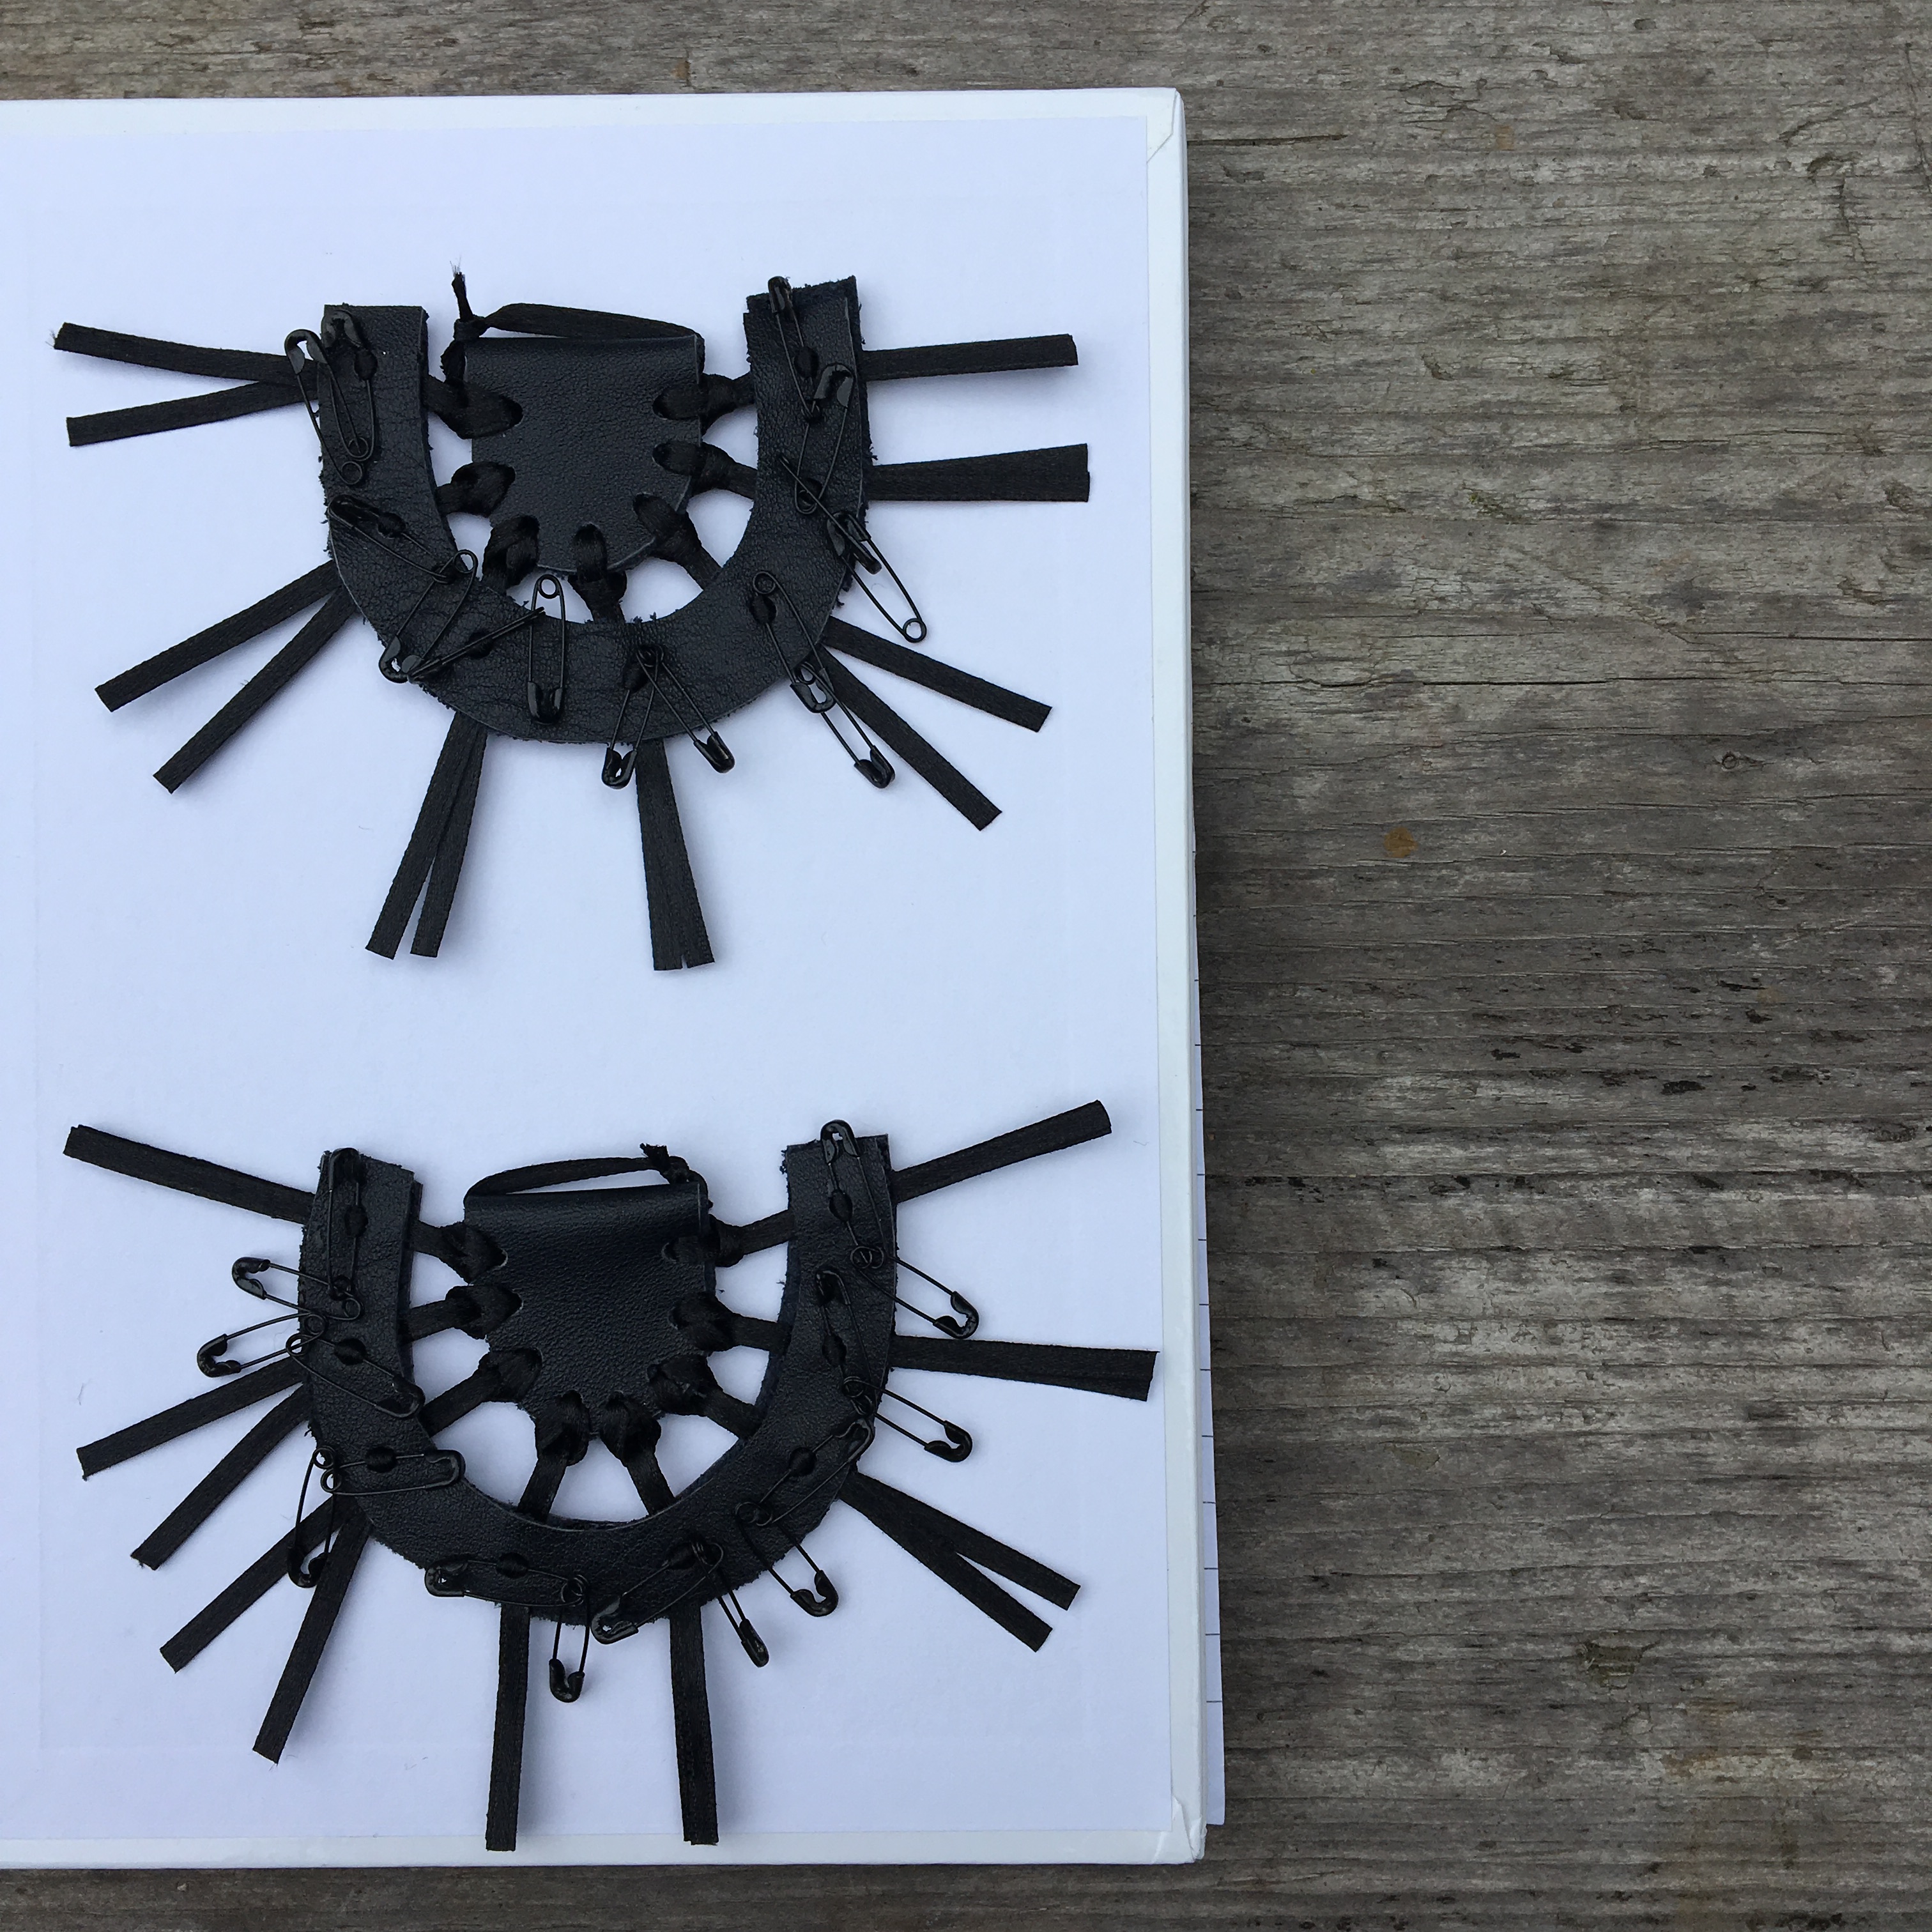
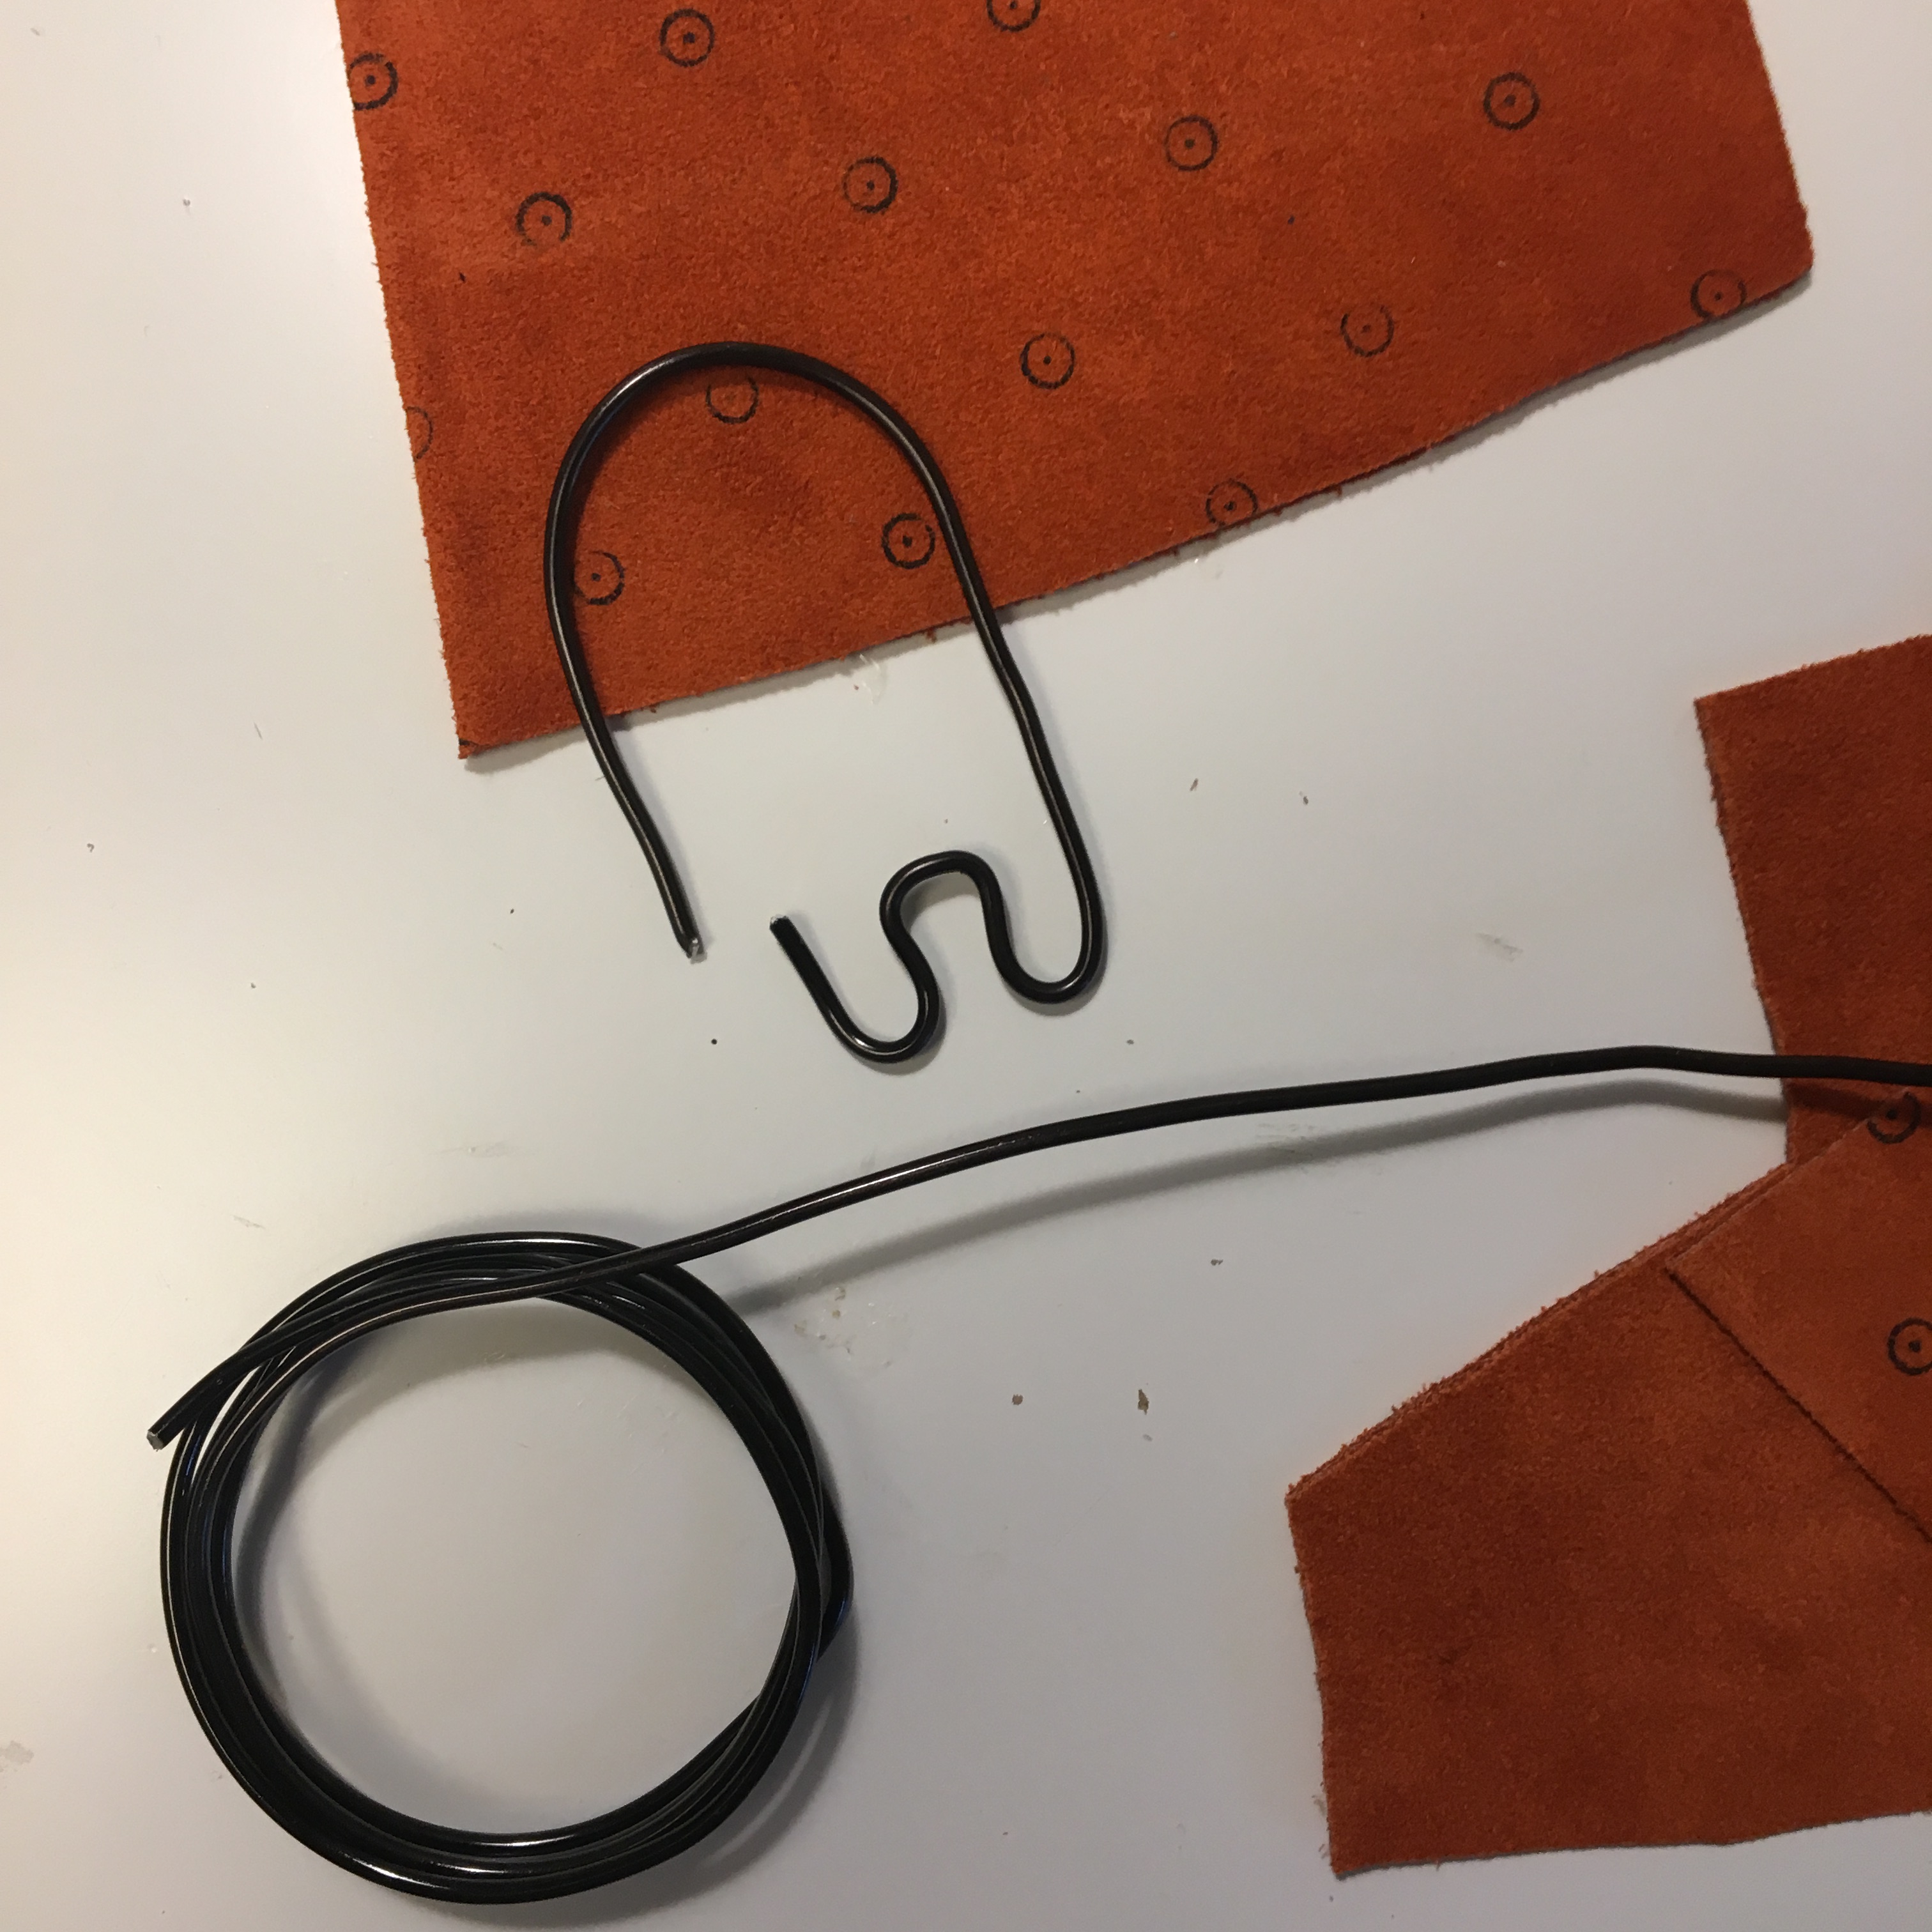
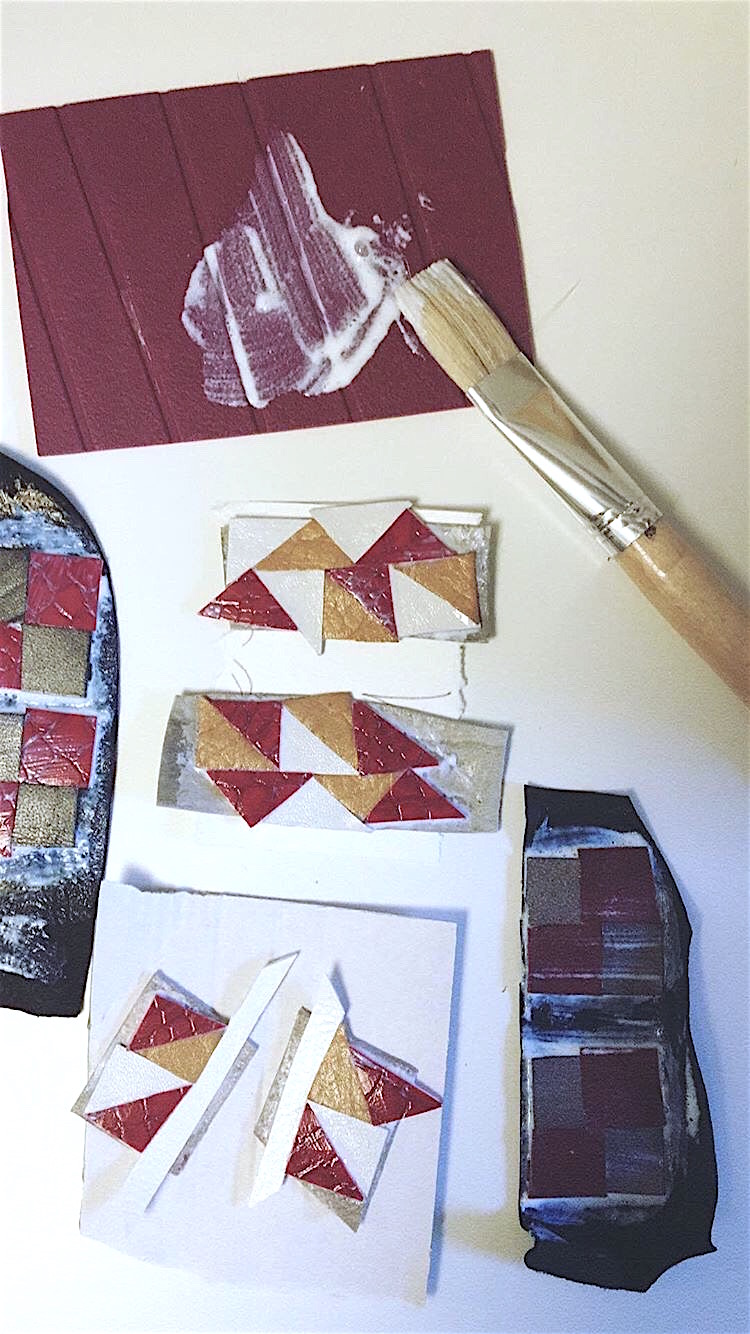
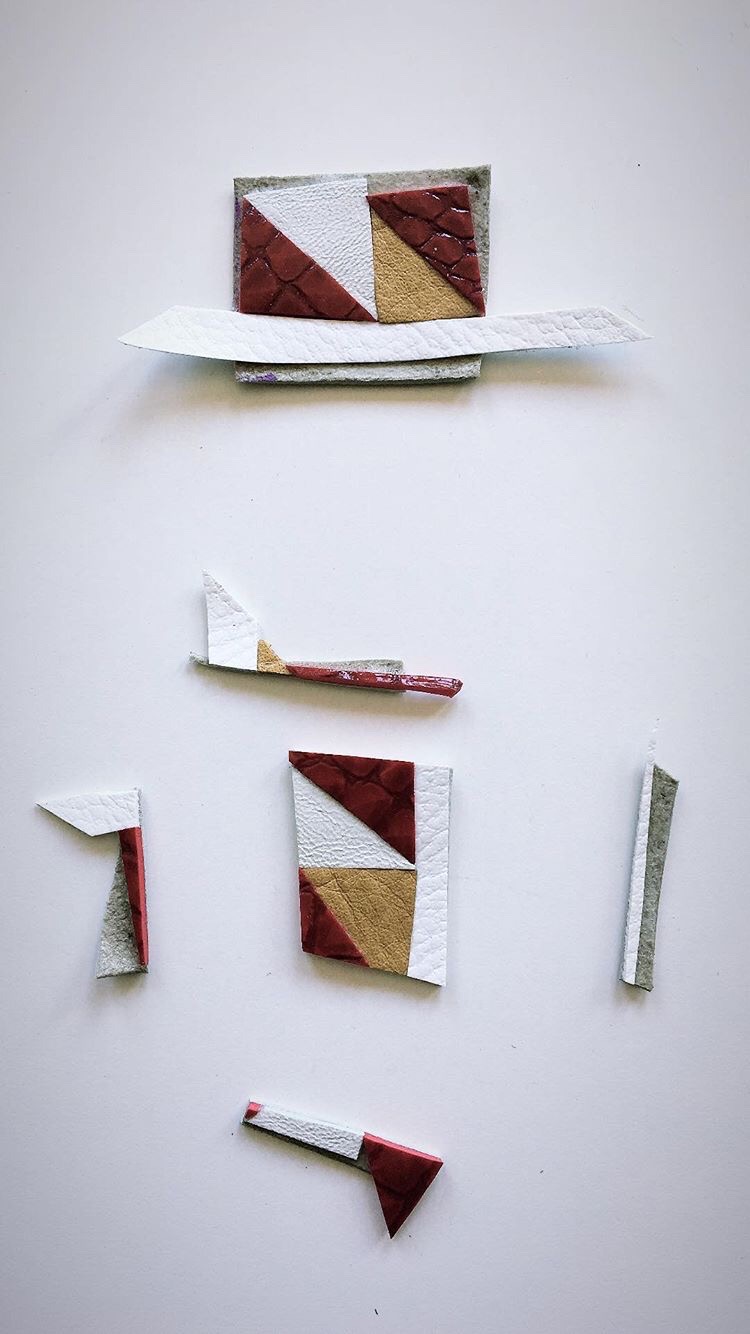
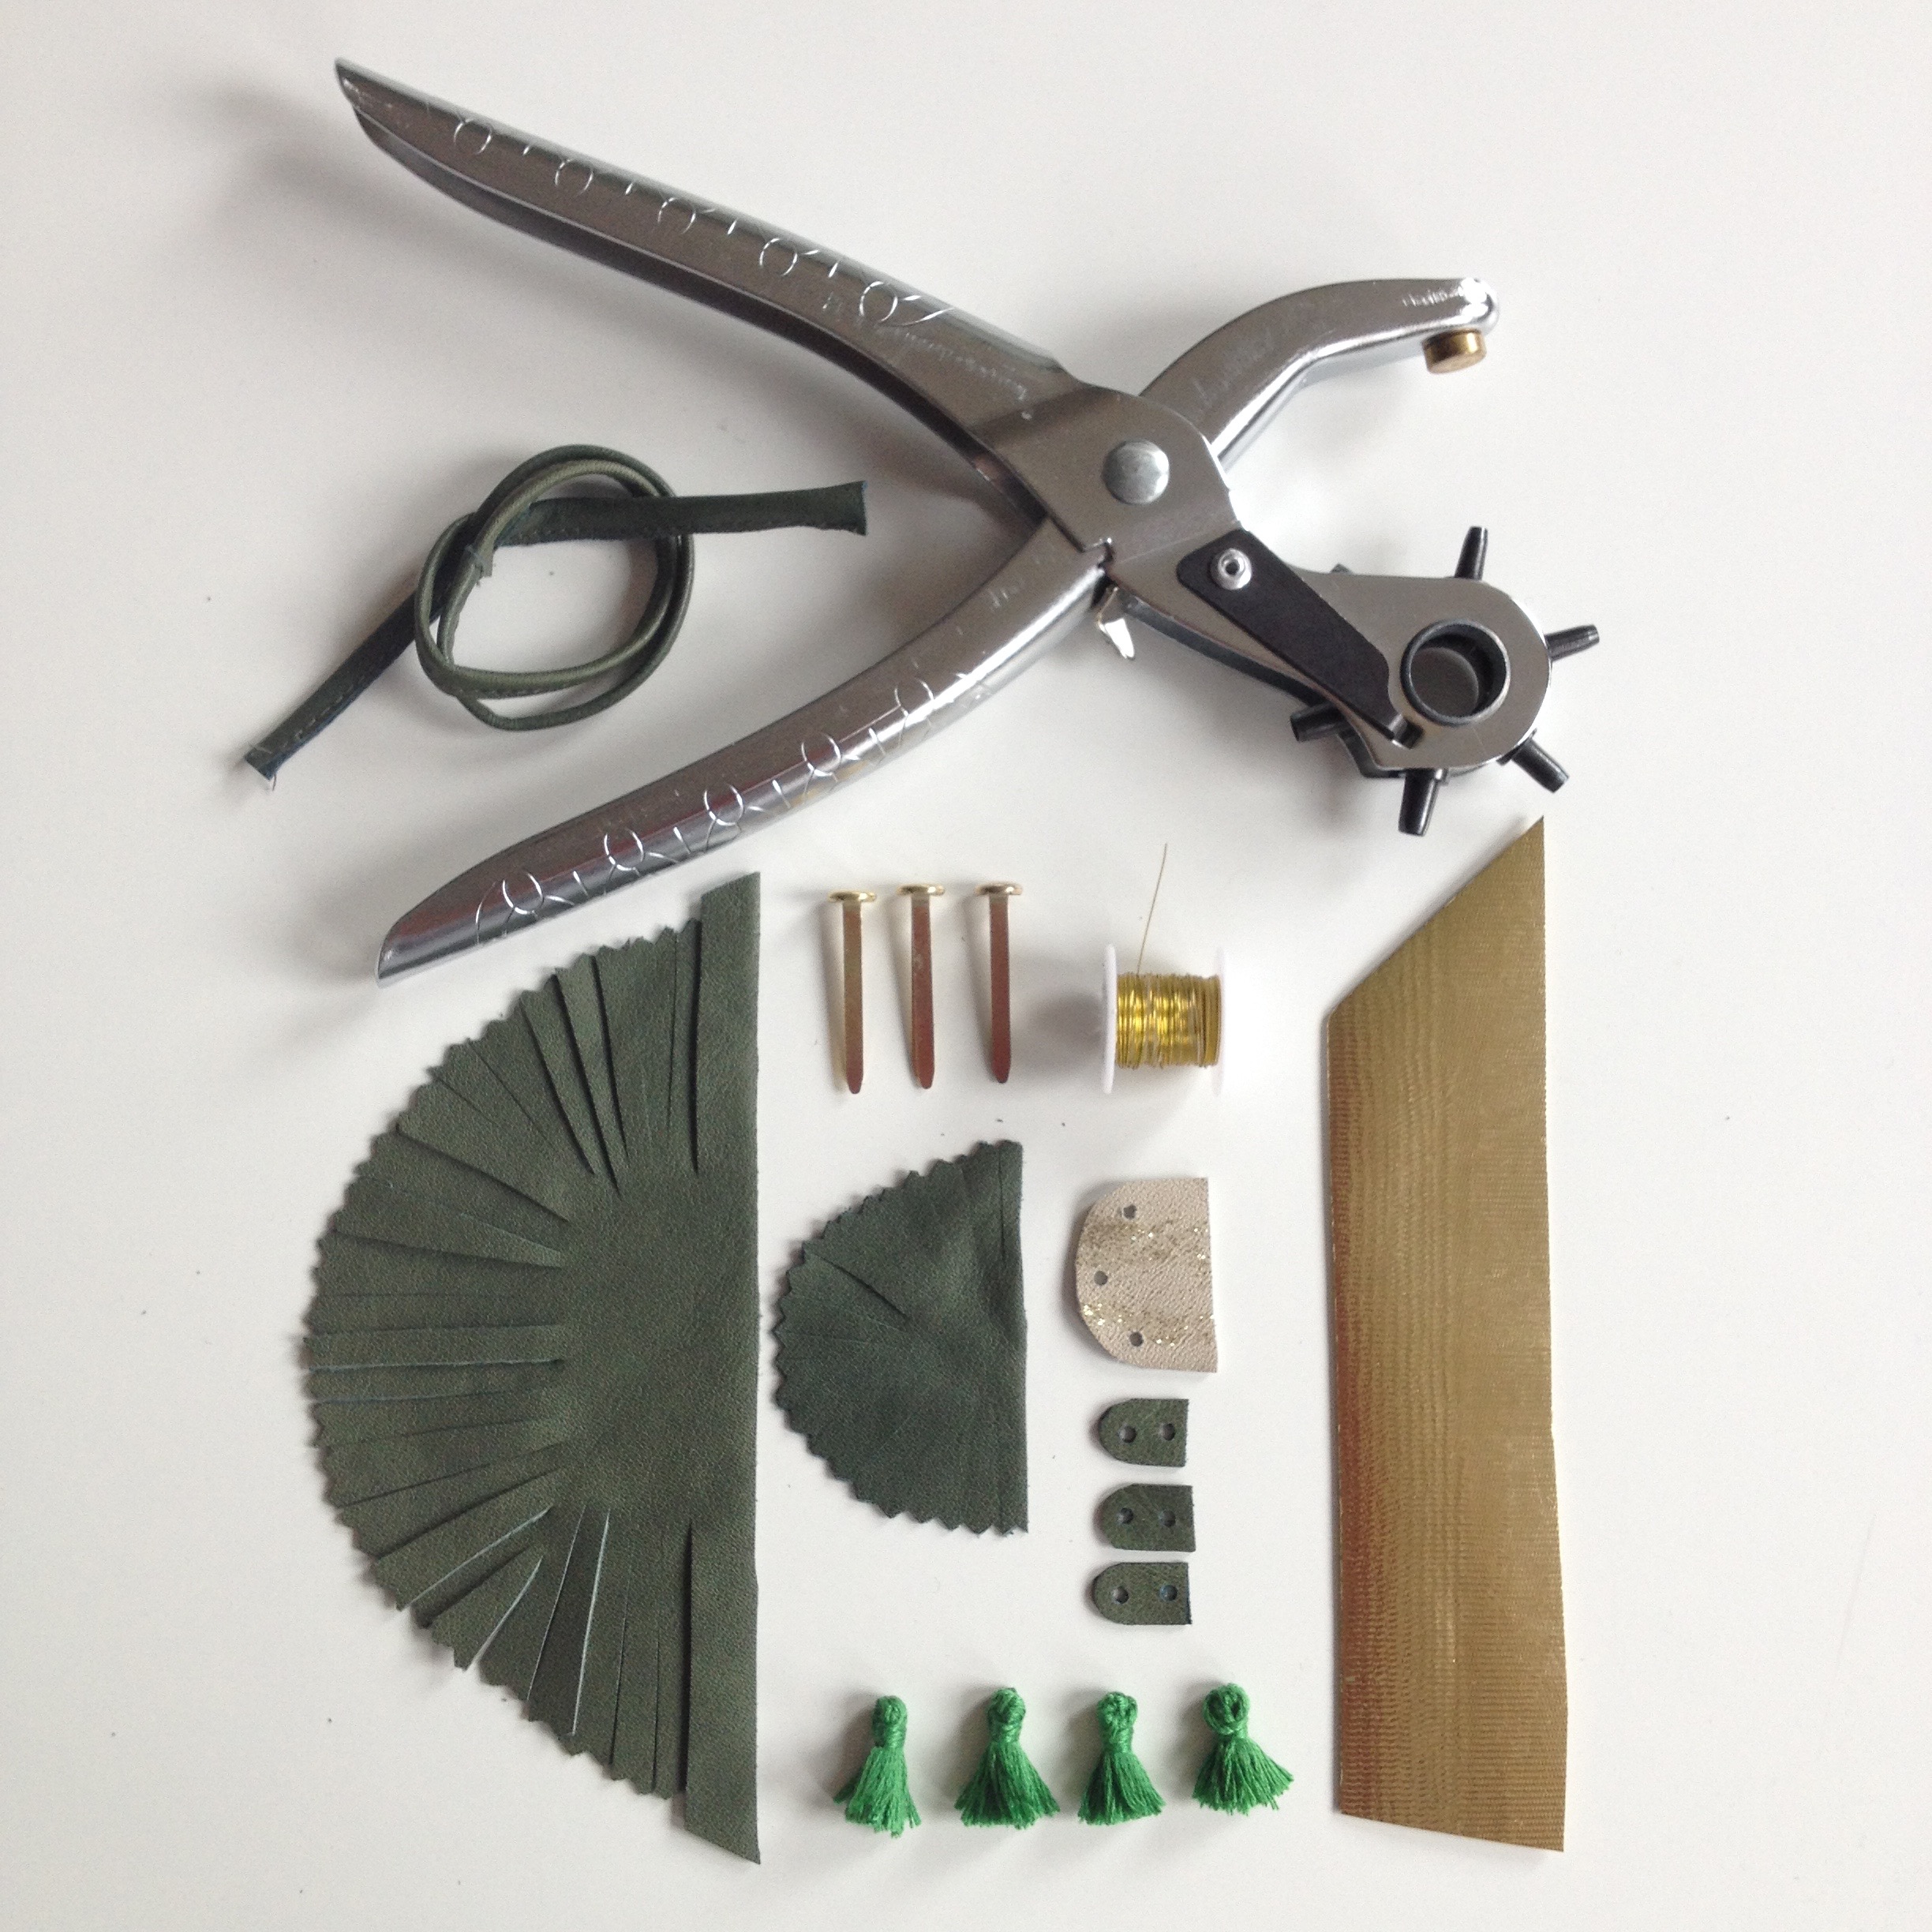
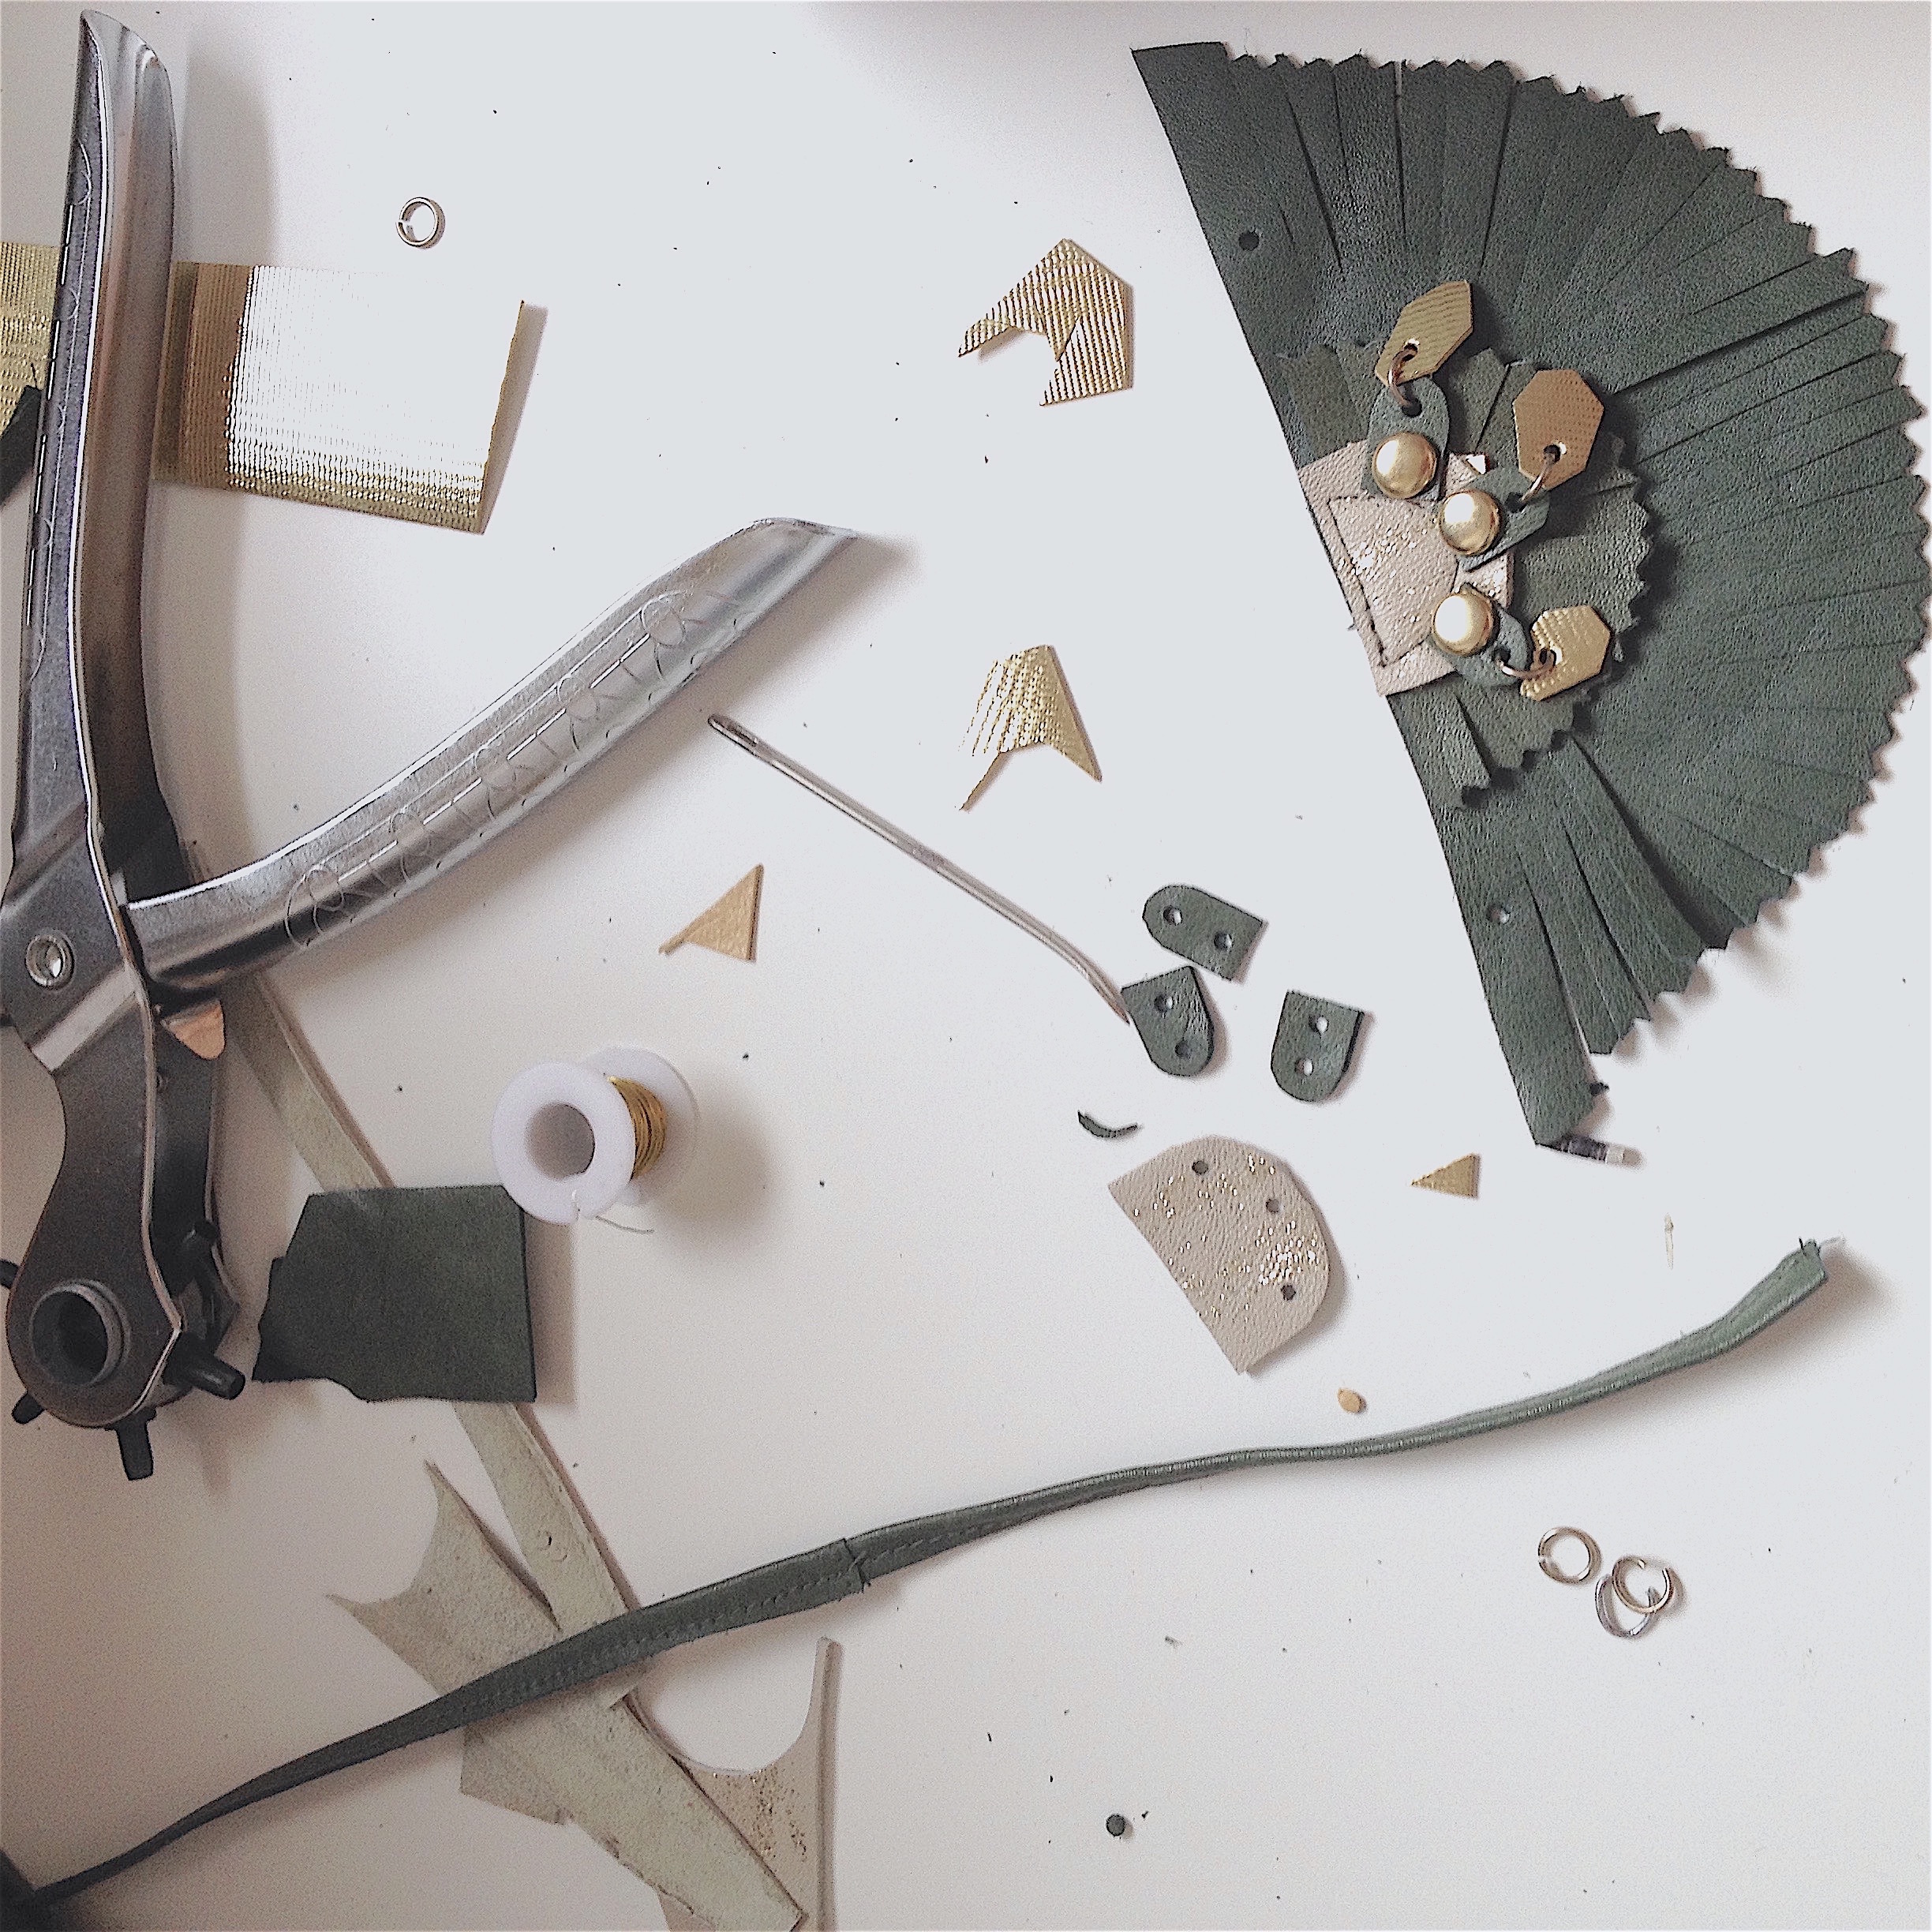
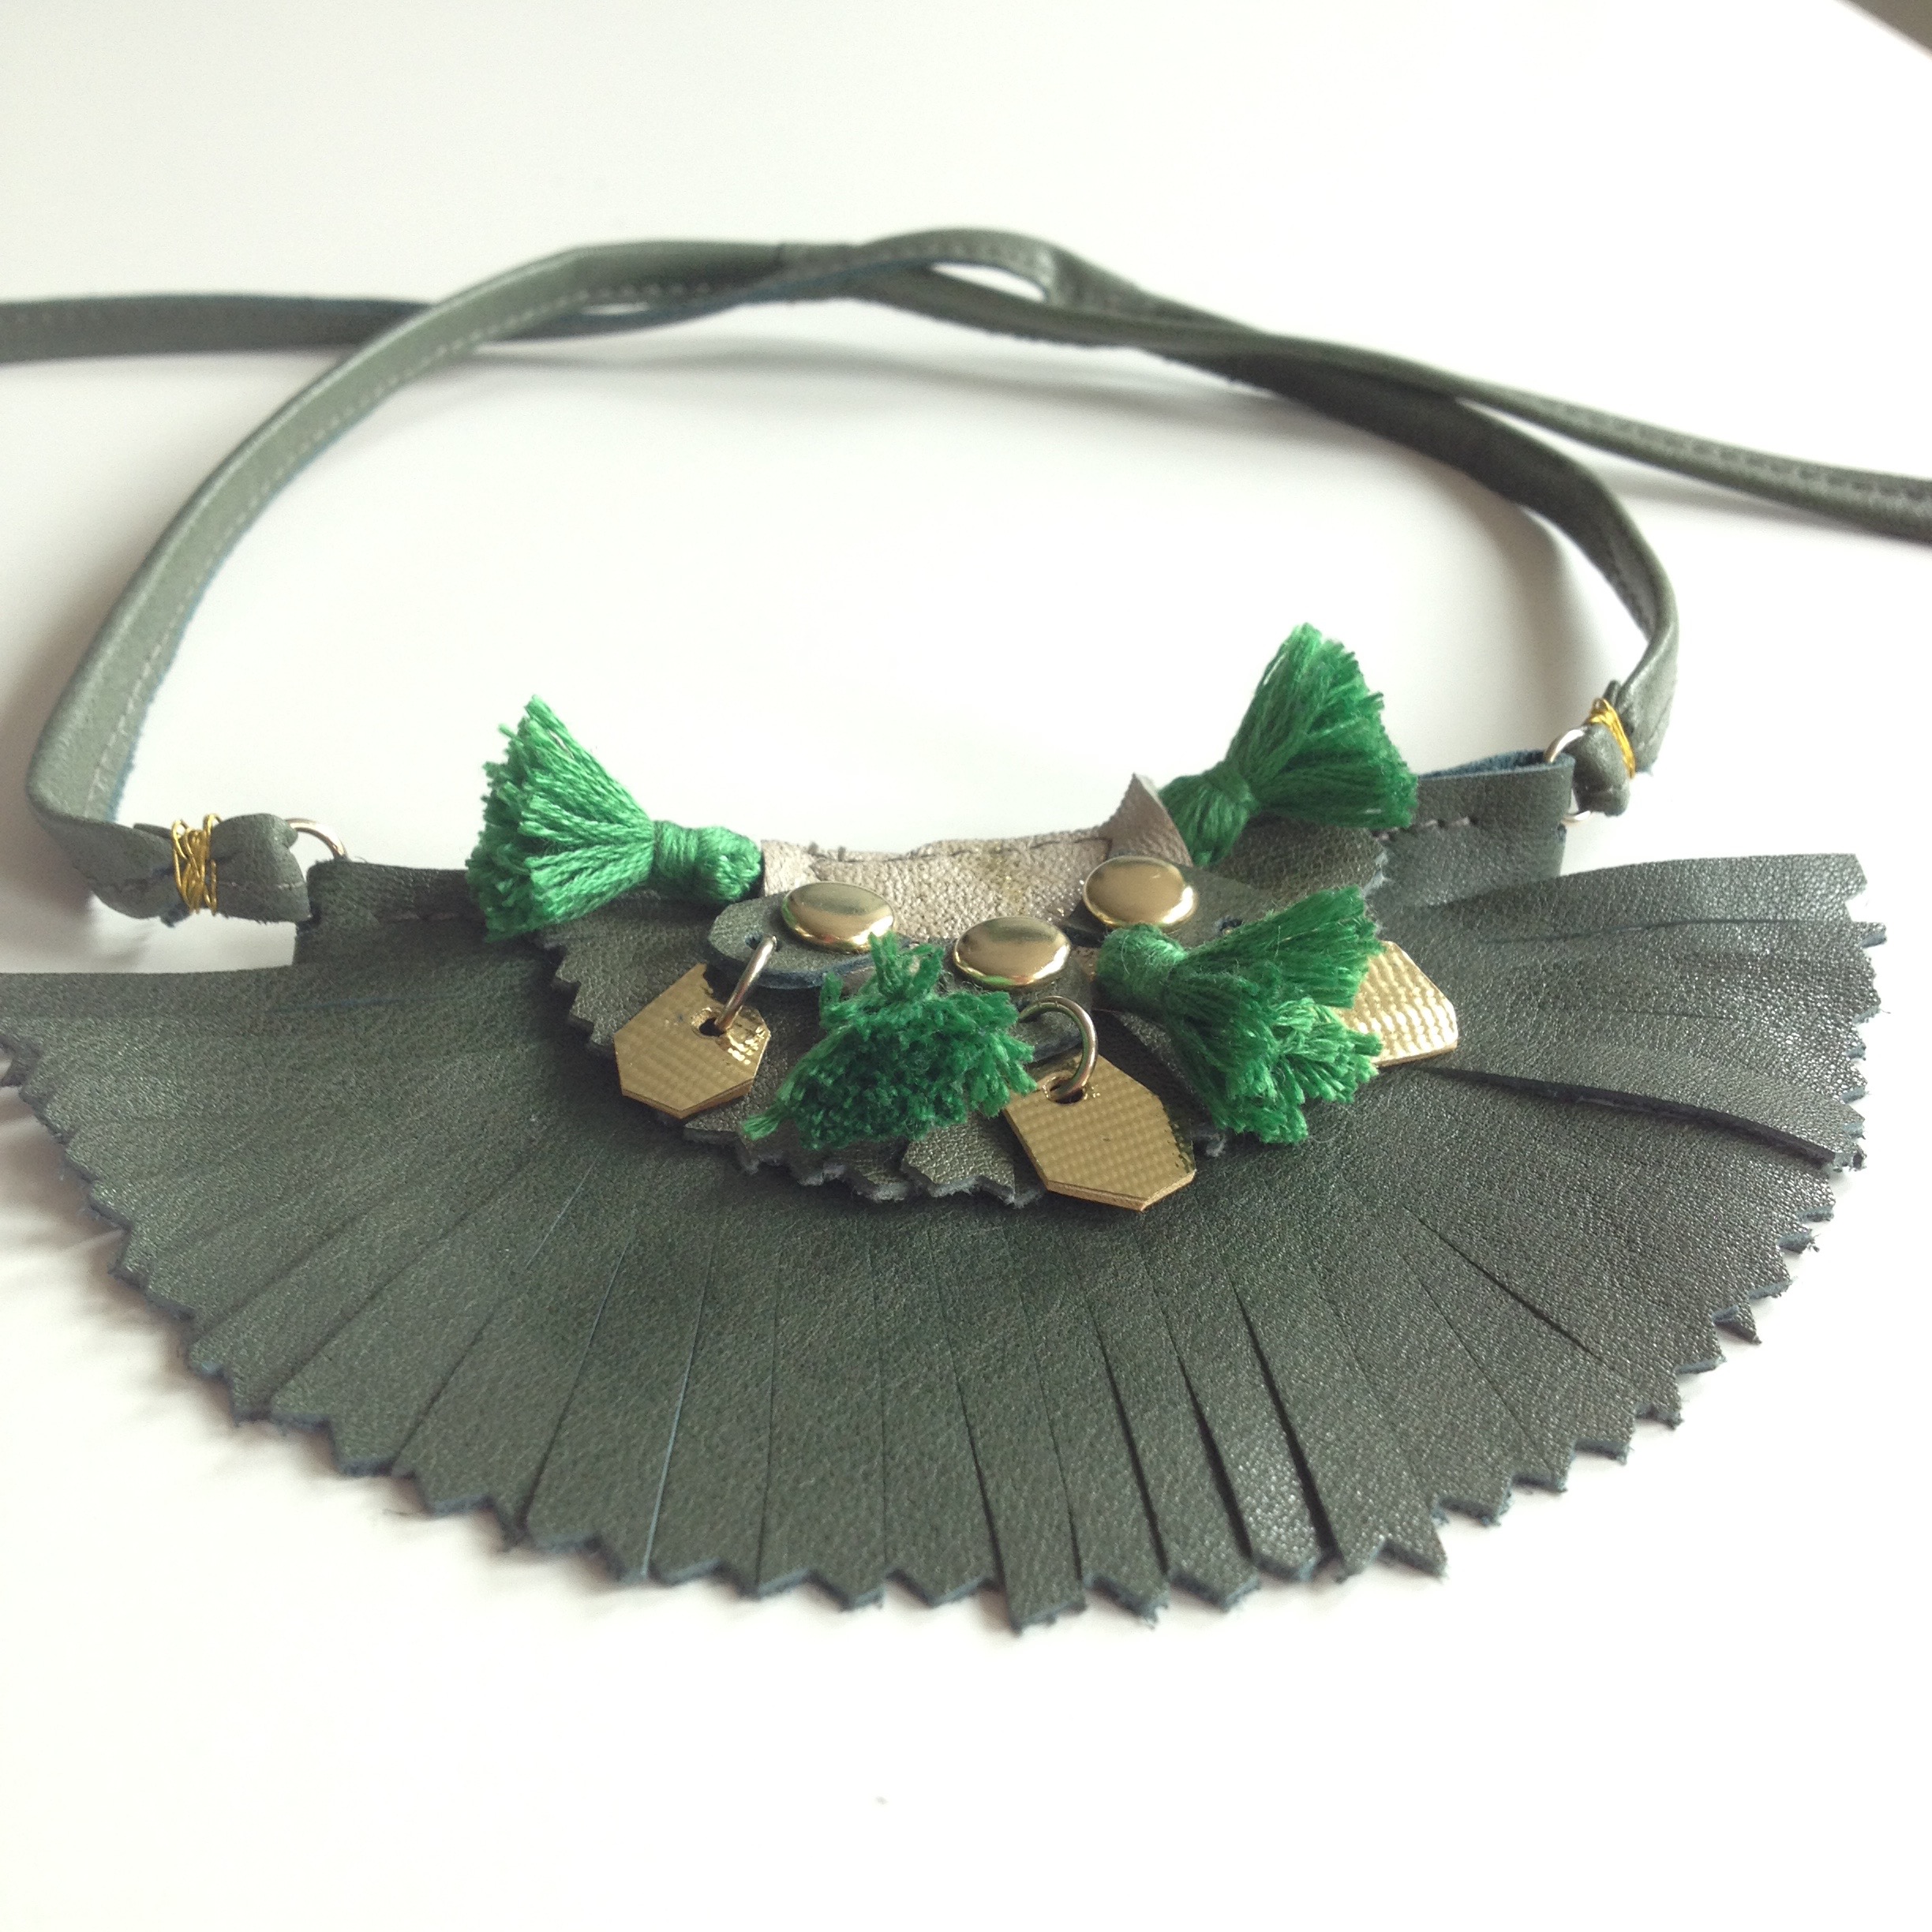
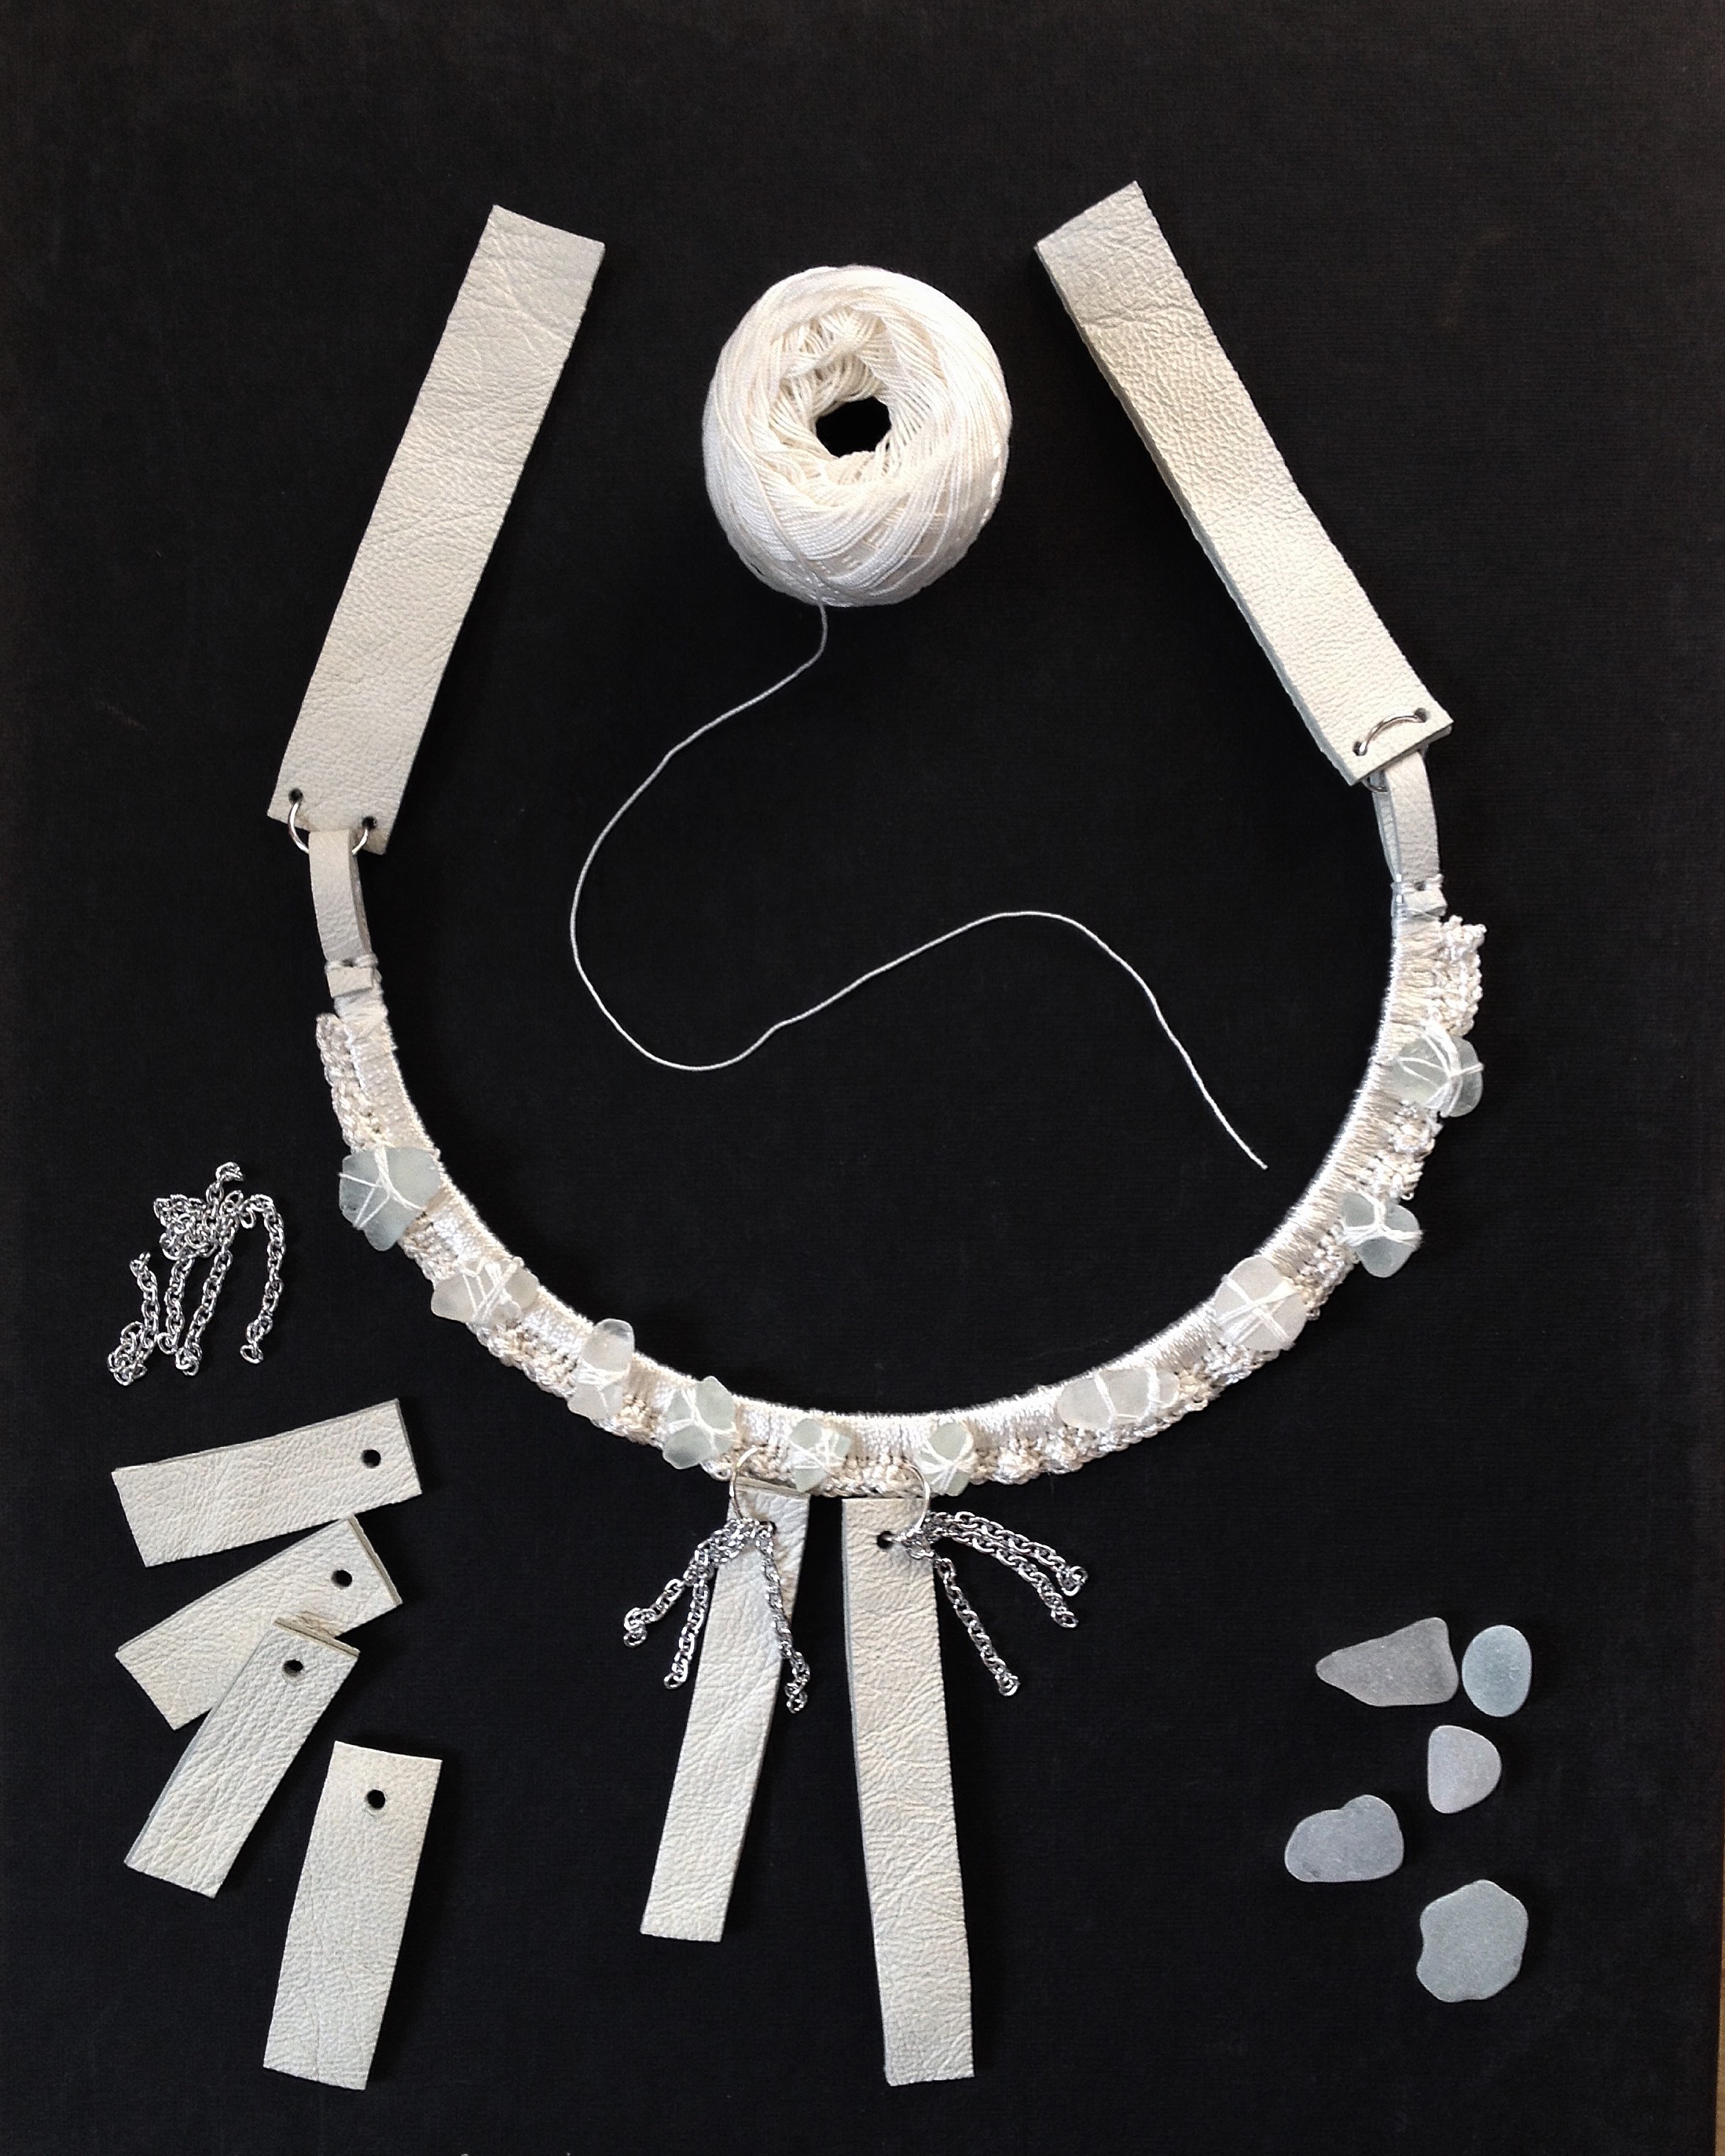
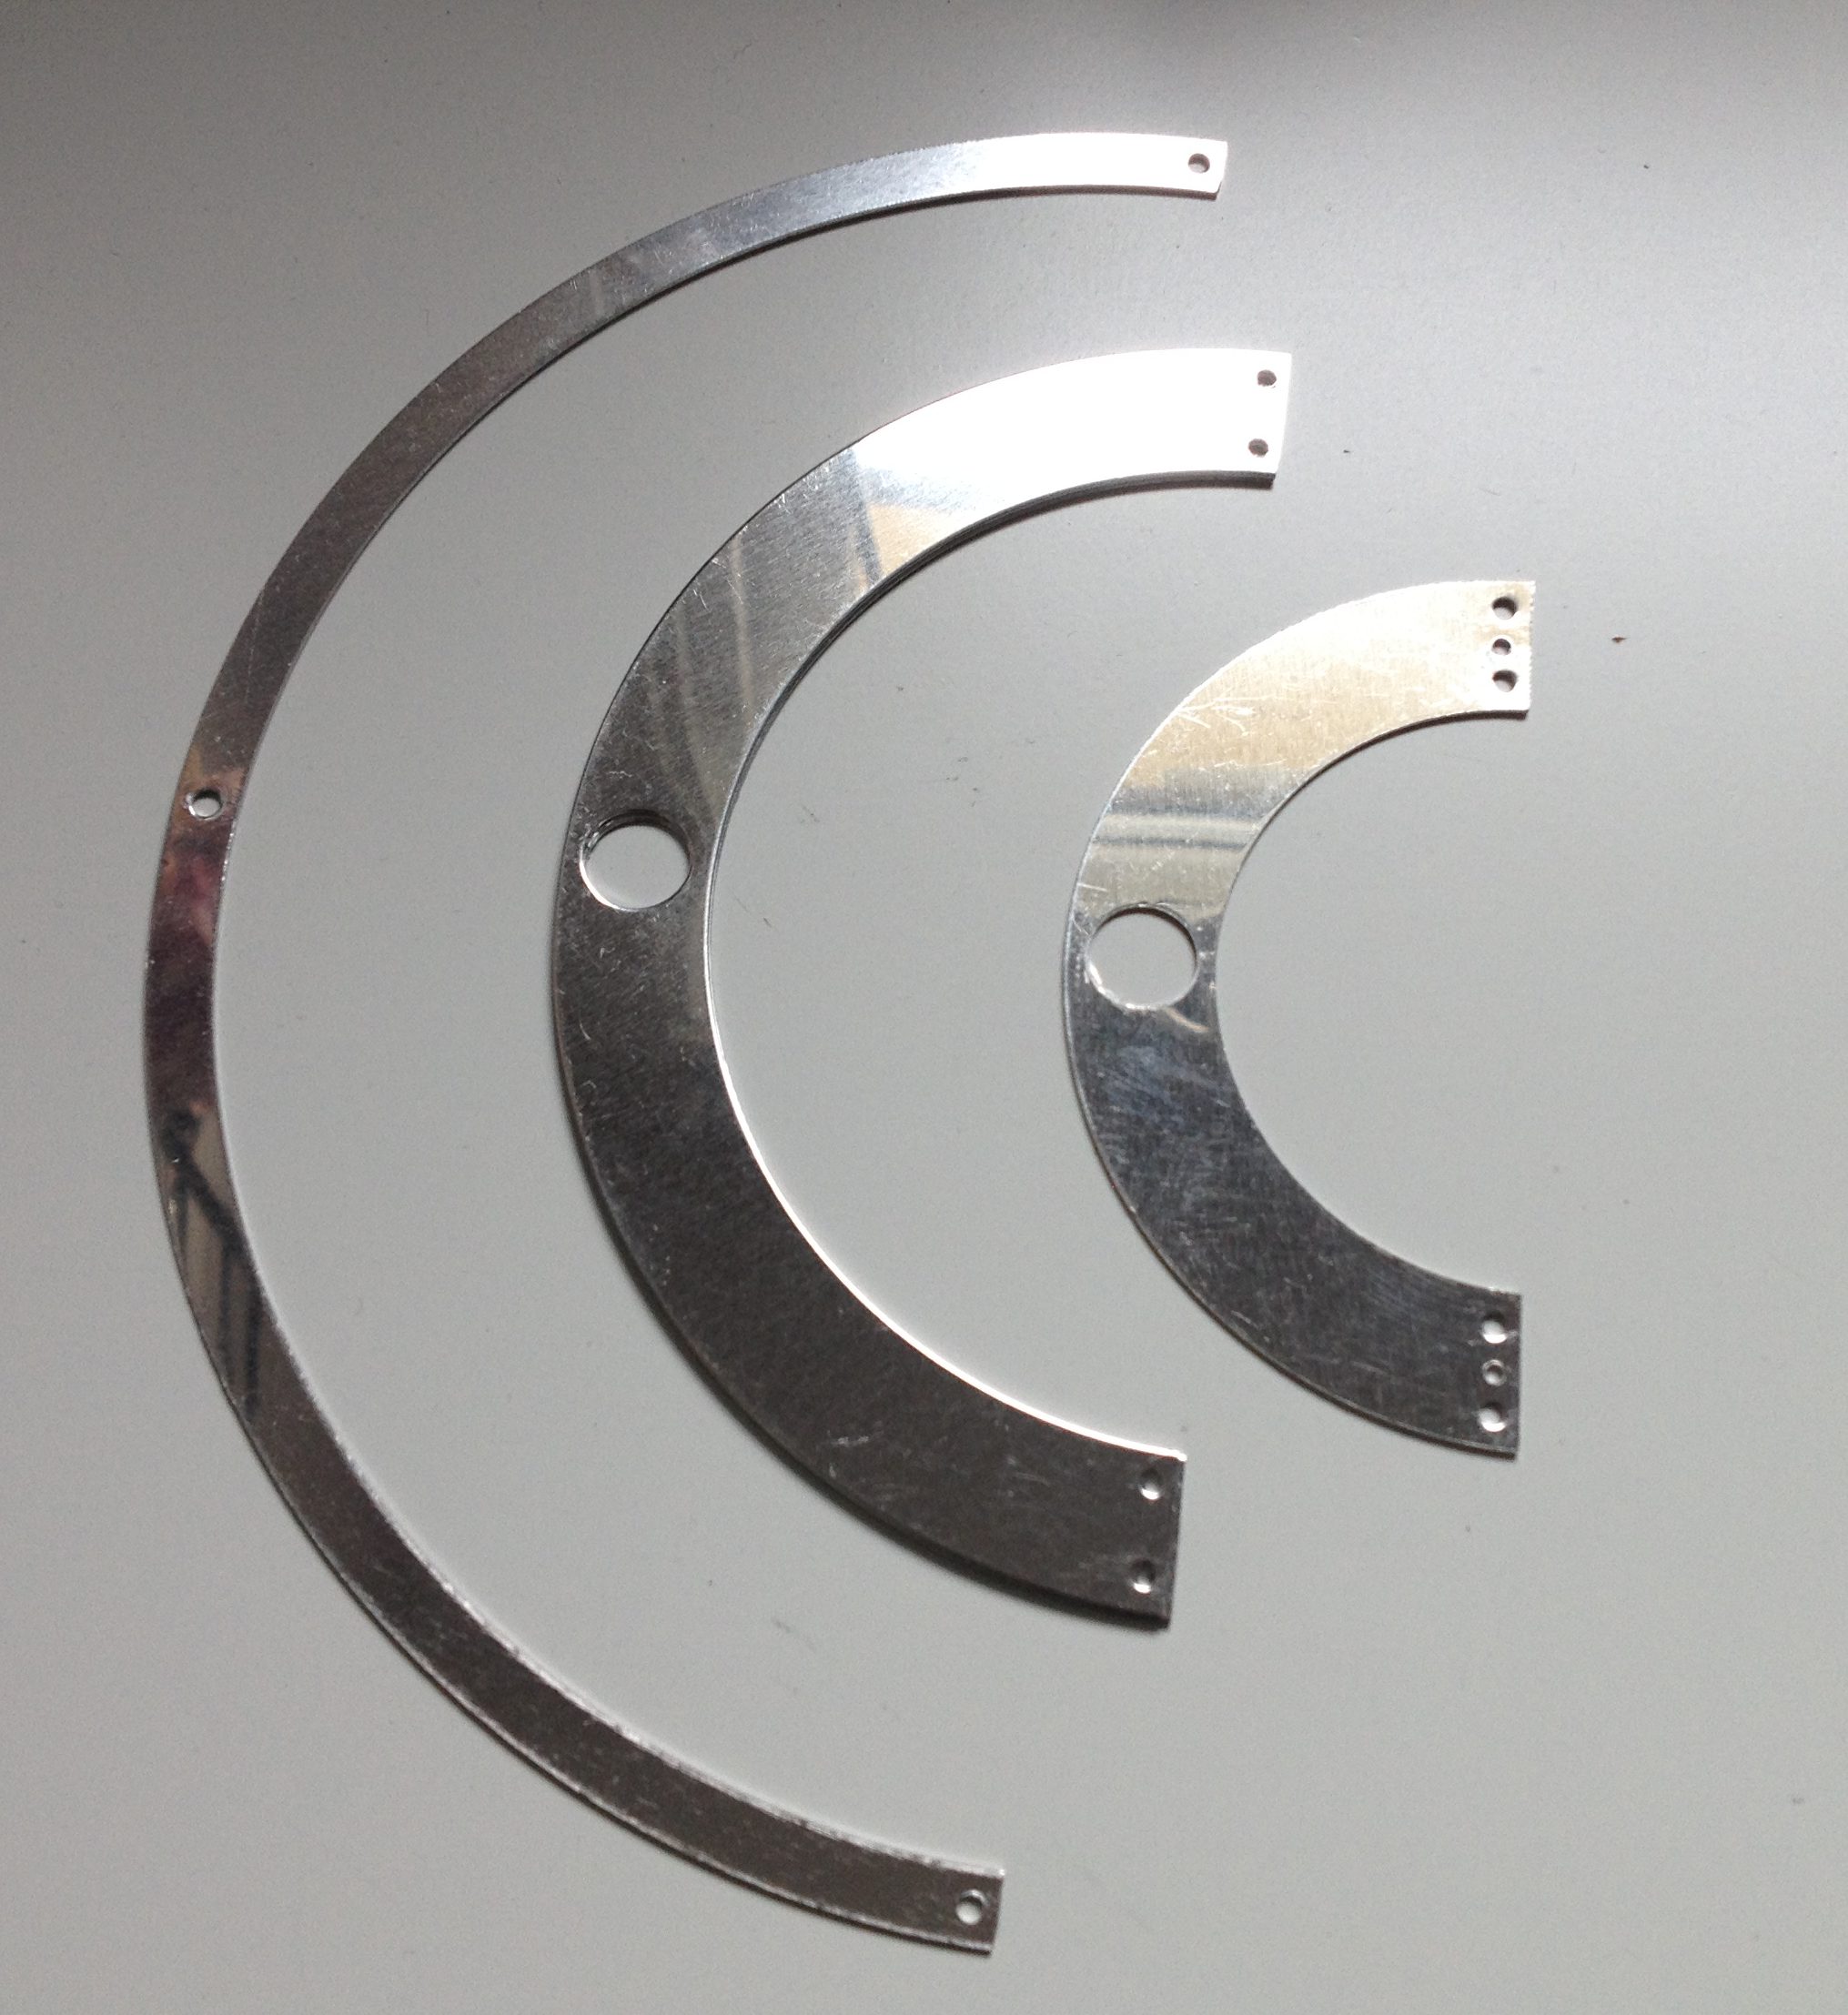
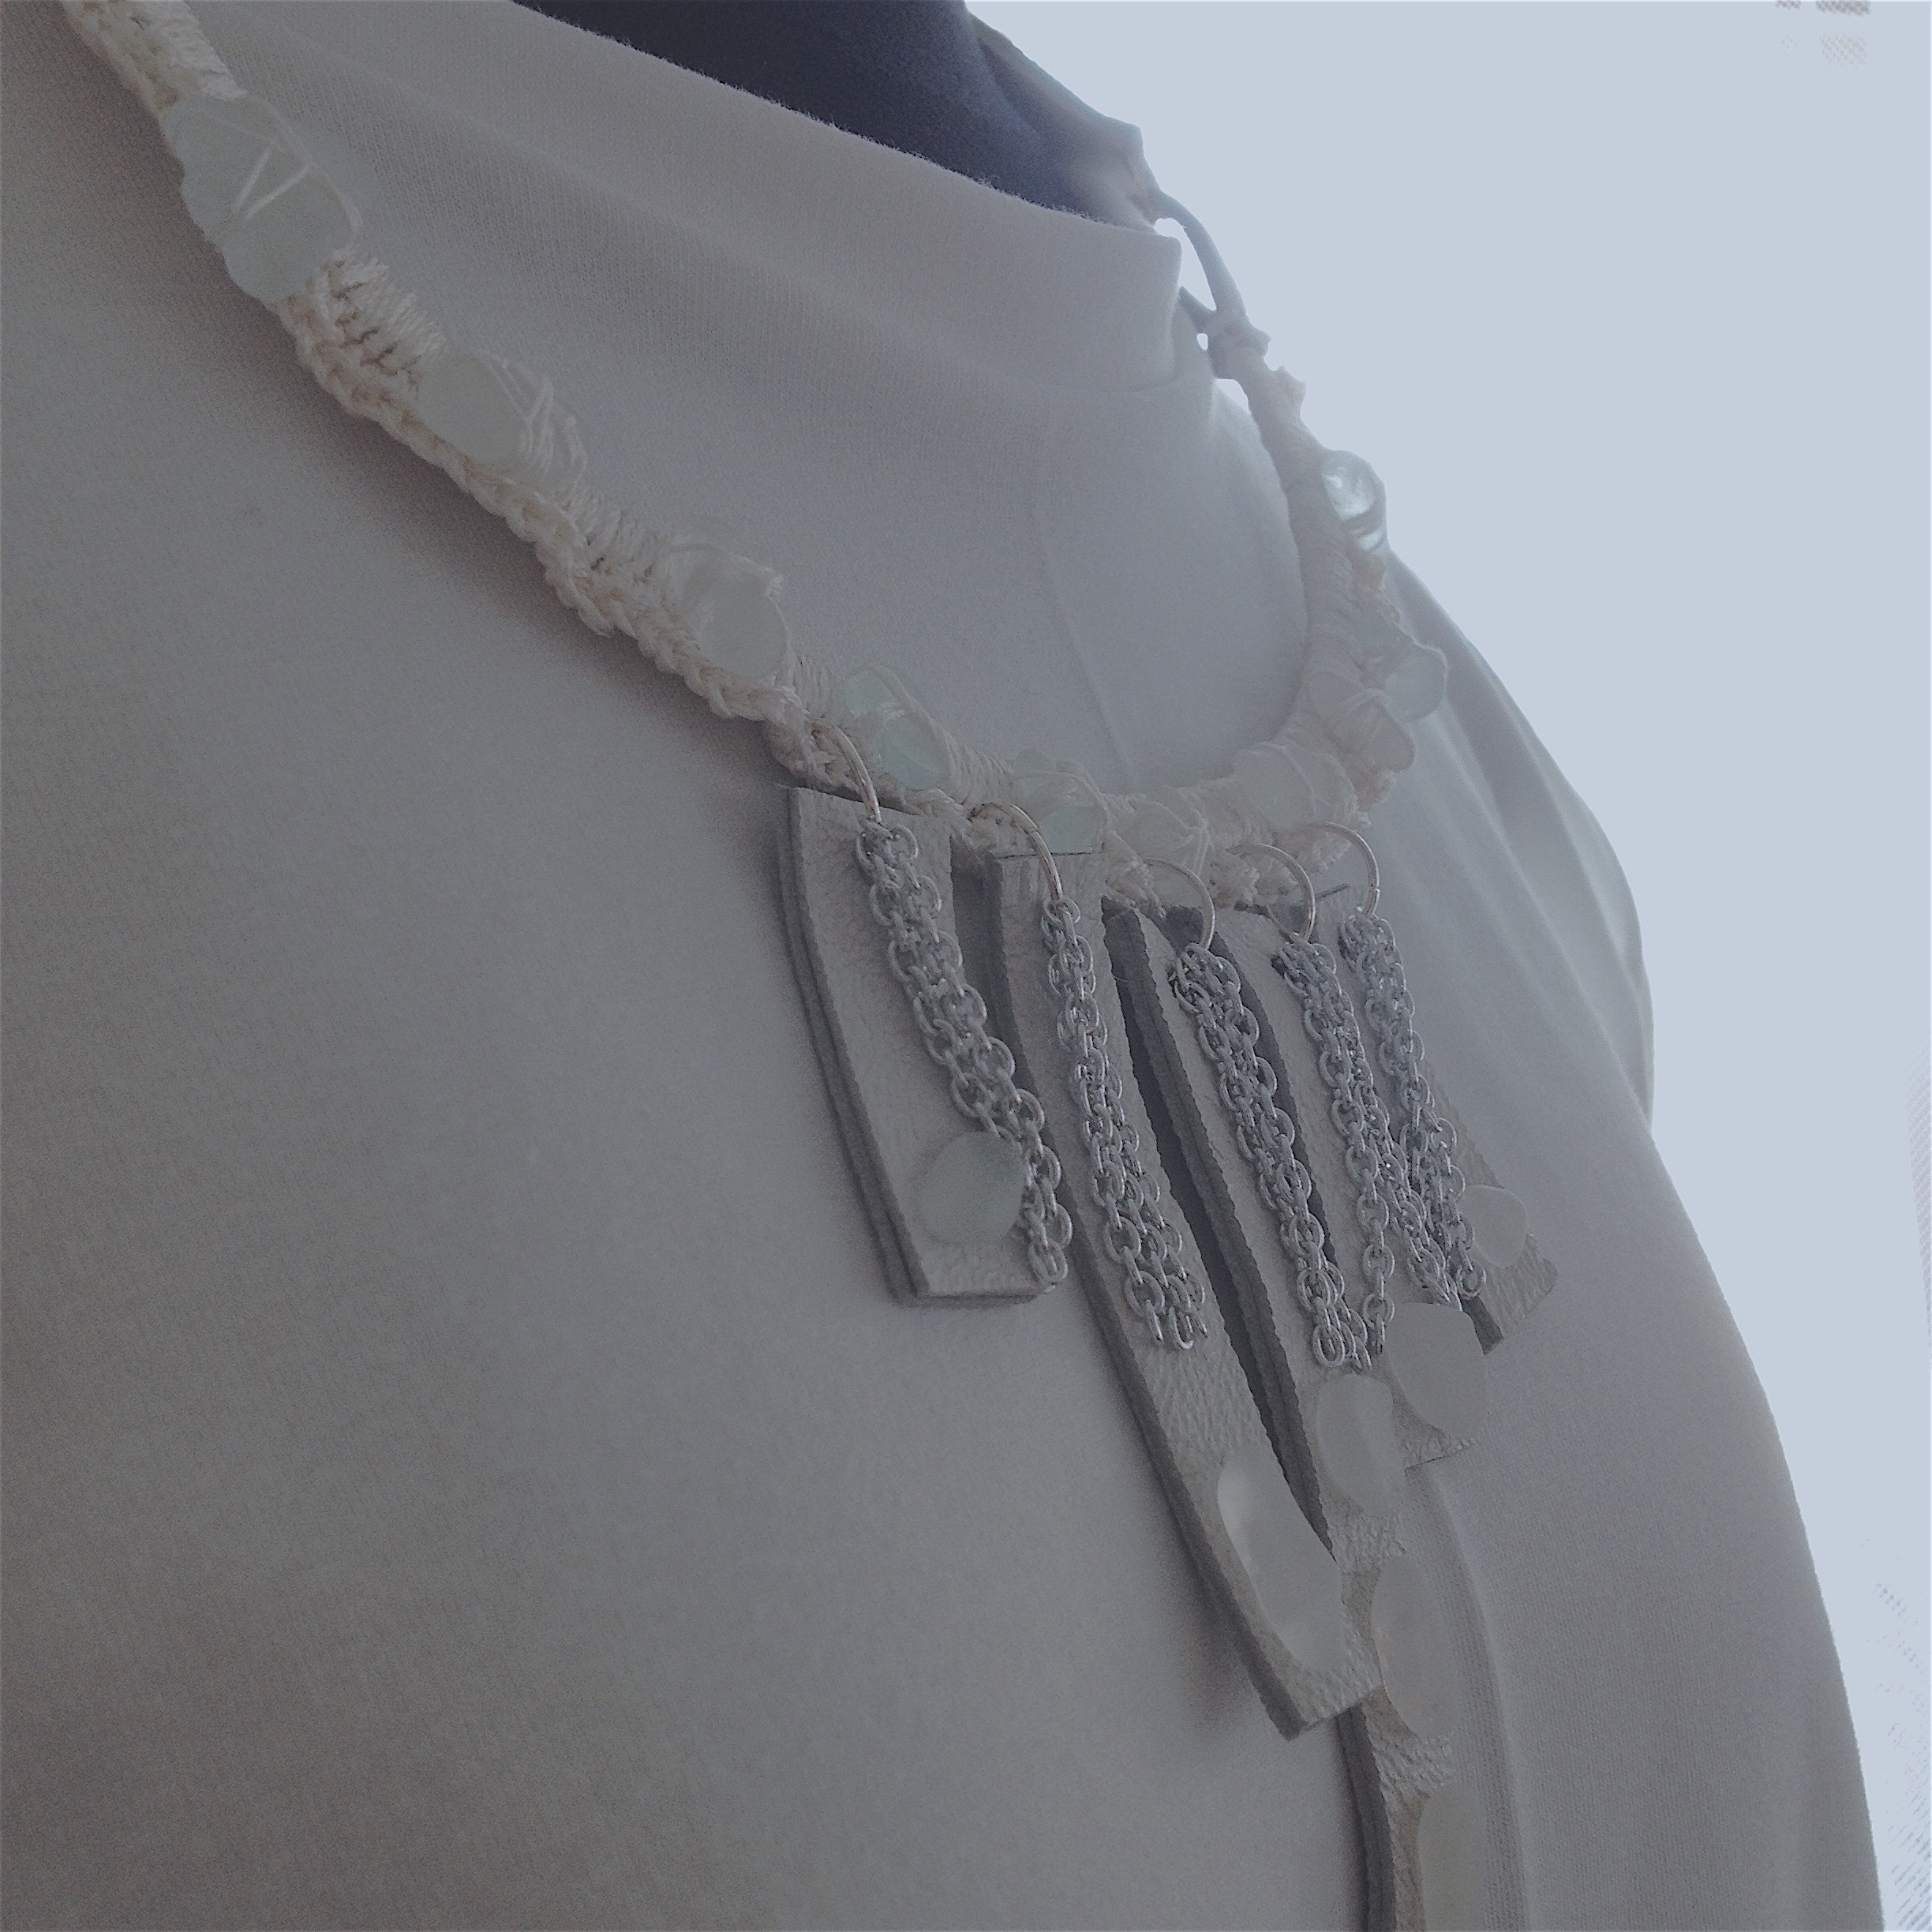
Neck piece is made out of old white 80s leather pants and one vintage H&M jersey trousers. I searched this neckpiece shape and form by first trying it out from paper on mannequin. When I finished the pattern I cut it out from leather and sew together with the shoulder “pads”. Reflecting small pieces on the neckpiece are sticky cover plastic sold in hobby stores.

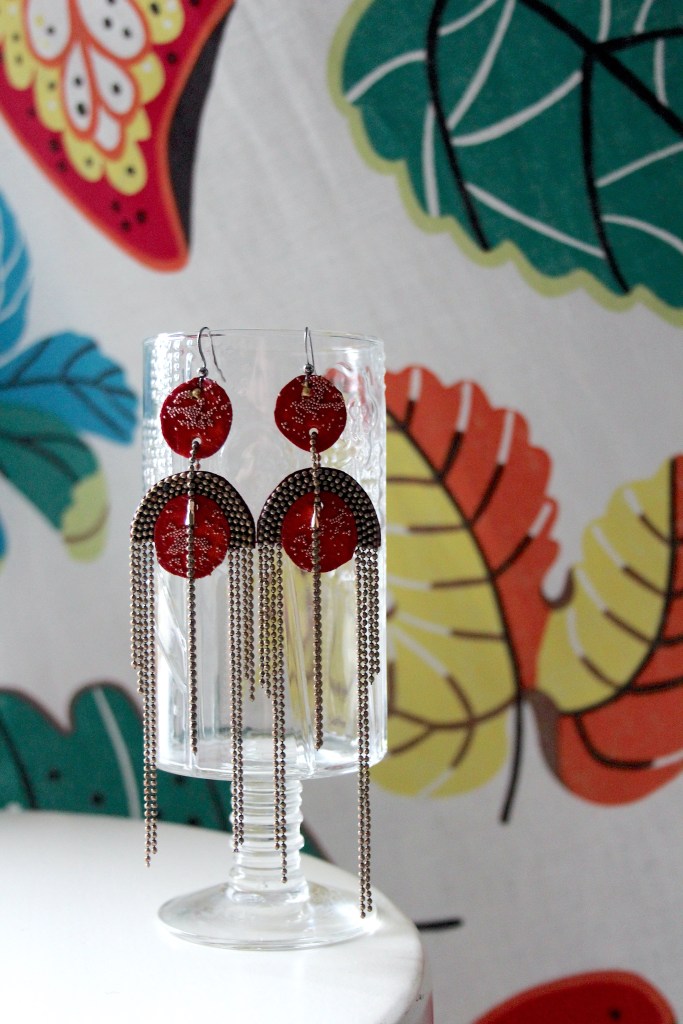
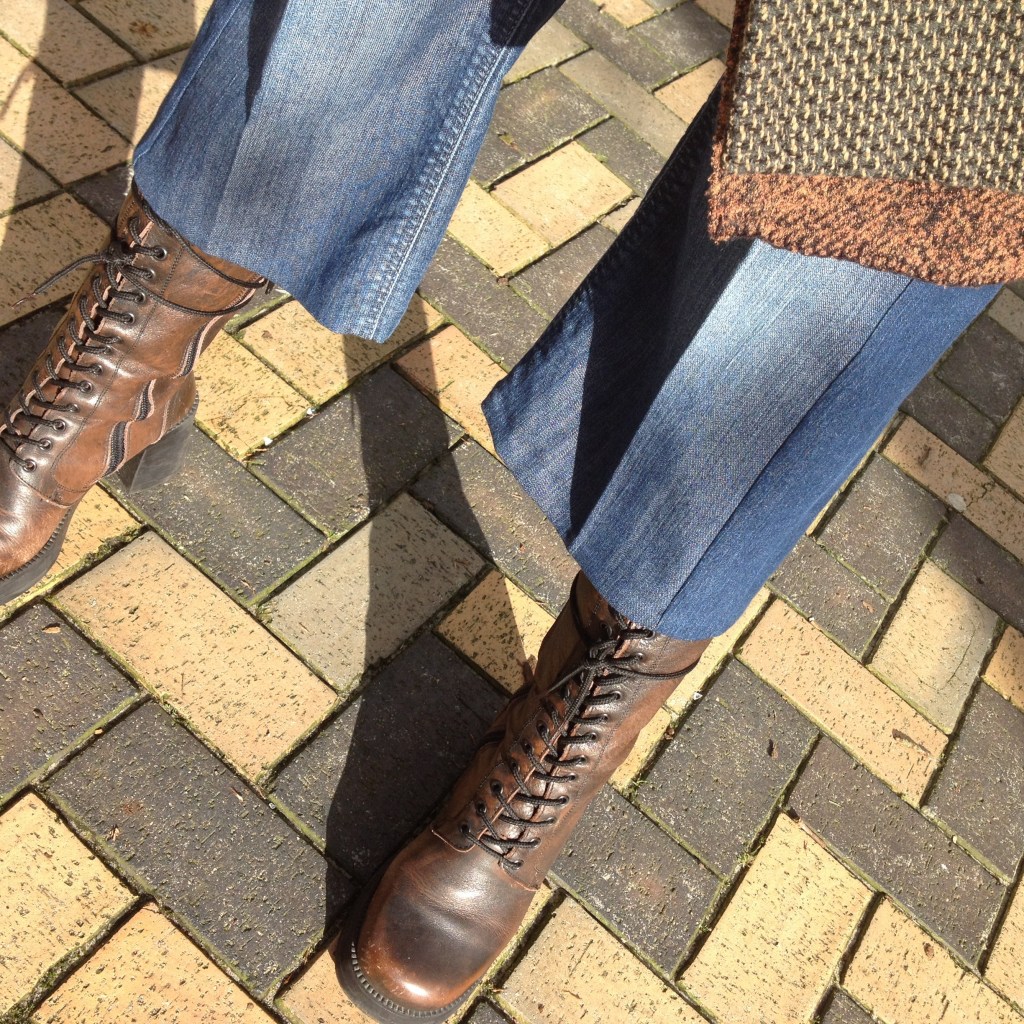
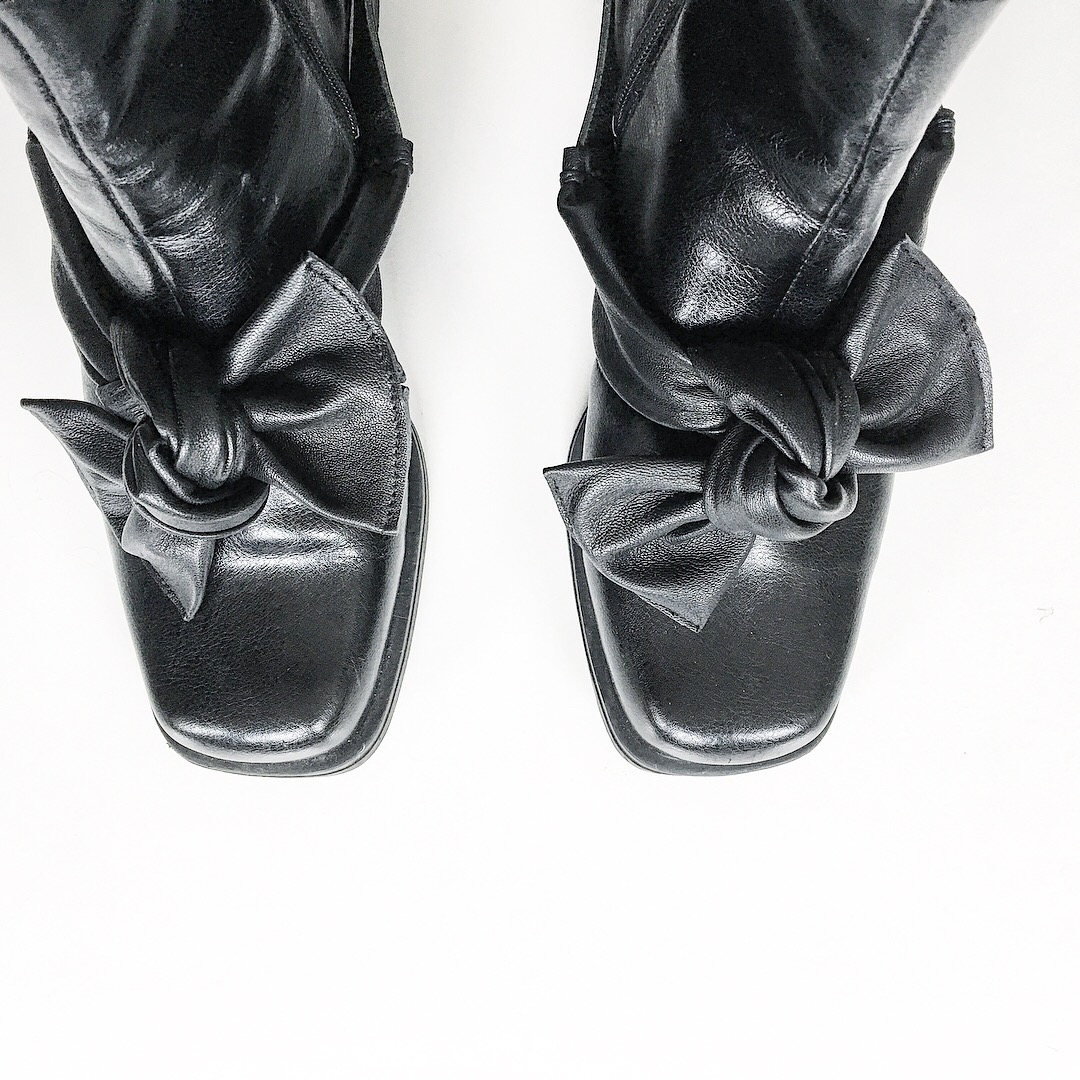
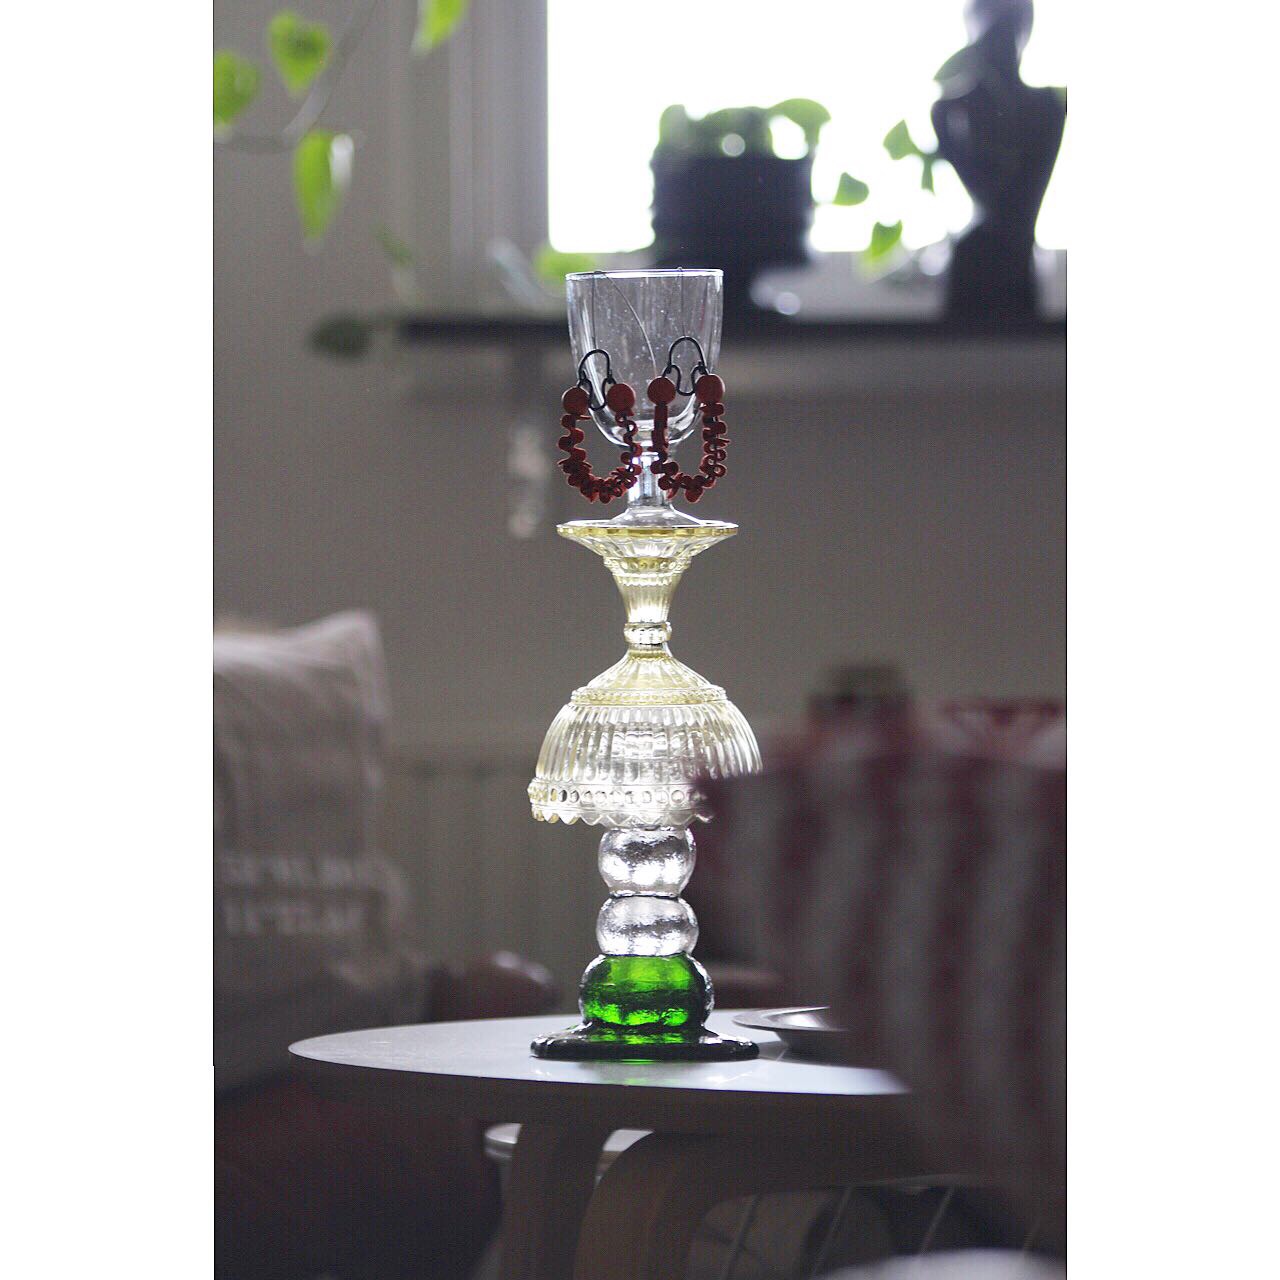
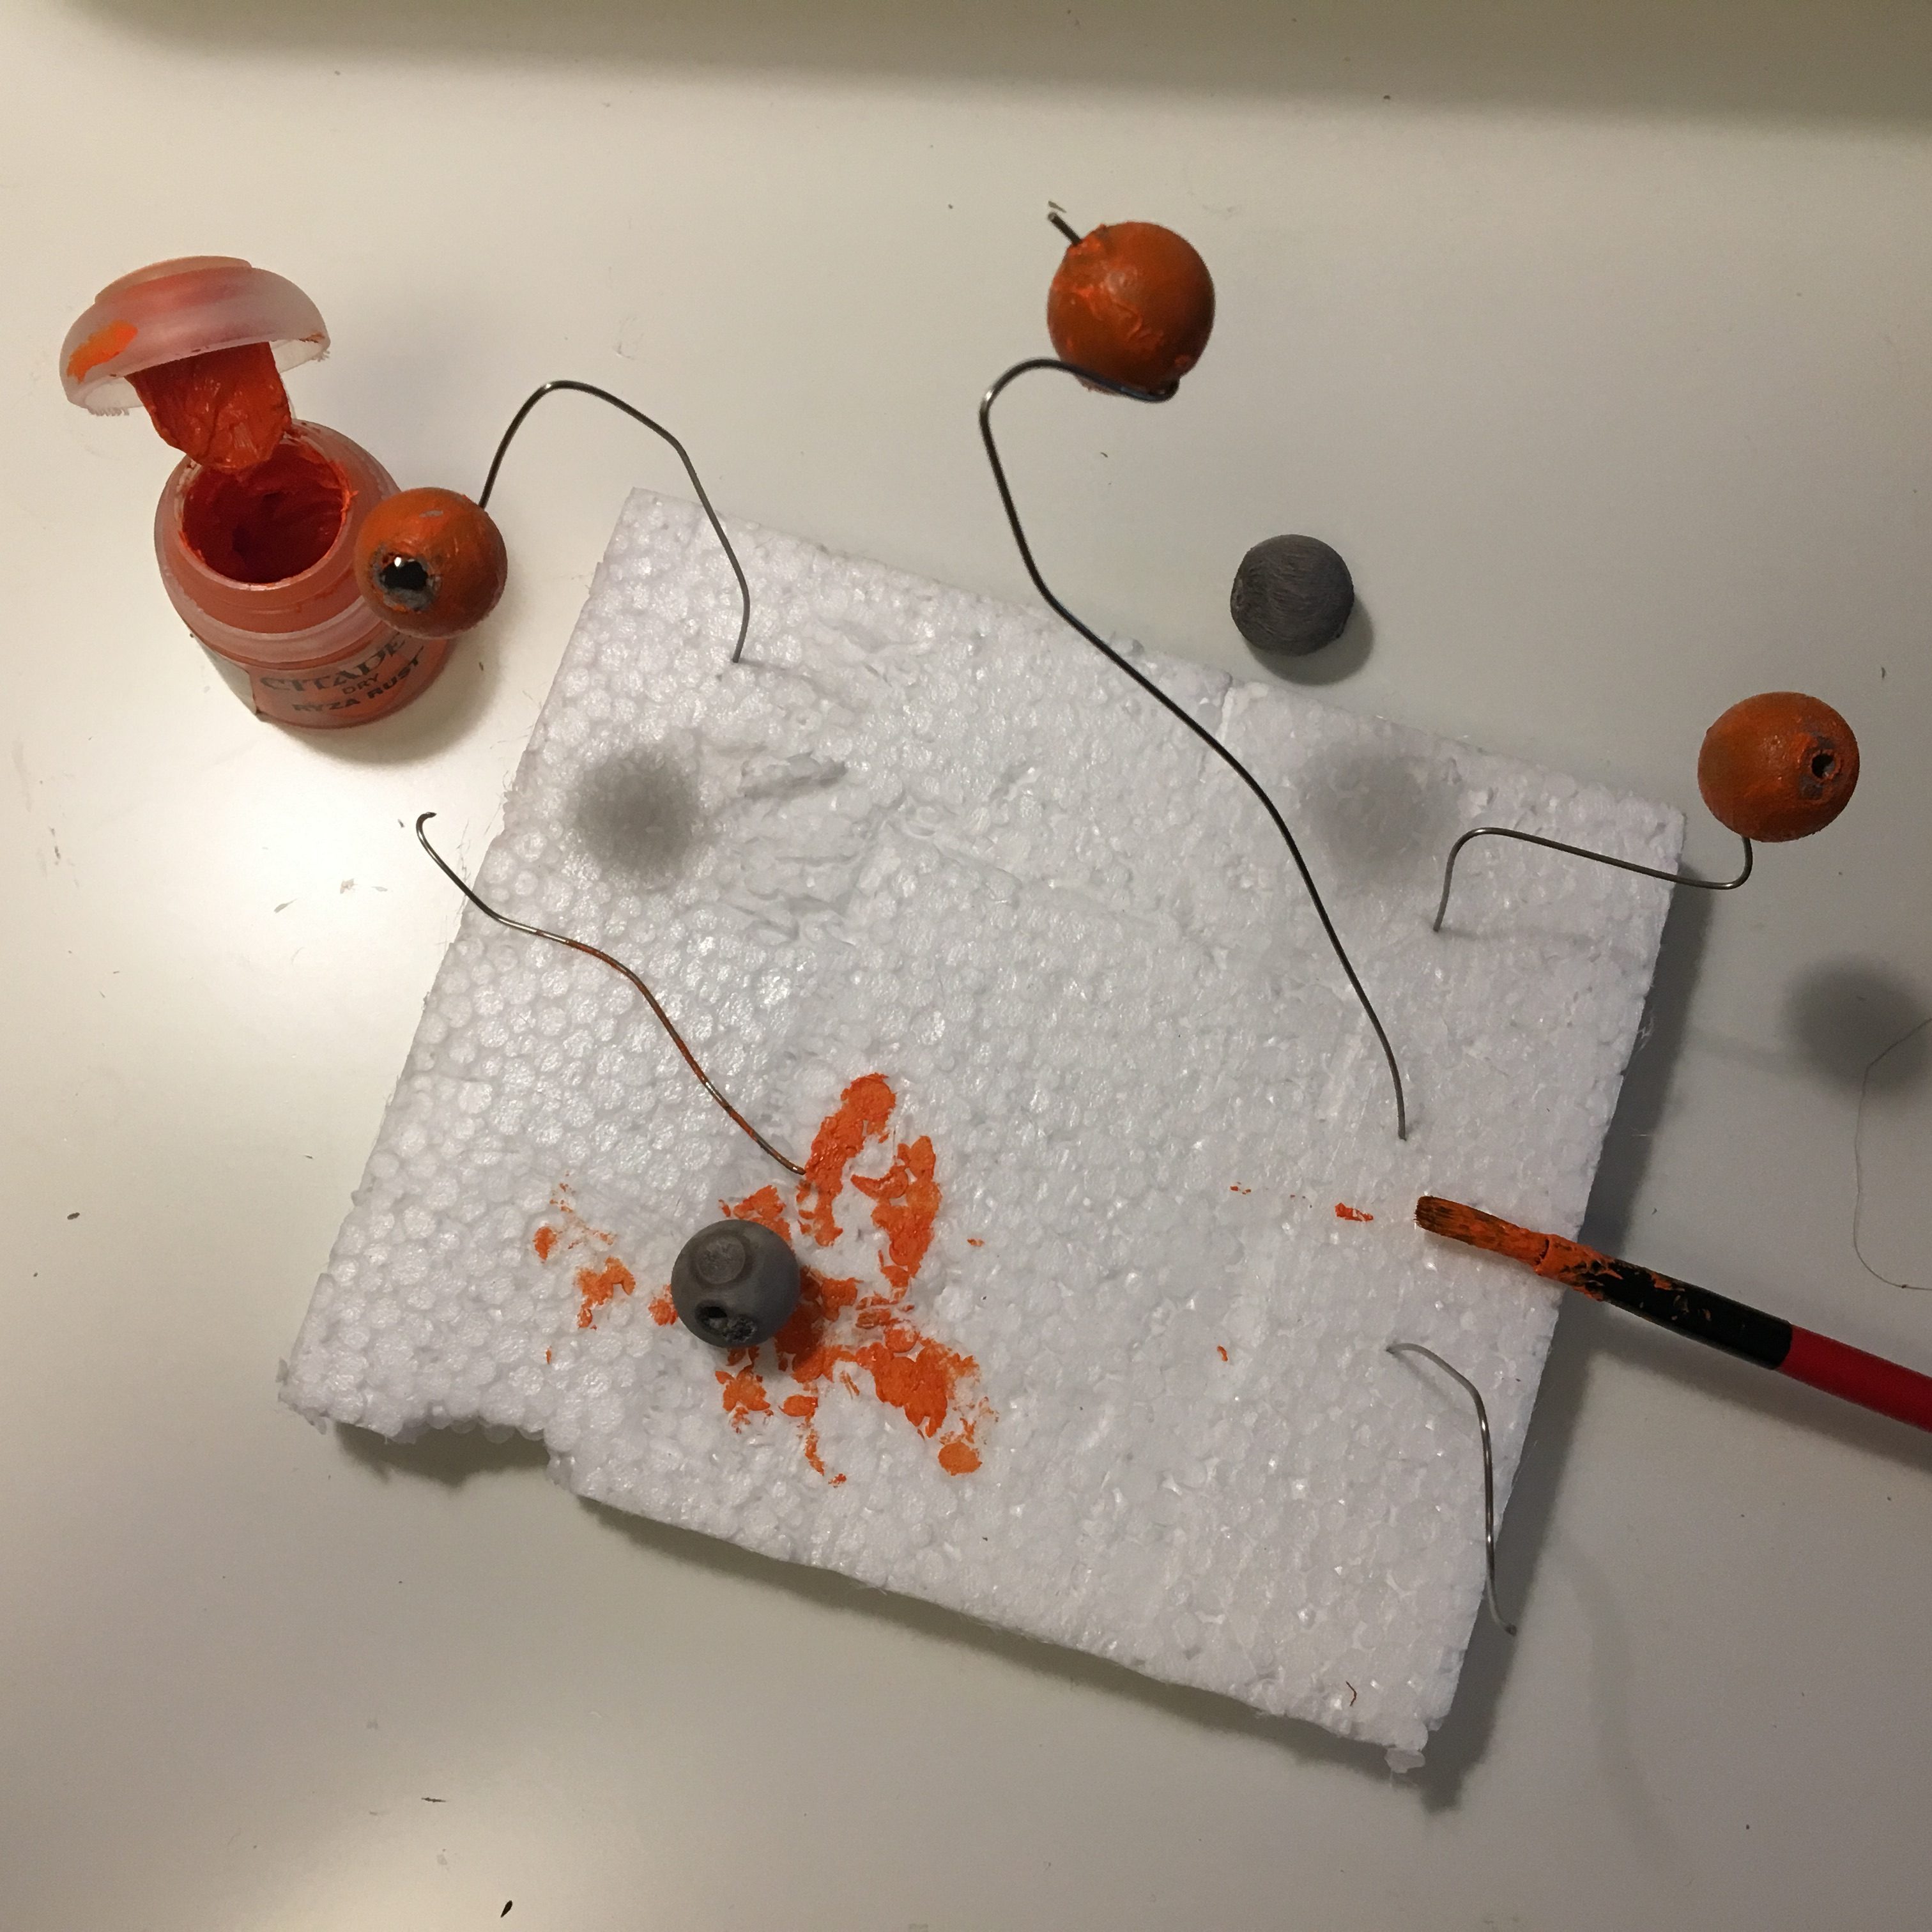
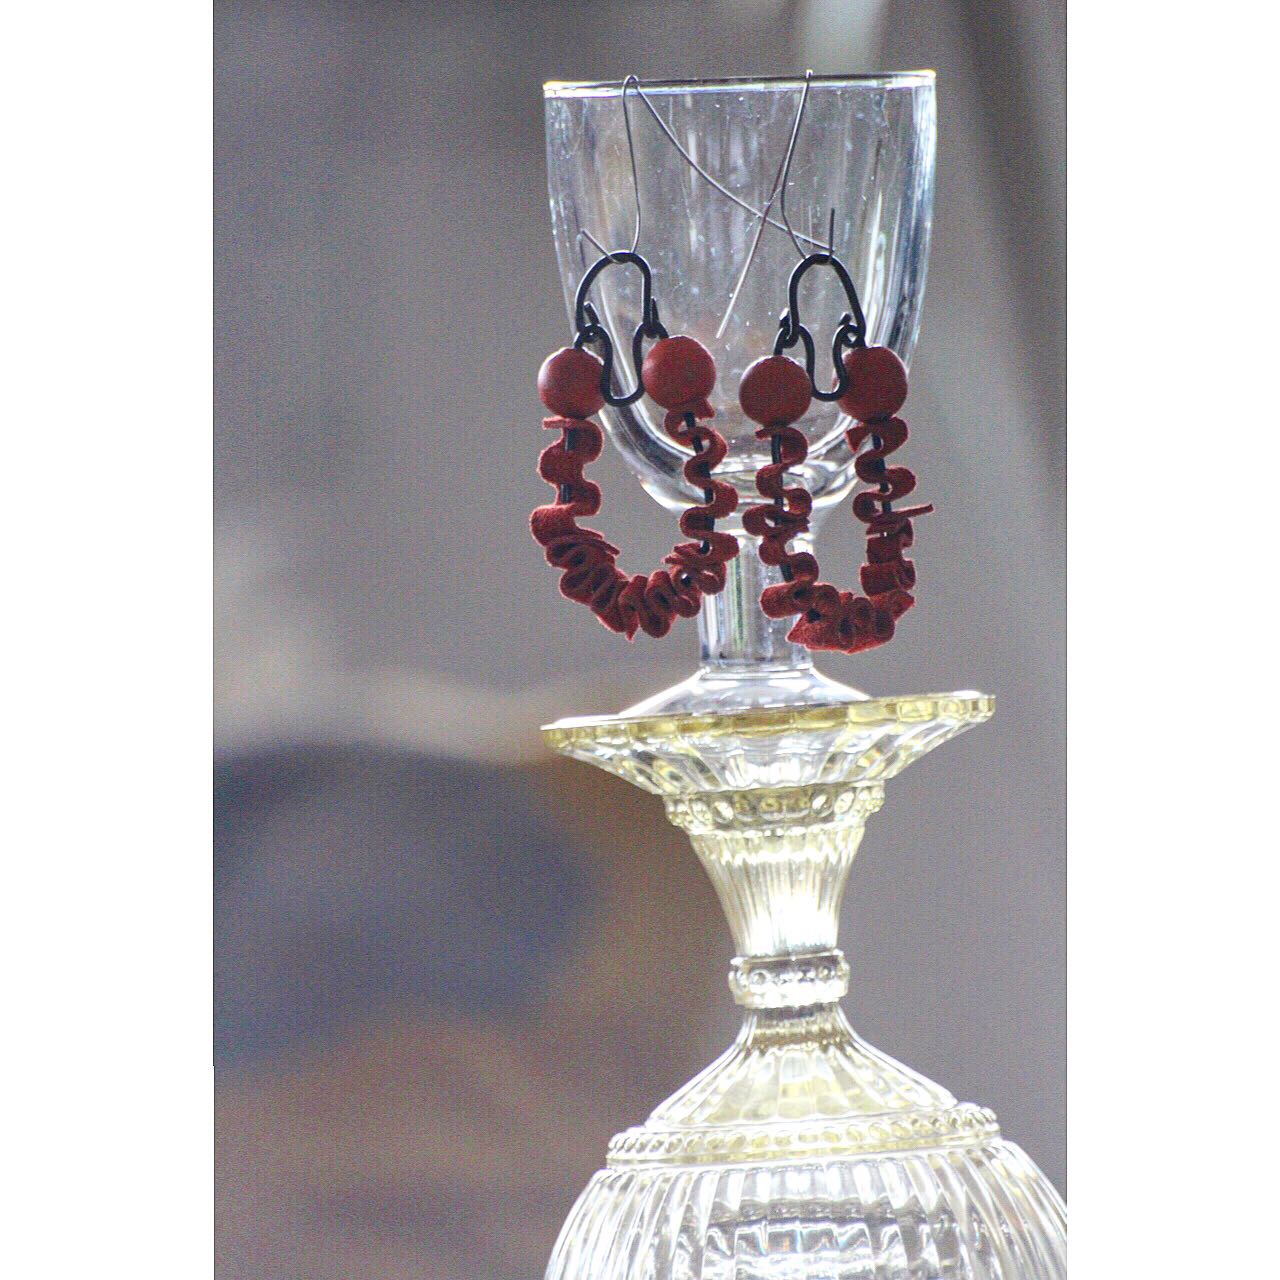
Shoes are second hand; handled with a coat of black paint and added extra bling with a pair of earrings.

Wristlets are made from plastic and I have one post in my blog that tells more about them.

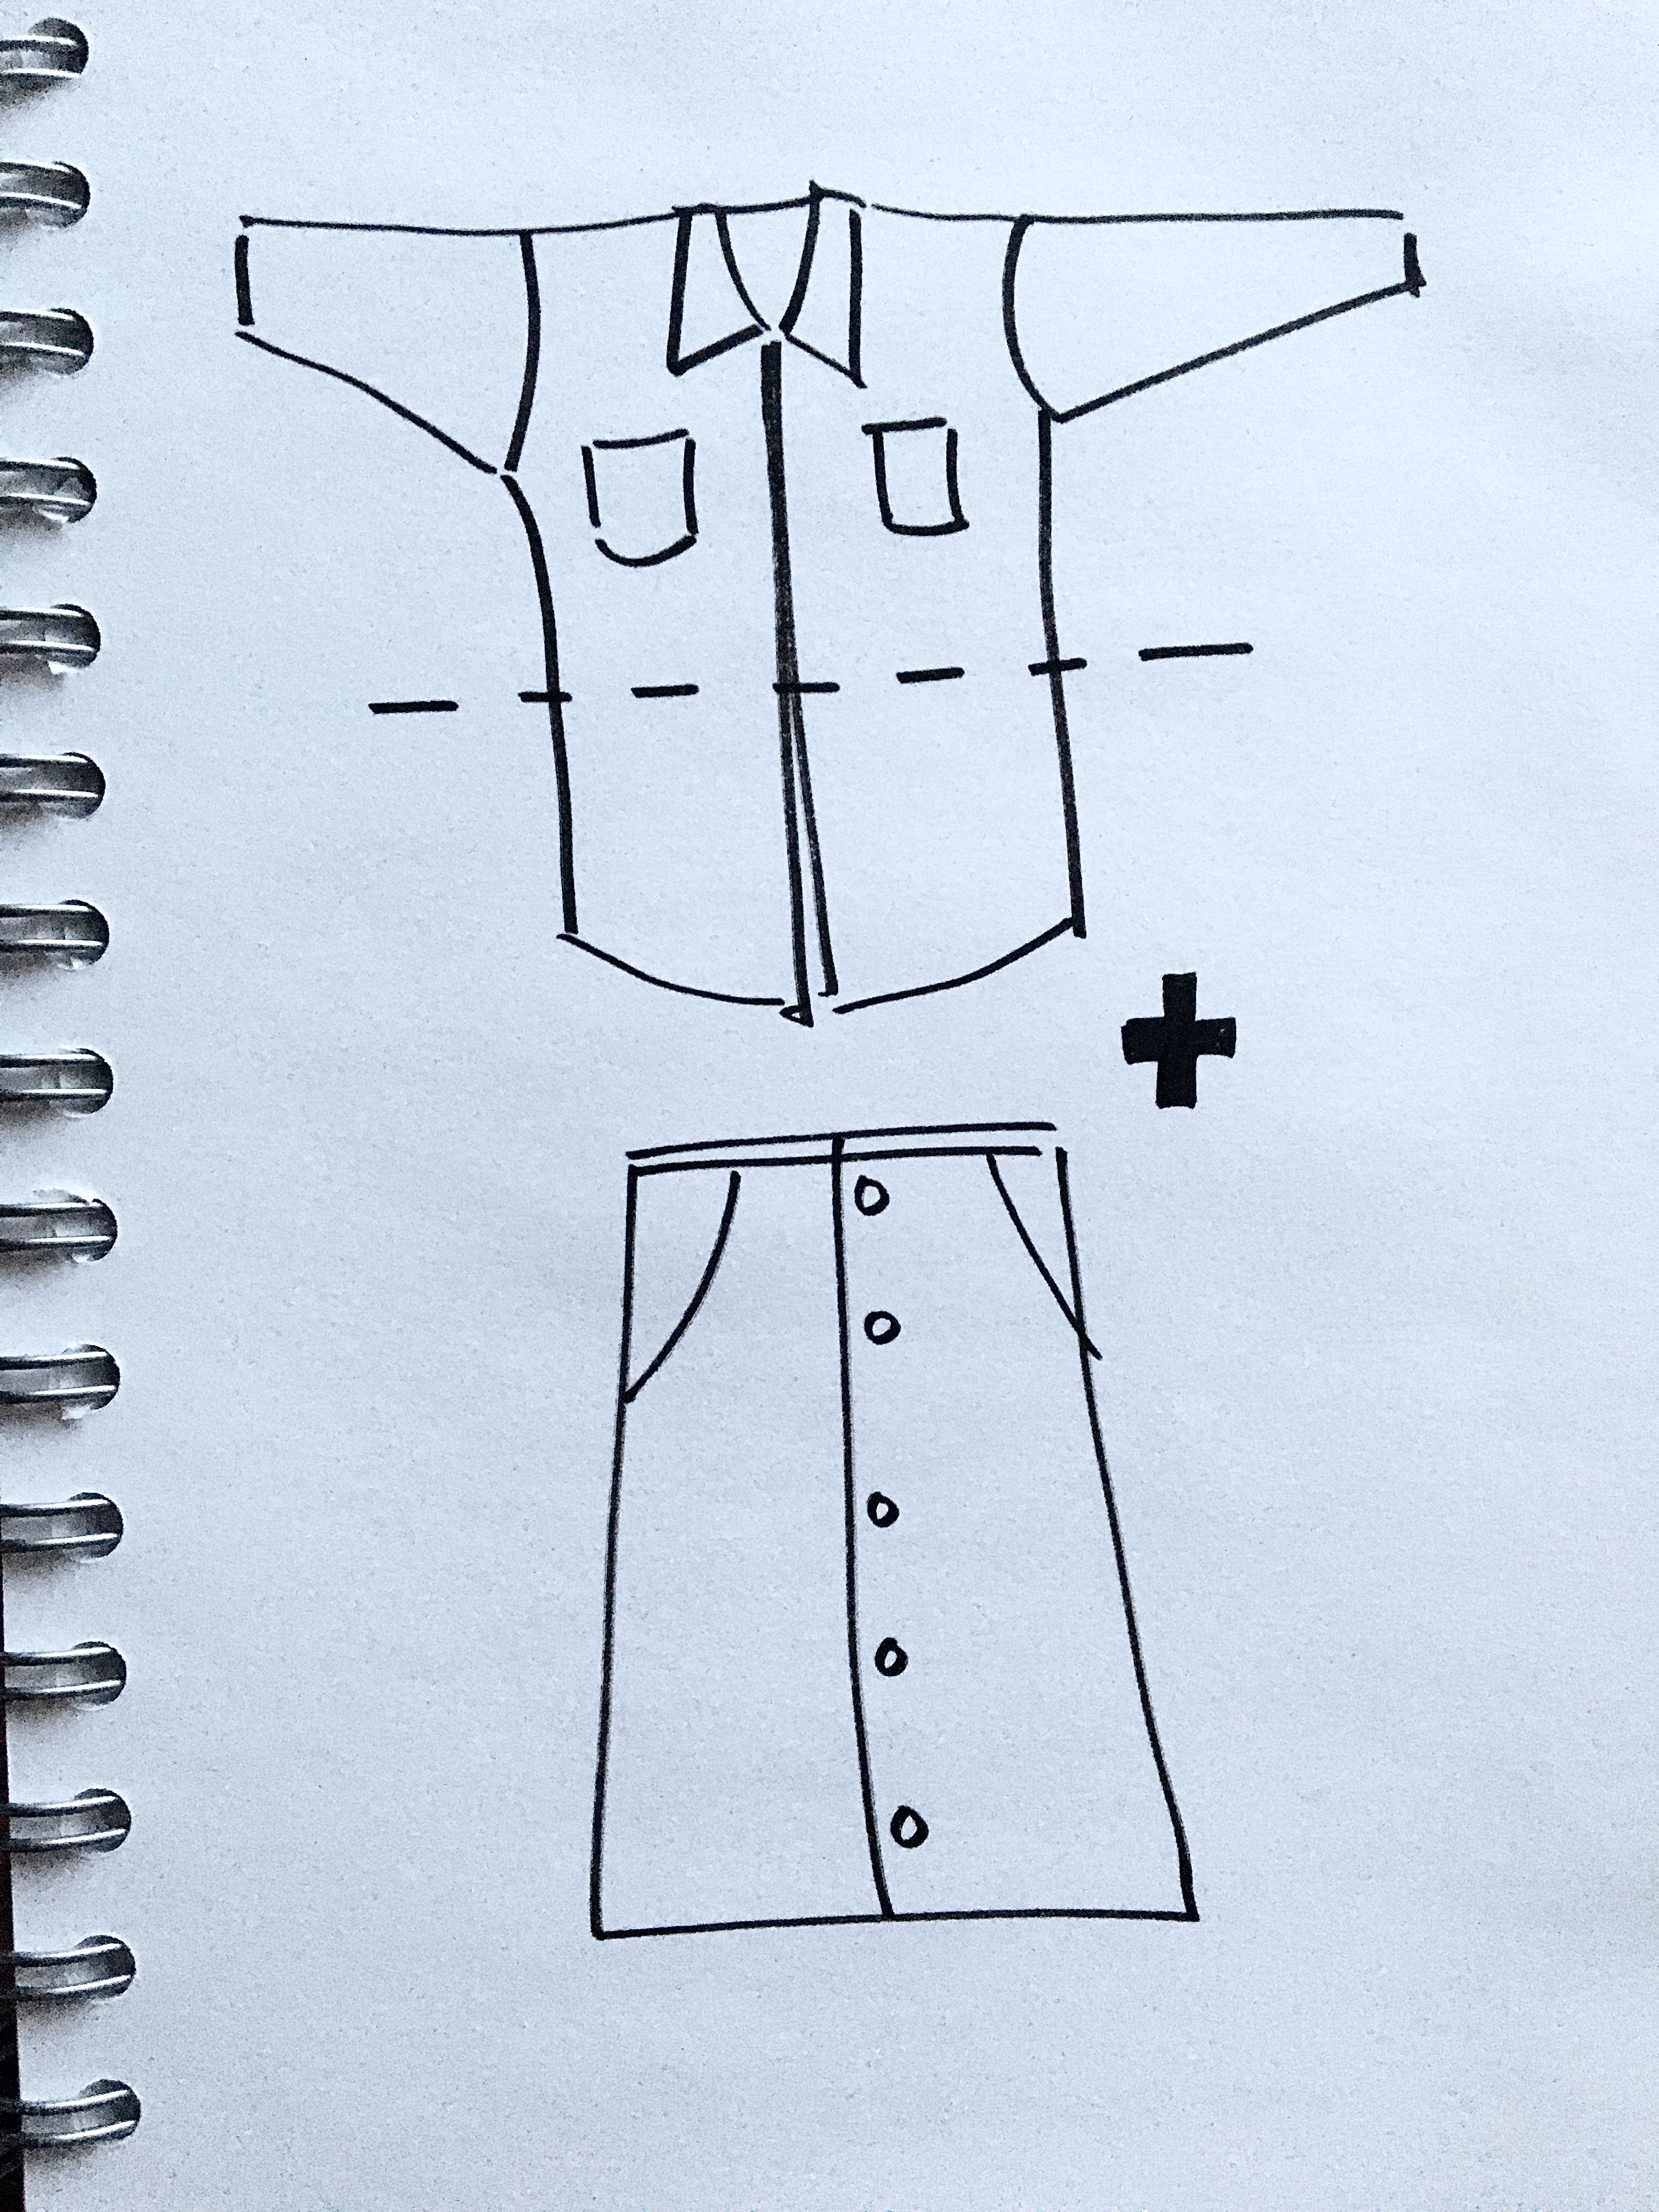
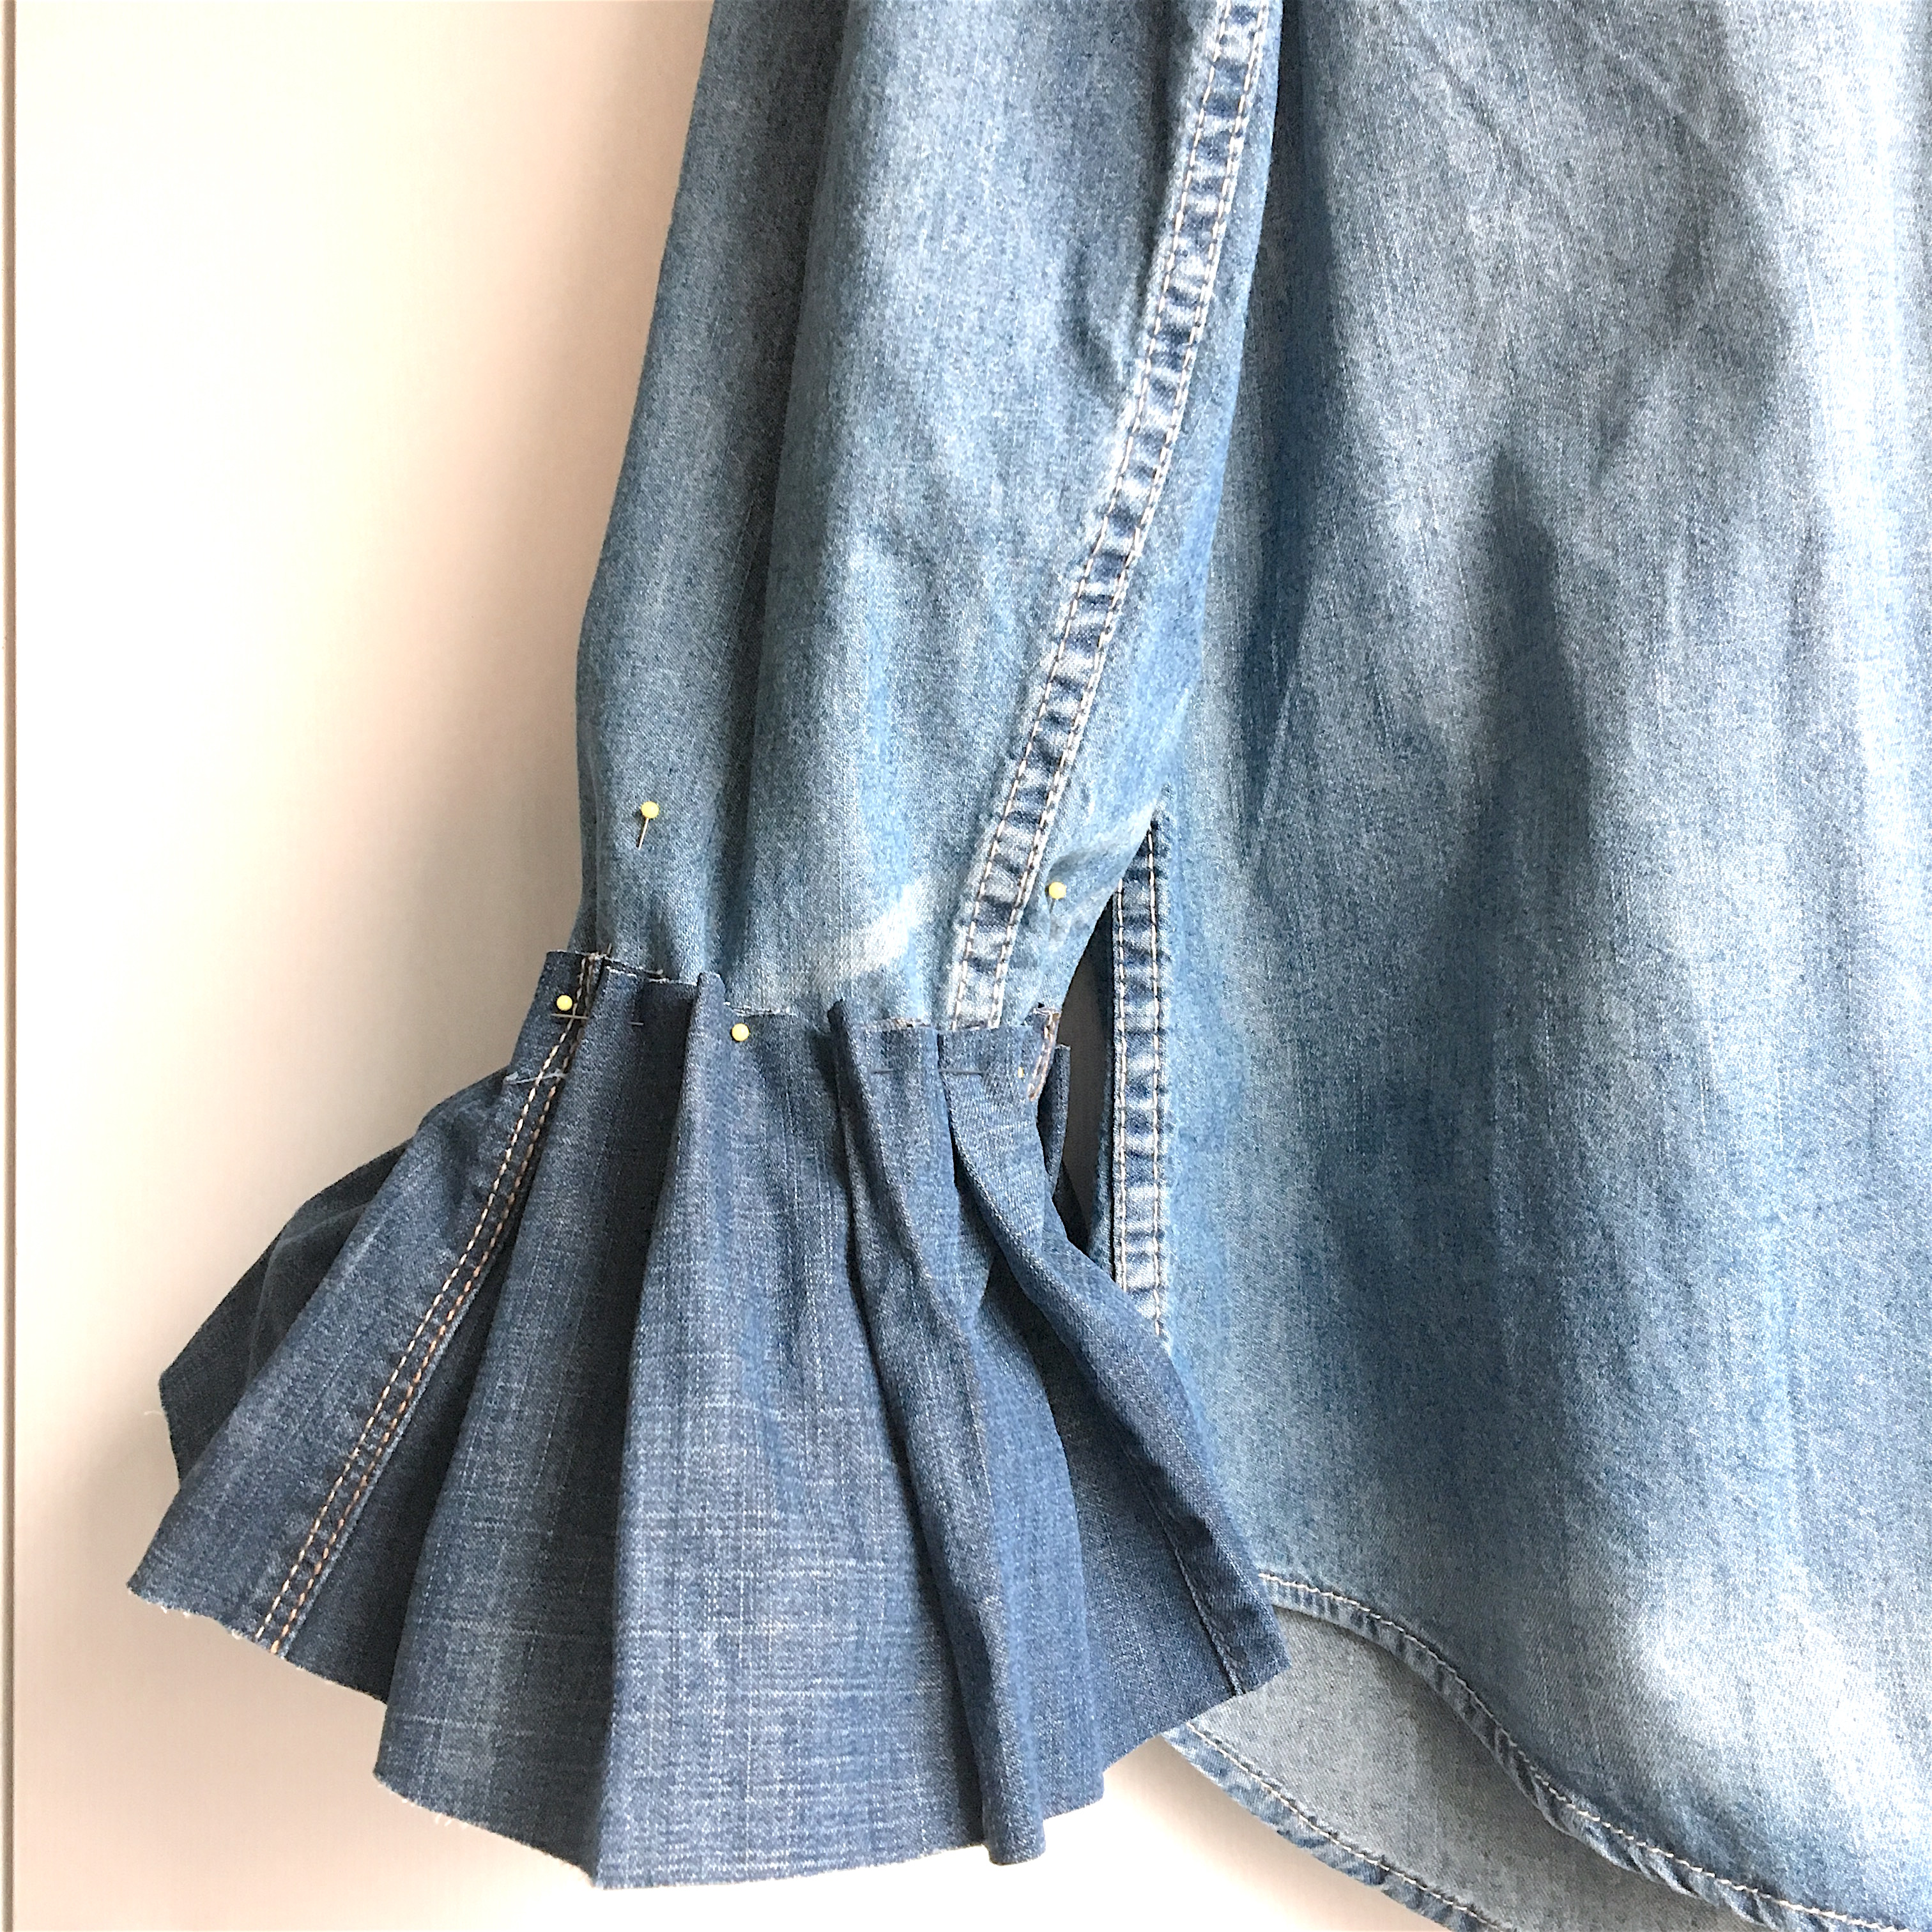
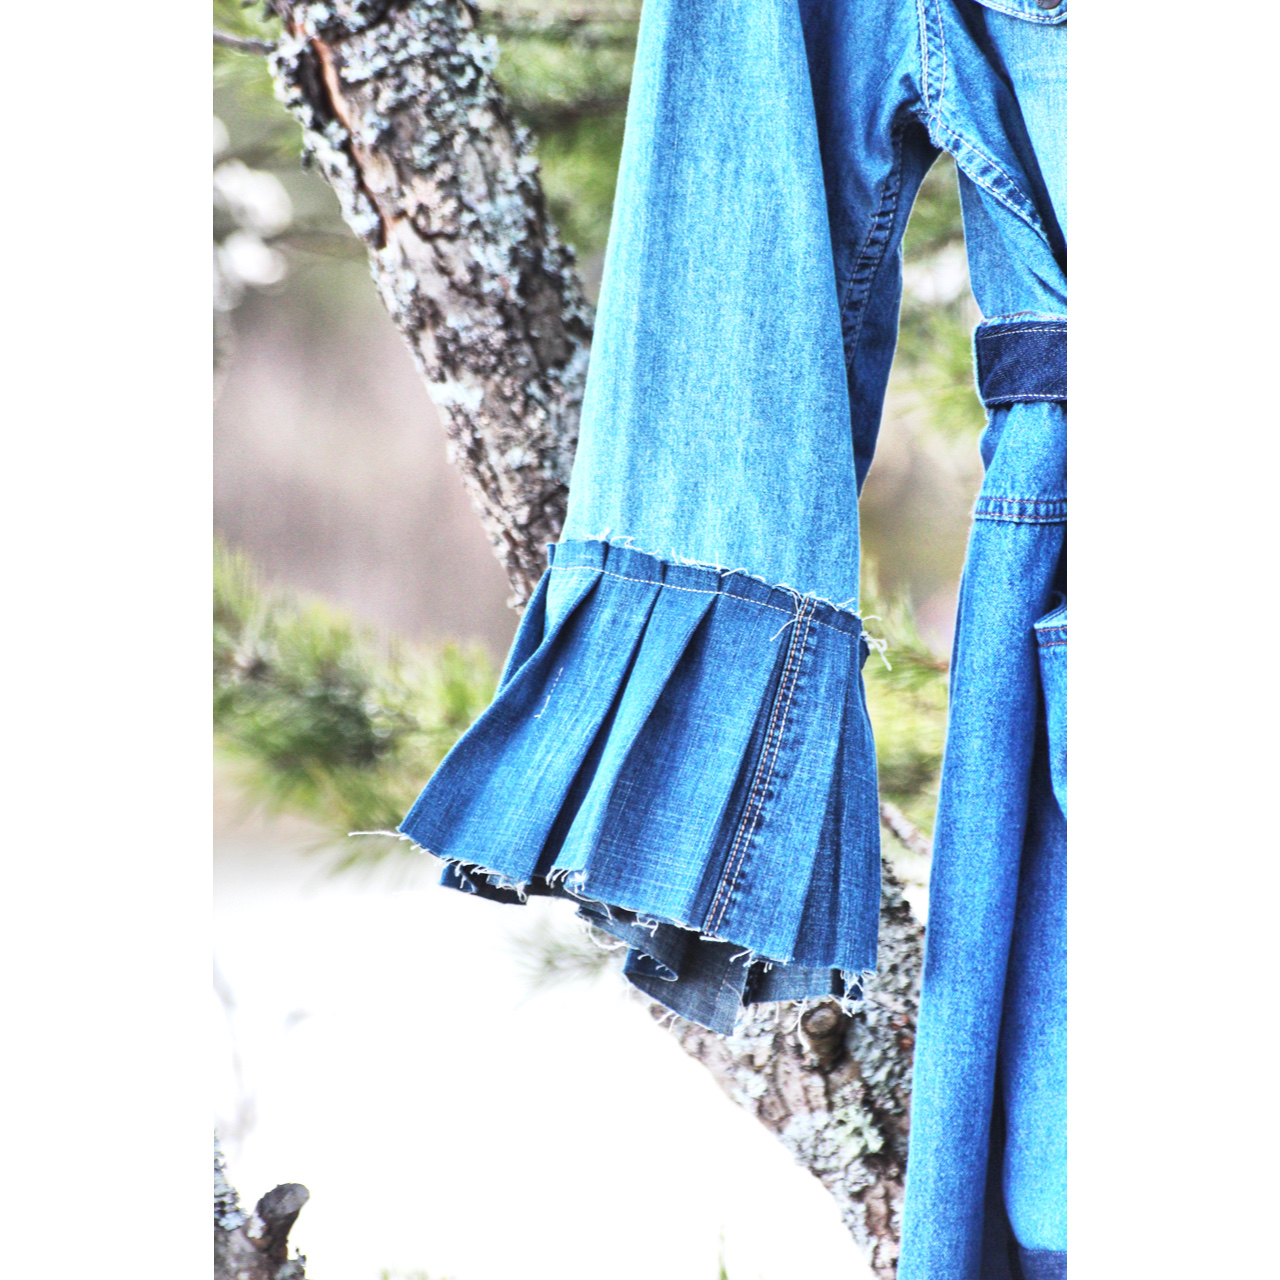
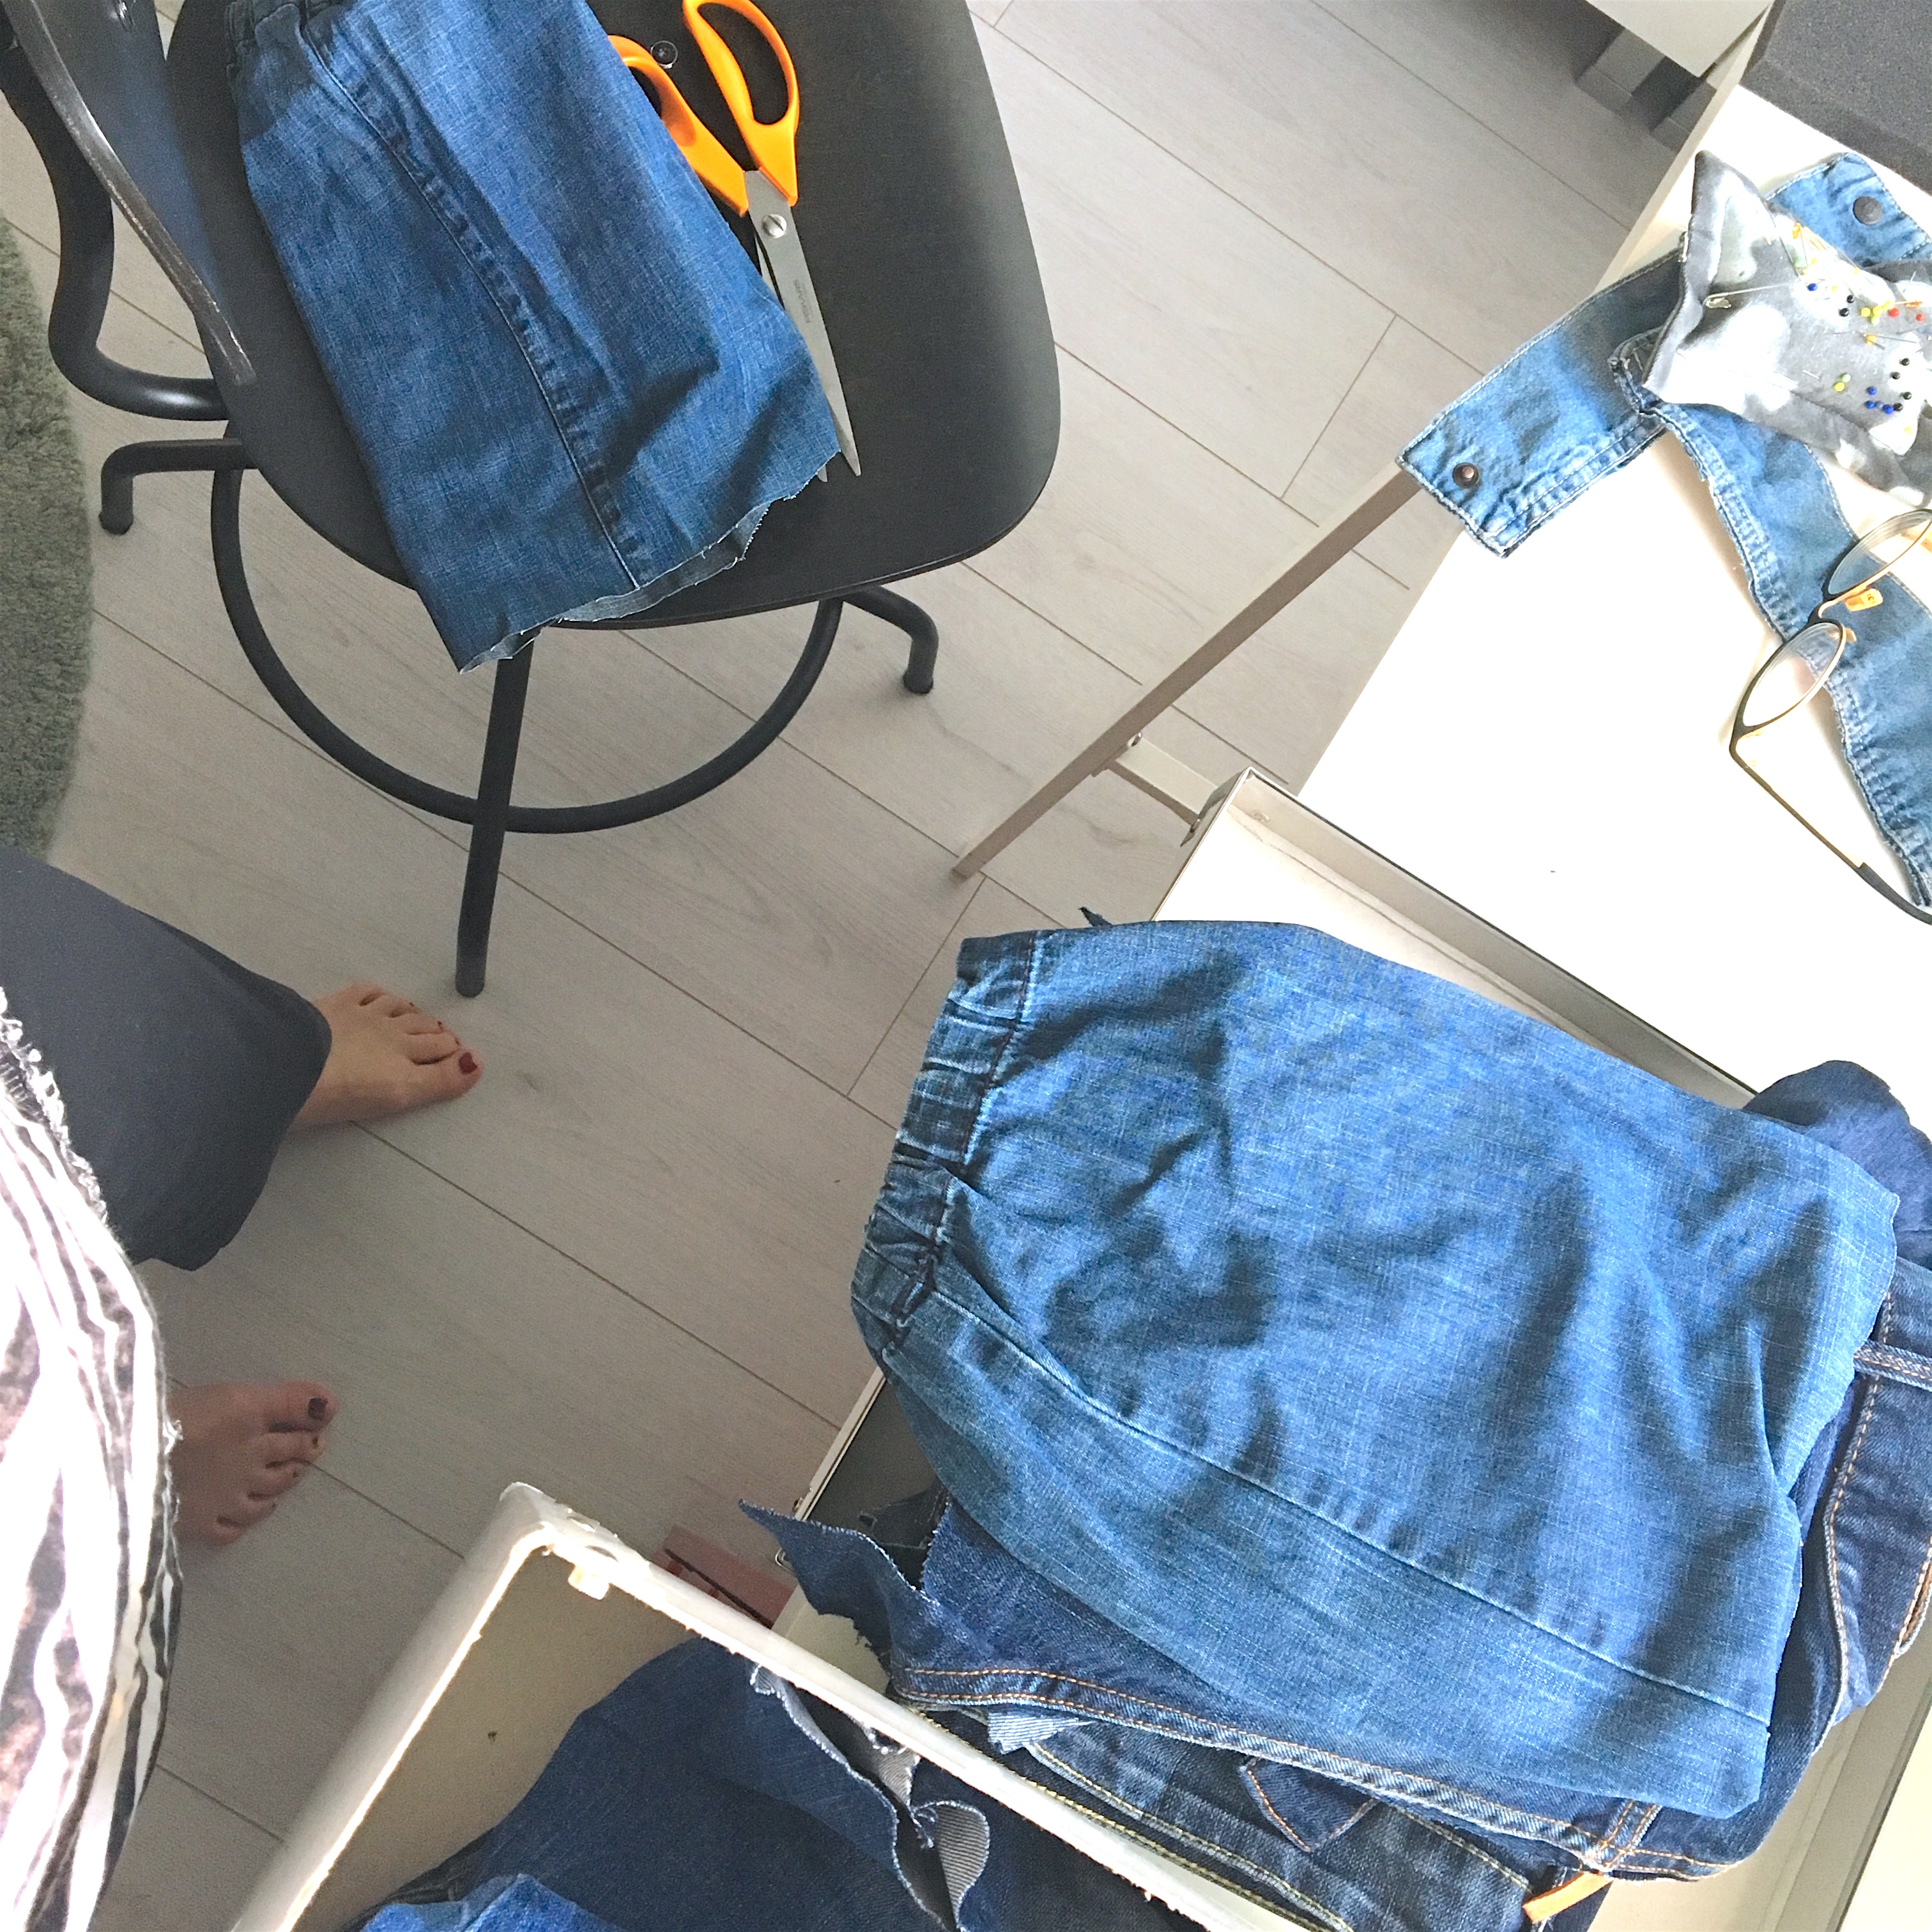
Vaatteiden materiaalit ovat kaikki kierrätettyjä, kauluriyläosa on tehty housuista, toppi hameesta ja hame paidasta. Kengät ovat second hand ja koriste kengissä pari strassikorvakoruja. Käsikorusta kerroin jo aiemmassa postauksessani. Kauluri on tehty nahasta ja kaavoitin sen tyköistuvaksi mallinuken päällä, rypytetty hihaosuus on ommeltu kiinni kauluriin. Maalasin myös kauluria hopeamaalilla jotta pinta heijastaisi valoa peilipinnan tavoin. Hologrammipalat ovat samaa materiaalia kuin käsikoruissakin. Tämän kuvauksen tyyliin hain inspiraatiota mm. avaruus ja urheiluaiheista.

photoshoot Intercoiffure Finland style Northern Lights, styling and acc. Susanoo

Intercoiffure photoshoot “behind the scene” with Susanoo refashioned clothes and acc.

Intercoiffure Finland photoshoot spring&summer 2015 trends at Suomenlinna Helsinki Finland. With the best crew of hairstylists, make-up artist and fashion photographer. And models were awesome too.

Click here to see the video

What Susanoo did
-styled four different looks based on a mood board from Intercoiffure spring&summer trends.
-designed and sewed clothes for all four styles
-designed all jewellery and accessories


Fashion photoshoot Intercoiffure- styling and clothes by Susanna Kaunisto

design bag with hologram details plus one old necklace

This bags idea I got from fabric sofa samples which I found from Kontti second hand store in Finland. Here I connected evenly measured stripes together with zig zag seam and created a modern and sharp background for my holographic decorations. I used earlier these small triangle shaped vinyl decorations for my wristlets to Intercoiffure Finland fashion photoshoot and now after few years “resting”  they still do the trick in this diy bag.

Pattern needed to have right dimensions for the small sized bag so I tried out different variations and found the one that worked for this design.

Strap is made out of old necklace, really thick but light metal chain. Tassel is the pendant from the necklace. Ones again totally recycled bag, every part of it is reused material.


My friend called the pattern “Iris” – the blue royal flower. I like the name. Let the bag shine like royalty but act cool and streetwise when needed.

diy bag from fabric sofa samples with holographic details

Bag made from round table coasters

Straw bag is the perfect outfit addition that just says “now it is summer, let´s go to the beach, summer markets and on holiday”

My bag is made out of two round table coasters from H&M home.

Bag is hand sewn together with thick cotton yarn, the seam was too thick to sew with sewing machine.

I made the shoulder strap out of an old suede belt and attached it with an o-ring to the sides of the bag. Round decorations and the fringe around the bag are made out of leather.  Lining is an old tablecloth with traditional pattern.


DIY leather shoe decorations


Shoe decorations has always been my addiction, a pair of plain white or black shoes works as a blanc canvas for me- I need to take the shoes to another level with the added decoration- make a pair of unique, one-of-a-kind shoes.

Here I have added a leather bow to a pair of NIKE sneakers bought second hand.

And a pair of black leather ankle boots made i Finland (second hand purchase) got a makeover with a leather bow too.

black leather earrings and safety pins- for good luck and protection

My mission was to make earrings from a piece of black leather, decorative black ribbons and black safety pins that I got as a gift from my friends. The shape just happened without planning. Now when it is ready I have been searching from different sources the symbol which the earring represents. First I searched for wheel (no hit) then for moon/sun (no hit) BUT I looked at the earring more closely and I am sure it is a horseshoe. For good luck and protection. And safety pins to firmly hold things together.

candy-like orange ruffled leather earrings

These earrings started first with bending and shaping black metal cord. Orange suede parts are punched first so it is easy to slide them into the metal cord. Easy and quick technique that is quite often used when leather needs to look ruffled. First it seemed that the shape does not need other decorations but I wanted the outcome to be more playful and  childish. So I added wood beads that I painted with orange paint. Earrings looks now chunky modern and playful with a clear handmade stamp on them. Like candy or bubble gum.

Earrings using triangle shaped leather/plastic

I have started to use this way of working with small leather scraps and other materials. First I cut out the shapes I want and glue them on to a piece of leather- let the pieces dry over night- after that I add a quite thick coat of decoupage lack on the surface- after the lack is completely dry I cut out the shape I want. Here I used old leather scraps and one old plastic snake pattern belt. Metal parts are from old bracelet.

These earrings I cut out as half moon shape and added o-rings from an old bracelet to give them more body and movement.

Susanoo design tassel earrings from second hand materials

These two pairs of tassel earrings I made out of quality yarns that I always buy second hand from charity/flea markets. Here I combined other elements with the tassel earrings such as old jewelry parts and fake leather from one old belt.

I love old clip earrings and some of my handmade earrings I design in a way that it is easy to slide it into the clip earring.  In this way you can change the look of the pair of earrings easily.


The red tassel earrings metal part is from old metal bracelet which I formed into a circle to fit a red bead in.


starched denim and hand painted leather

Handpainted leather earrings and starched denim earrings.

Denim starched with sugar and hot water gives endless possibilities to form whatever you can imagine after the fabric is soaked with the mix. Even 3D is possible if you have patience to form it first and then wait for 2 or 3 days until the piece is totally dry.

When the starched denim piece is dry you can  for example paint, punch or glue the pieces how ever you want. Easy and fun.

multicolored small leather bag

Small bag made out of different colored leather.

I had a stash of small leather left over pieces in different colors and textures which one day started to grow into a canvas by joining  the parts together and this “canvas” suddenly into a bag. Shoulder strap is an old belt fastened to the bag with reused jacket parts. Tassel is my own design, giving the bag unique finishing with a wooden animal as the “spirit” of the bag.

striped leather belt bag

Bum bag, fanny pack, belt bag…here is my version. I wanted the surface to have striped effect and joined leather pieces with zig zag to achieve more handmade effect. Pattern is my own, I used an old belt bag as a base. Zipper is reused from an old jacket and the belt is old canvas belt which I decorated with matching flat decorative ribbon. Tassel is handmade from the same leather as the bag.

Kurume kasuri goku masu

Bought Susan Briscoes book Japanese quilt blocks to mix & match from a craft fair in Finland few years ago and the amount of inspiration it`s given me! This denim bag started from the idea to have just one big  quilt block instead of several small ones and the pattern is called Kurume kasuri goku masu- five squares.


Struggled a bit with the scale but finally got it right!

Super happy with the end result! All denim used are from old jeans, shoulder strap is old leather belt and the lining is made out of old skirt. So again 100% recycled!

"Kurume kasuri goku masu- five squares" patterned denim quilt bag with second hand belt

"Kurume kasuri goku masu- five squares" denim quilt bag on the fitting torso

grand Ibiza bag


The bag is made out of a cool vintage tanktop I found. Super easy recycling for old tanktops to turn them into handy and cool bags…just with one seam!

Pictures not taken at Ibiza :)…photoshoot took place in Finland springtime by the lake.

Big tote with medieval touch

Photoshoot for the bag took place in very mystical surroundings….

This project was started up by two pieces of fabric sofa samples that I found second hand…and one belt. Idea was to make a roomy bag, easy to sew and without any super fancy decorations.

But as the project went on I wanted to do something extra, to give that unique touch to this bag also rather than leaving it just black. I found from my cross stitch stock this “dragon”. It´s almost ten years ago I bought it and now was the right moment for it. By placing it in the middle of the bag it serves also as a pocket. Buttons are vintage too, red ones to boost up the red from the cross stitch.

Canvas belt found second hand had some nice studs on it and looks amazing as handles for the bag. By hand stitching some decor to one of the handles makes it look raw and crafty and the pattern just “created itself” while stitching.

Overall look of the bag is a little bit medieval- maybe thanks to the studs and the dragon. Location to shoot the bag was in this case easy to figure out- it is an old mill from 17th century in Röttle near Gränna Sweden. I think I felt some vibes from times passed by while taking pics there…


flip-flop decoration from leather

A pair of shoes works for me as an empty canvas, just have to add or create decorations that will mark the pair as “Susanoo shoes”.

All my decorations are easy to attach and to take away- to be used when ever some extra attention is needed.


From my leather stock I found some beautiful green pieces, gold colored stiff material is actually a placemat and minitassels are easy to do from yarn.


Here I added the decorations to my flip flops but why not use them with any kind of shoe…maybe over the shoelaces? Freedom of expression.


A-lined short shirt from 90´s pattern

Photoshoot took place in Stockholm Sweden (Södermalm). The concrete wall with the nice little artsy window was perfect background for my outfit.


This pattern from a 90s Finnish fashion and sewing magazine Muoti+Kauneus I have used over and over again.

Shirt is easy to sew and by using overlocker to finish the hem makes the fabric fall down in more natural way than using a straight stitch. Black and white checked fabric I found second hand for only 3€.


metal/thread/stones neckpieces


From second hand store found some metal plates in different sizes. I like to combine different materials and as usual I just started to test and try how it would look like when I crochet silk thread around the metal. It was not easy cause the silk is so slippery but I am happy how the silk looks together with the beach glass that I glued on top of it.

By using some hanging leather decorations also covered with stones the whole necklace looks airy and floating. Here I paired it with my white diy t-shirt.


The sand colored smaller neckpiece is done with the same technique only here I wrapped the thread around the metal part instead of crocheting. Stones are handpicked from the shore of lake Vättern.


Yellow thread tassels combined with the metal plate. Card is by emmajansson.se

studs and squares

diy leather bag picture taken in Centre Pompidou Paris Susanna with her diy leather bag in Centre Pompidou Paris

Idea of this leather bag began when I found a pair of leather trousers second hand. I often buy worn and outdated but good quality leather clothes second hand…of course if the price is ok, under 10€ is still a bargain of a good leather.

In this case I cut out the front and the back pieces for the bag from the leg part of the trousers because leather on the legs were in good condition and I did not have to do any extra seams. I tryed out different motifs on the bag but finally I ended up playing with the swiss cross and by adding black leather squares the pattern looked deeper. Studs are there to “rock” the bag but the style is still versatile to combine with different looks and outfits: preppy, rebel, chic etc.

Because I wanted the bag to have “one piece look” so adding in handles was out of the question. Instead I cut out holes to the top part, folded the seam allowances from the cut out to the back and glued them with a flexible glue. Lining is done out of leather and denim, I repeated the same cut out hole and then I just glued the front and the back together. So more glue than seams on this leather project. Glue I used was BISON transparent, it was really easy to work with and now after carrying various loads in my bag for a week around Paris I can say that the glue hold the leather together super good.

Photoshoot is done in Musée des Arts et Métiers and Centre Pompidou in Paris. Thank you Paris!